> ## Documentation Index
> Fetch the complete documentation index at: https://docs.lmnl.app/llms.txt
> Use this file to discover all available pages before exploring further.
# Configure Travel Rule in Vaults
You can configure Travel Rule in Vaults for incoming and outgoing transactions. Take the following steps to configure settings for Travel Rule.
1. Log into [Vaults](http://vaults.lmnl.app) .
2. Go to **Apps** and then select **View** adjacent to **Notabene**.

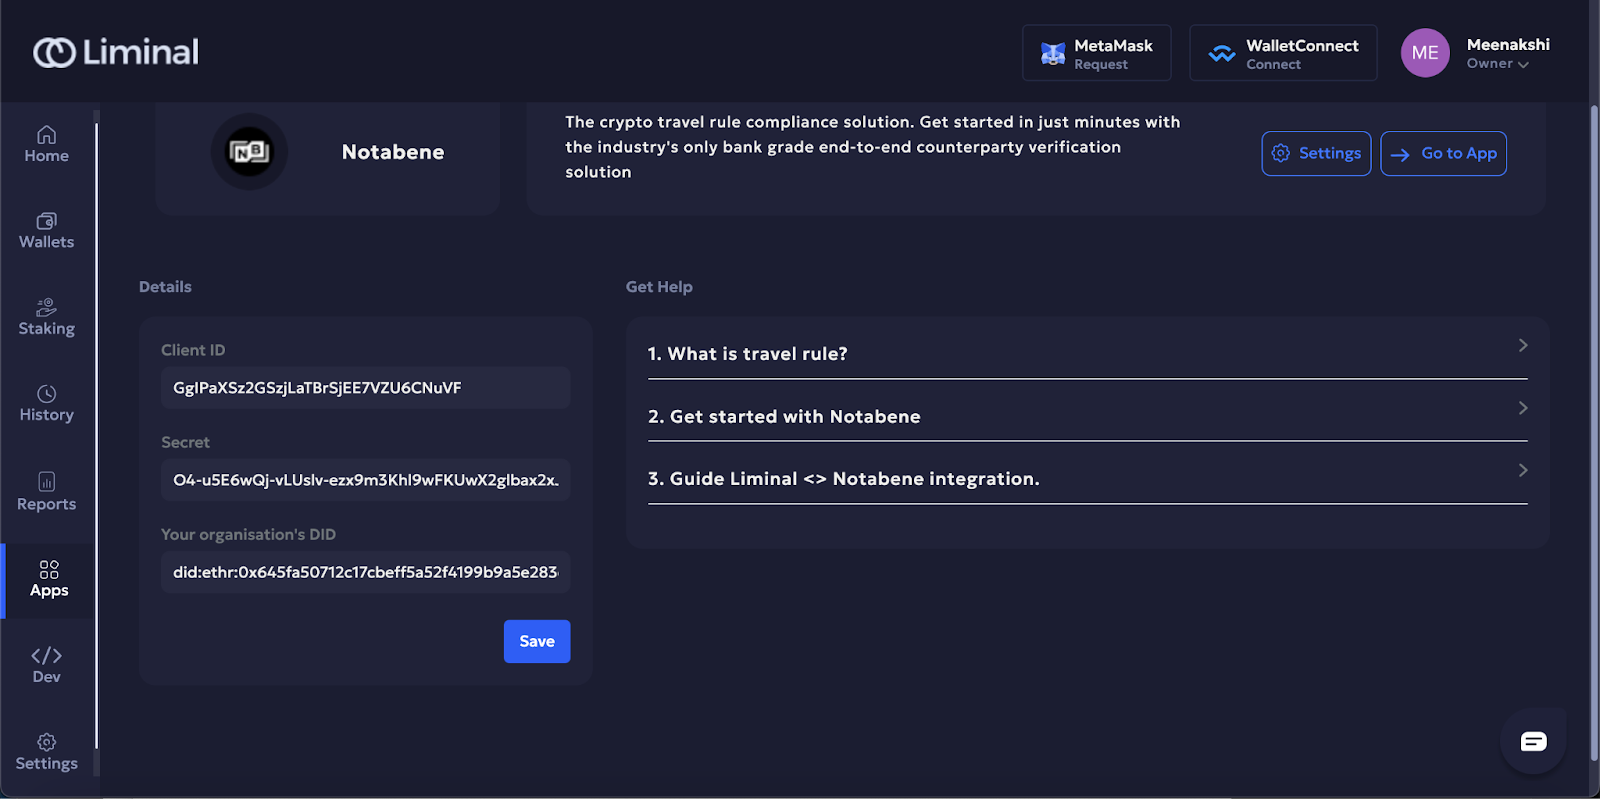
3. Enter your generated client ID, secret, and your organisation's digital identity (DID) in their respective fields as shown in the screenshot below. To learn how to generate client ID and secret, see [Generate client ID and secret in Notabene](https://docs.lmnl.app/docs/generate-client-id-and-secret).
4. Select **Save** to save the details.
5. Go to **Settings** and select **View** adjacent to Travel Rule.

6. Under the **Select your provider** section, select the provider as **Notabene** from the dropdown.
7. Under **Outgoing transactions**, toggle the **Force travel rule check on all transactions** option to enable it for all transactions. Select the **Send on travel rule message delivery** option from the dropdown.
8. Scroll down to the **Default Originator Profile** section. Enter details of your originator VASP for outgoing transactions.

9. Select **Update** to save the details.