
Exchange account integration
In Liminal Vaults, you can add your exchange accounts, such as Binance accounts. You can manage digital assets across multiple exchanges, including easy transfers and real-time balance monitoring. You can add both main as well as sub accounts in Vaults. Main accounts are the default account on the exchange. Deposits and withdrawals take place from this account. Sub accounts are used to securely store large funds and to segregate different teams, accounts. Sub accounts aren’t used to make direct transfers (deposits or withdrawals). You can link sub accounts to main accounts. Once connected, you can transfer funds to the sub account from the main account. Transfers between main accounts and sub-accounts are off-chain and do not require a network fee. The movement between sub-accounts is not supported.
Contact the Liminal Sales team at [email protected] to enable this feature in your organisation in Liminal Vaults.
Note
- Liminal currently supports integration with Binance.
Set up your Binance main account
If you have an existing Binance main account, you can add it in Liminal Vaults. As an owner or admin of your organisation, take the following steps to configure your Binance main account in Liminal vaults.
Step1: Generate API keys
- Log into your Binance account.
- Go to the https://www.binance.com/ API documentation to generate a Binance API key.
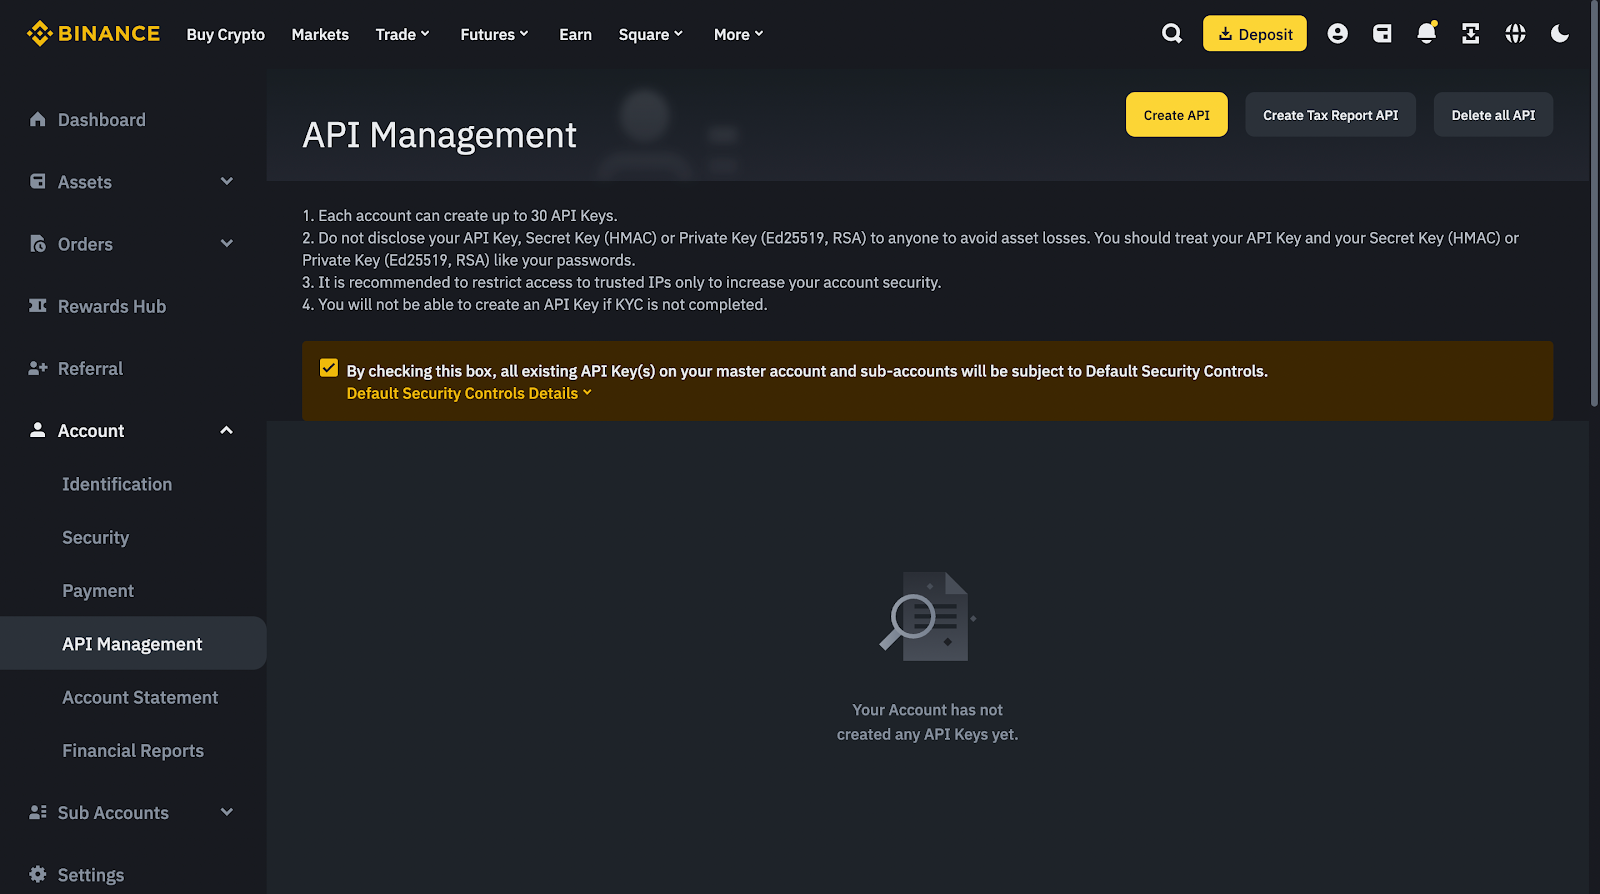
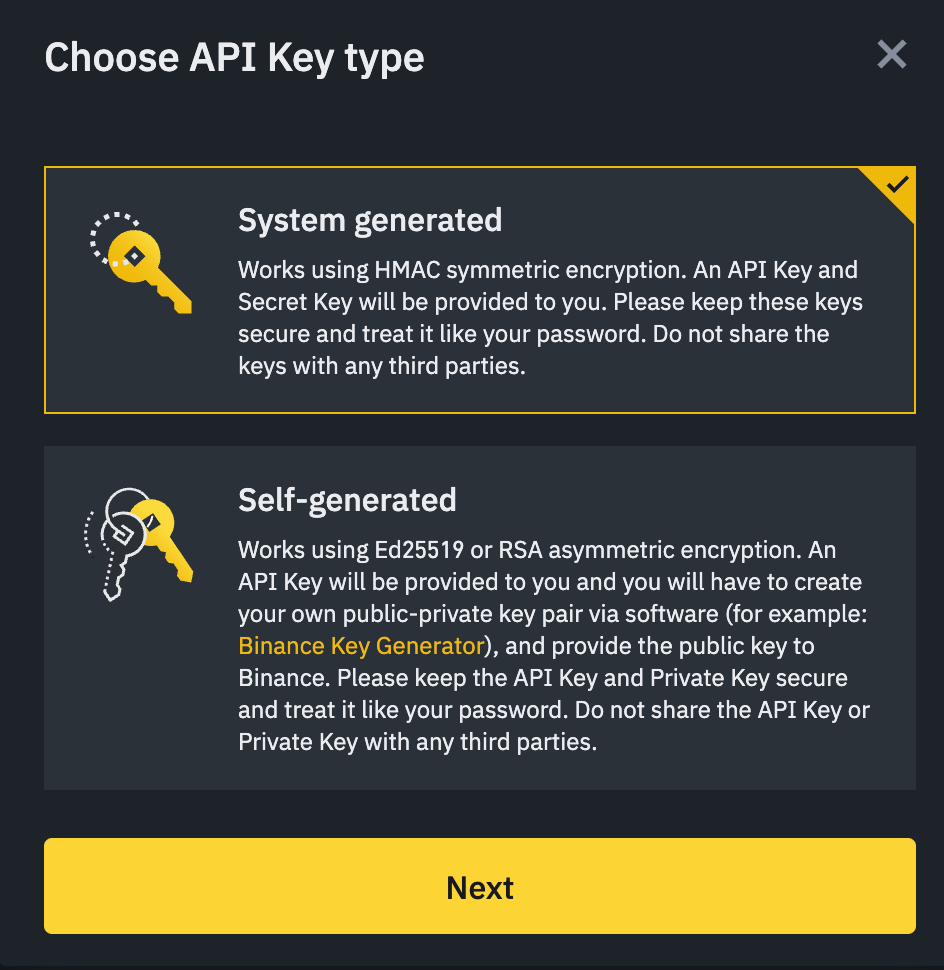
- Select Create API and then select System generated.
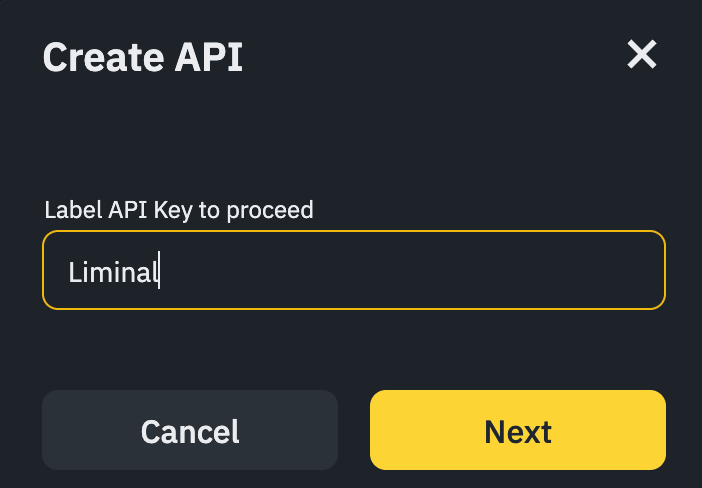
- Name your new API Key, for example “Liminal”.
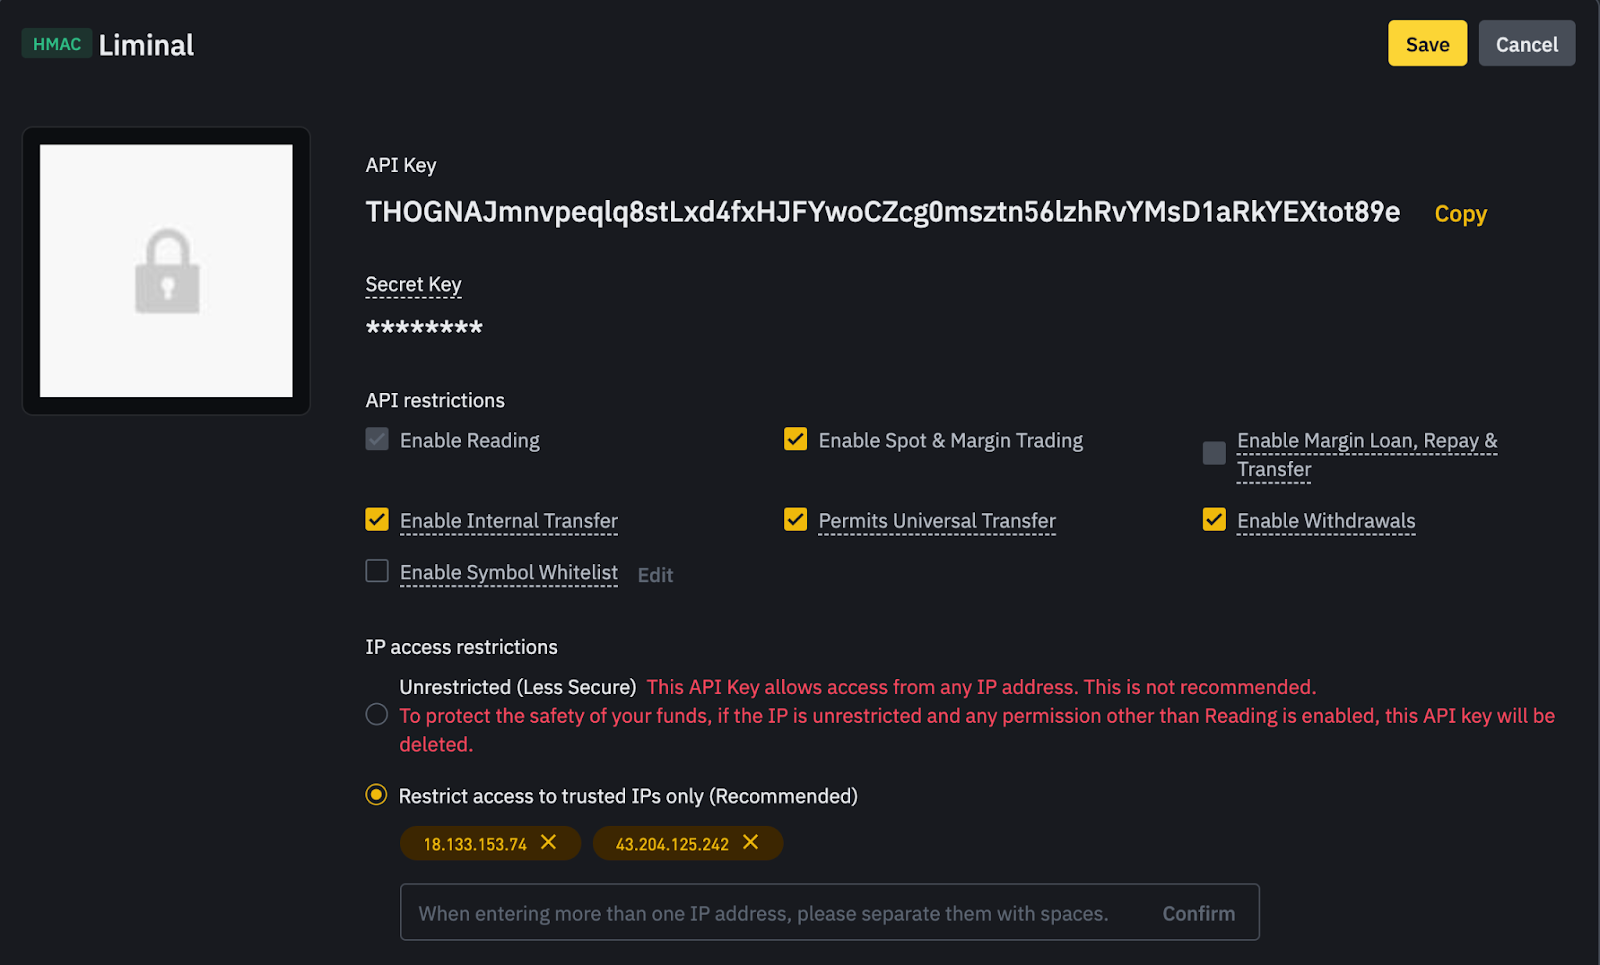
- Copy and save both the API key and secret key; you will need them when adding your Binance main account in your organisation in Liminal Vaults.
Step 2: Enable API restrictions.
- Ensure the following API restrictions are enabled:
- Enable Reading
- Enable Withdrawals
Note
- The Enable Spot & Margin Trading option is not yet supported by Liminal.
- Restrict network access to allowed IP addresses. Select Restrict access to trusted IPs only (Recommended) and add the IP address
18.133.153.74. - Select Save to save your settings.
Step 3: Configure your Binance main account
Once you have completed the above steps, you can set up your Binance main account in Liminal Vaults. Only the owner and admins of an organisation can add Binance accounts in Liminal Vaults. Members who are associated with the account teams (transaction initiators or signers) can view and approve transactions.
As an owner or admin, take the following steps to add your Binance main account in Vaults.
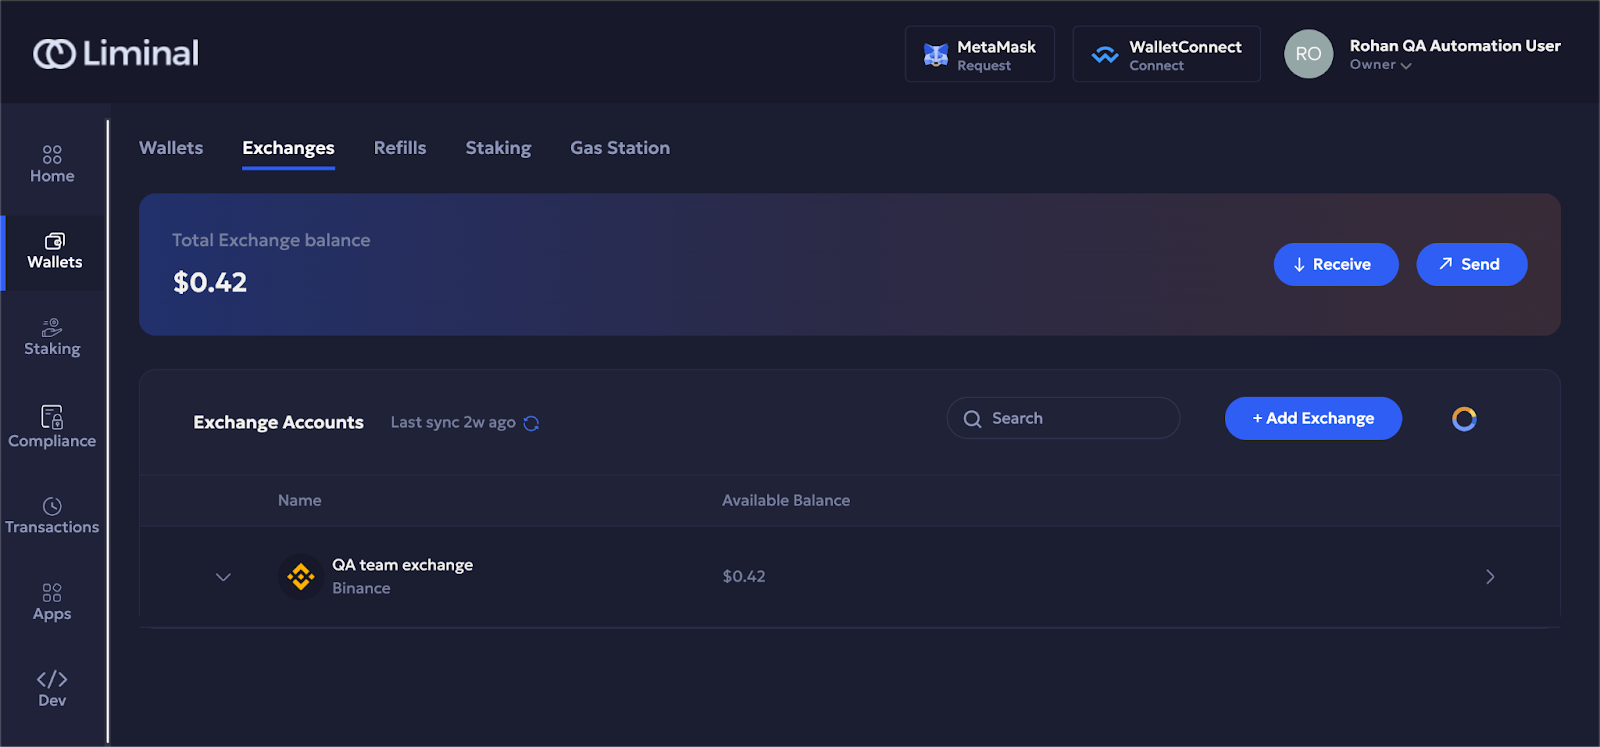
- Log into Vaults.
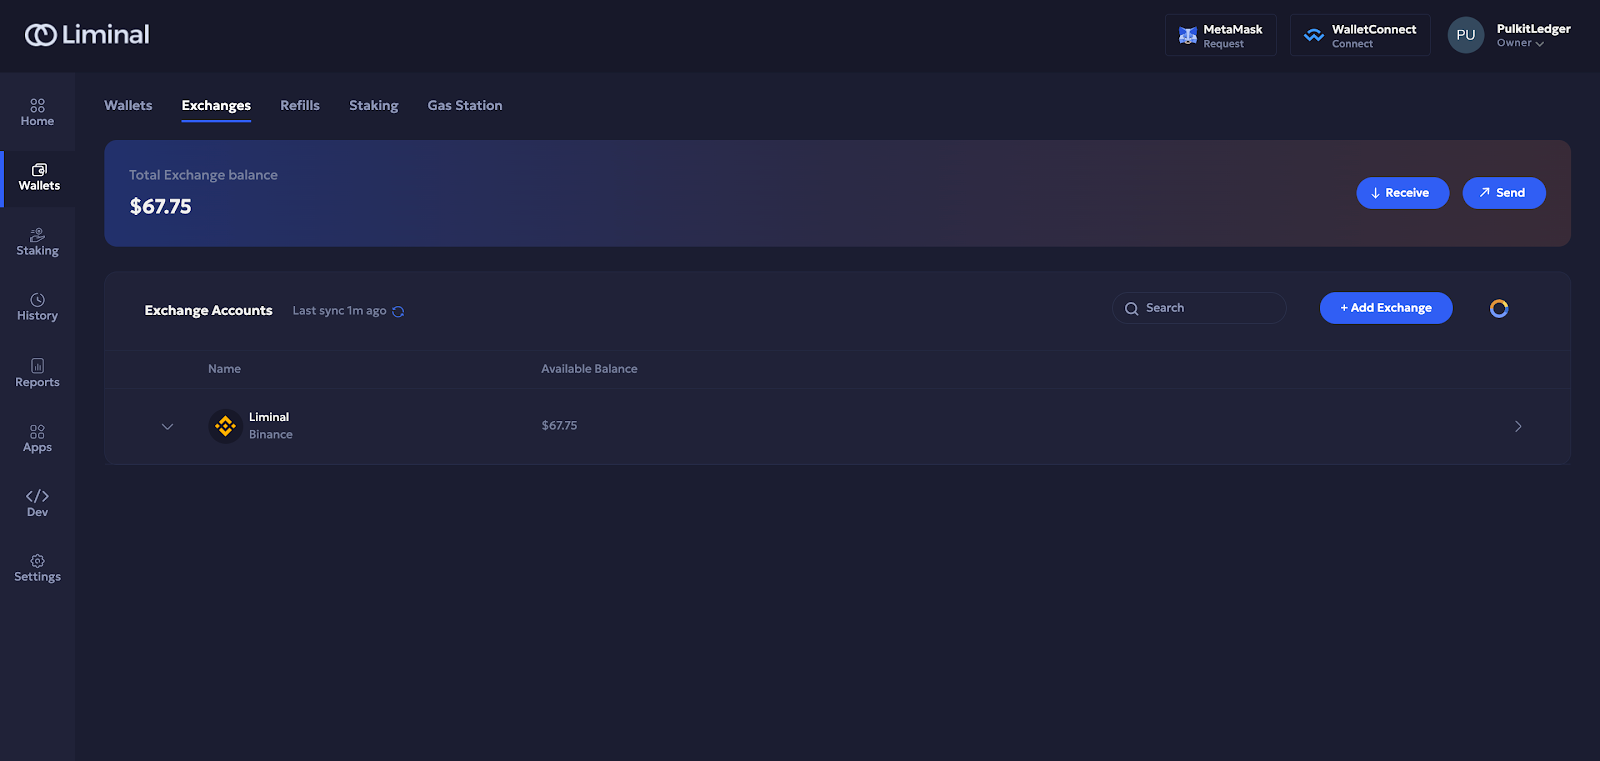
- Go to Wallets > Exchanges.
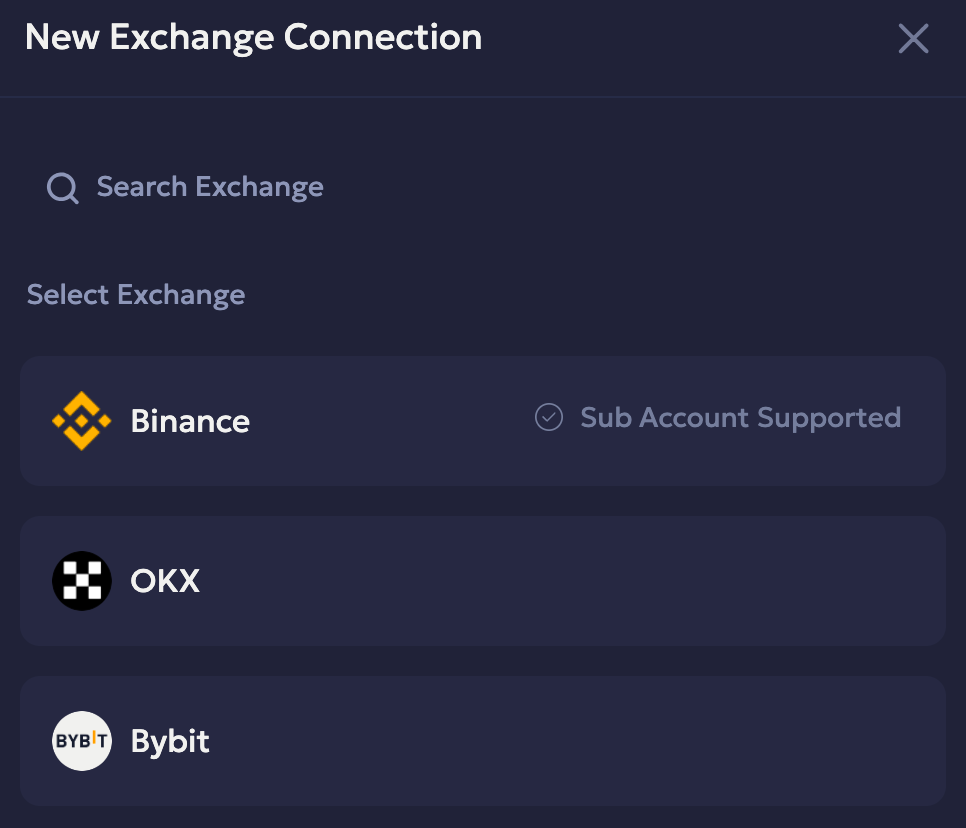
- Select + Add Exchange.
- Select Binance.
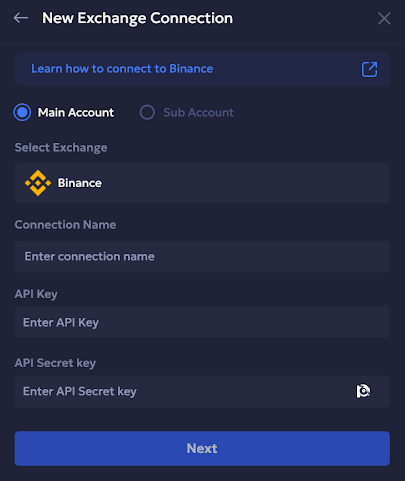
- Select Main Account, and select Binance from the dropdown in the Select Exchange field. Then fill in the following fields:
- Connection Name: Enter the name you want to give this exchange account in Liminal Vaults.
- API Key: Enter the API key saved from Binance.
- Secret Key: Enter the Secret key saved from Binance.
- Select Next.
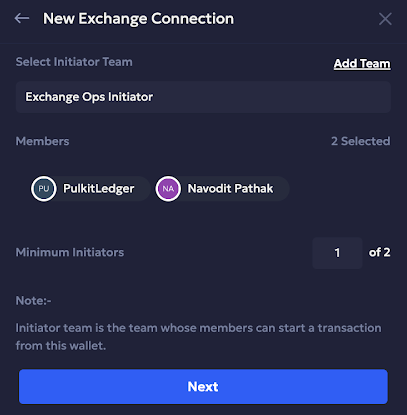
- In the Select Initiator Team field, choose the initiator team.
- Adjust the number of Minimum Initiators required to approve a transaction.
- Select Next.
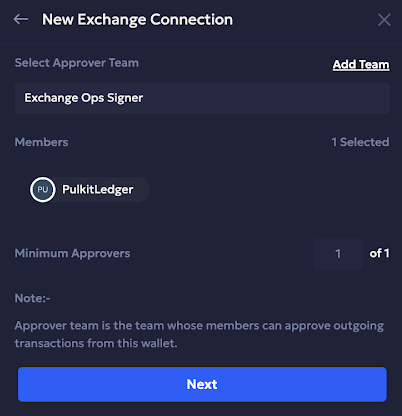
- In the Select Approver Team field, choose the signing team to sign the transaction.
- Adjust the number of Minimum Approvers required to approve a transaction.
- Select Next.
- Review your changes and select Add Connection to complete your account creation.
Your Binance account will appear on the Exchanges page along with all managed assets and their balances. Transfers between Liminal Wallets and Exchange Accounts are now available.
Set up your Binance sub account
After setting up your Binance main account, you can add your Binance sub account in Liminal Vaults. A sub account helps you rebalance your assets securely between the main and sub accounts.
Take the following steps to configure your Binance sub account in Liminal.
Note
- To add your Binance sub account, ensure that you have the account created in the Binance platform. Additionally, save and keep your API key and secret handy before adding the sub account in Liminal Vaults.
Step 1: Enable API Restrictions.
- Ensure the following API restrictions are enabled:
- Enable Reading
- Enable Withdrawals
Note
- The Enable Spot & Margin Trading option is not yet supported by Liminal.
- Restrict network access to allowed IP addresses. Select Restrict access to trusted IPs only (Recommended) and add the IP address
18.1.23.1334
Step 2: Configure your Binance sub account
Once you have completed the above steps, you can set up your Binance sub account in Liminal Vaults. Only the owner and admins of an organisation can add Binance accounts in Liminal Vaults. Members who are associated with the account teams (transaction initiators or signers) can view and approve transactions.
As an owner or admin, take the following steps to add your Binance sub account in Vaults.
- Log into Vaults.
- Go to Wallets > Exchanges.
- Select + Add Exchange.
- Select Binance.
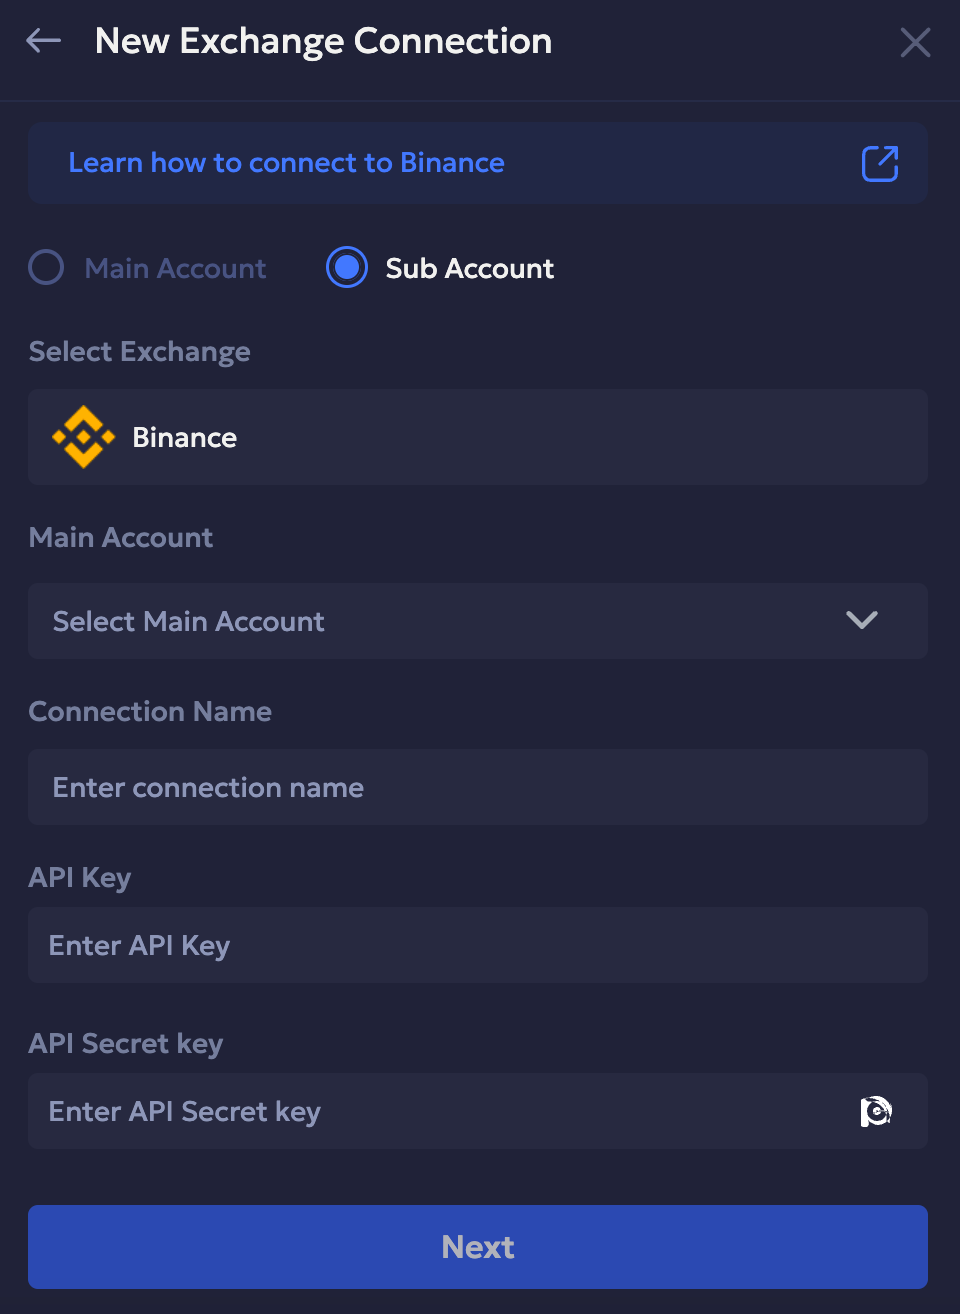
- Select Sub Account, and select Binance from the dropdown in the Select Exchange field. Then fill in the following fields:
- Main account - Select your Binance main account from the dropdown.
- Connection Name - Enter the name you want to give this exchange account in Liminal Vaults.
- API Key - Enter the API key saved from Binance.
- Secret Key - Enter the Secret key saved from Binance.
- Select Next.
- In the Select Initiator Team field, choose the initiator team.
- Adjust the number of Minimum Initiators required to approve a transaction.
- Select Next.
- In the Select Approver Team field, choose the signing team to sign the transaction.
- Adjust the number of Minimum Approvers required to approve a transaction.
- Select Next.
- Review your changes and select Add Connection to complete your account creation.
Receive funds into your Binance main account
Before adding funds into a Binance main account, ensure that the account address is whitelisted in Liminal Vaults. You can obtain the Binance account address either from the Binance platform or using the Receive button in Liminal Vaults. Transfers are only allowed after whitelisting destination wallet/account addresses. To whitelist the Binance main account, refer to the Whitelist an address user guide.
Note
- Binance automatically converts TUSD, USDP, and USDC stablecoins to BUSD when deposited into a Binance main account from any source.
Recommendation
- Before depositing any asset into an exchange account in Liminal Vaults for the first time, it is highly recommended to do a small test transaction and make sure the funds have arrived in the exchange account.
Take the following steps to deposit funds into your Binance account.
- Log into Vaults.
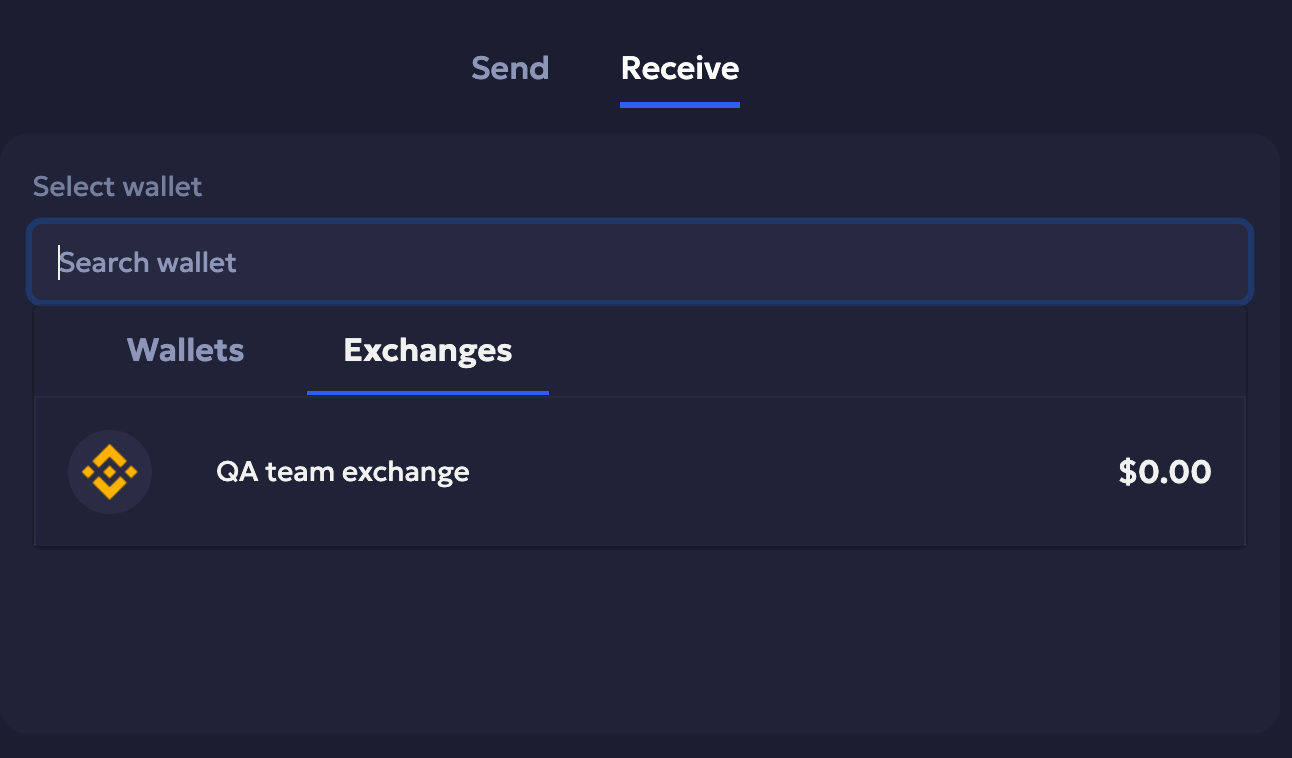
- Select the Receive button.
- Select the Binance wallet.
- In the Asset field, select the type of asset you want to receive.
- In the Network field, select the type of network.
- Copy the generated wallet address and use it as the destination address while sending assets to it.

Note
- Currently, Liminal does not support transfers between main Binance accounts and sub accounts. This implementation is in the process to be released soon.
Send funds from your Binance main account
In Liminal Vaults, you can send funds out of the Binance main account into any wallet (including Liminal wallet). Transfers from your Binance main account are permitted after you whitelist the destination addresses. You need to whitelist the destination address in the Binance platform.
Note
- When sending BUSD from your Binance account, you can select TUSD, USDP, or USDC from the asset menu to convert BUSD automatically and transfer it.
Take the following steps to deposit funds into your Binance account.
- Log into Vaults.
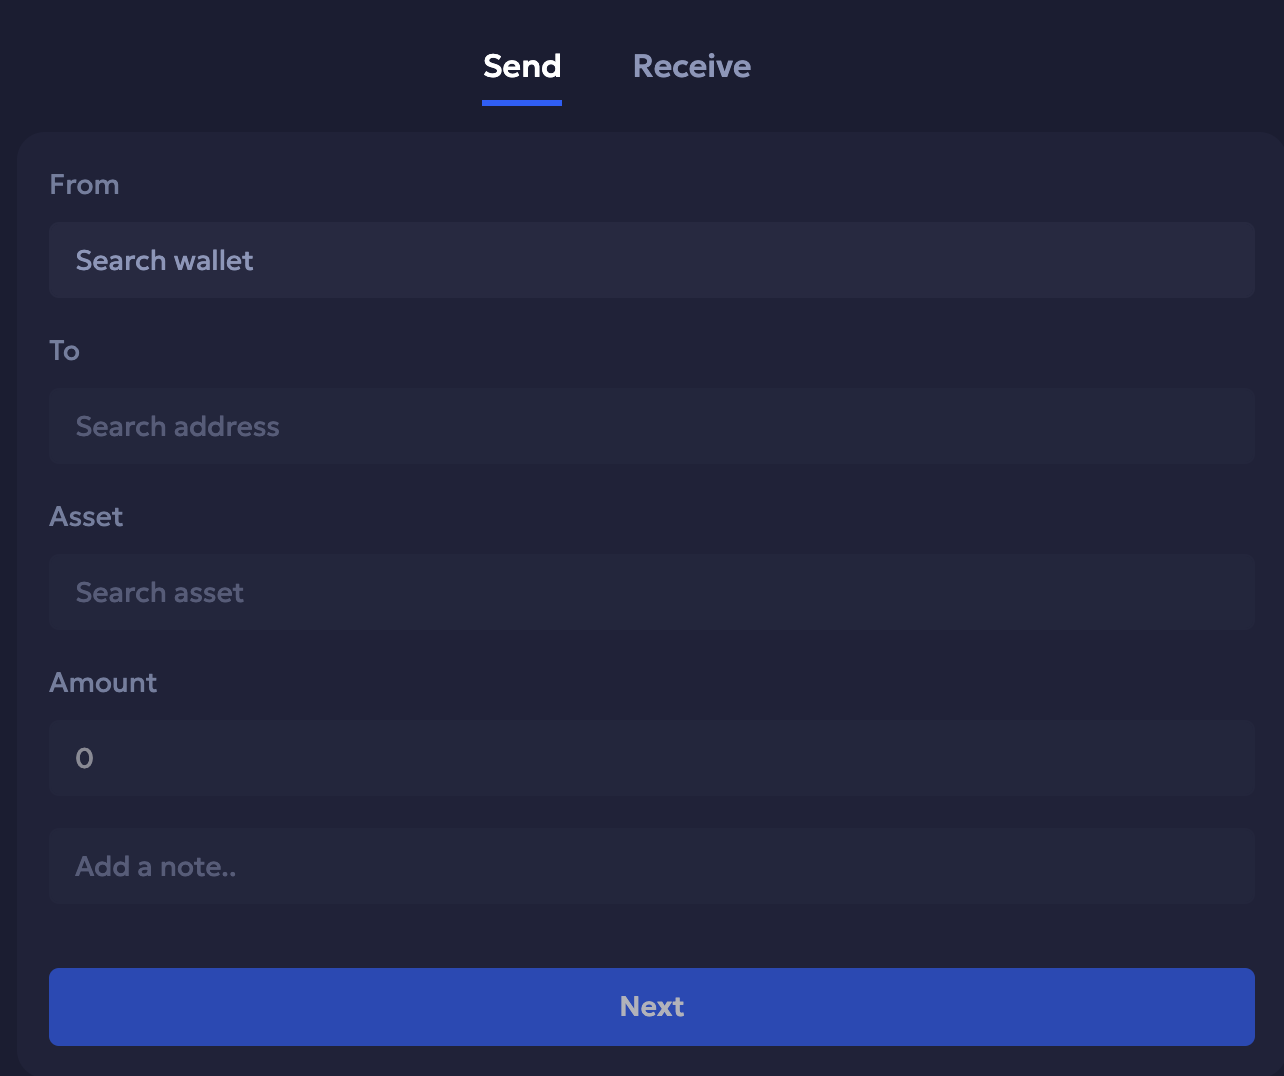
- Select the Send button.
- In the From field, select your Binance account as the source account from where you want to withdraw funds.
- In the To field, select the Liminal wallet as the destination wallet where you want to transfer funds.
- In the Asset field, select the type of asset you want to transfer.
- In the Amount field, enter the total amount you want to transfer. Ensure that withdrawal amounts are greater than $10, as per Binance regulations.
- Select Next to confirm.
- Enter the code in the field you received in the Google Authenticator mobile app against the credentials with which you have signed into Vaults.
- Select Continue to authenticate yourself.
Your initiated transaction needs to be approved by a minimum number of initiators and then signed by the minimum number of signers, as configured for the source wallet.
To approve a transaction, the other initiators must take the following steps.
- Log into Vaults.
- Locate the pending transaction and select View.
- Under the Initiation tab, select Approve.
- Enter the code received in the Google Authenticator mobile app.
- Select Continue.
To sign a transaction, the other signers must take the following steps.
- Log into Vaults.
- Locate the pending transaction and select View.
- Under the Final Approval tab, select Approve.
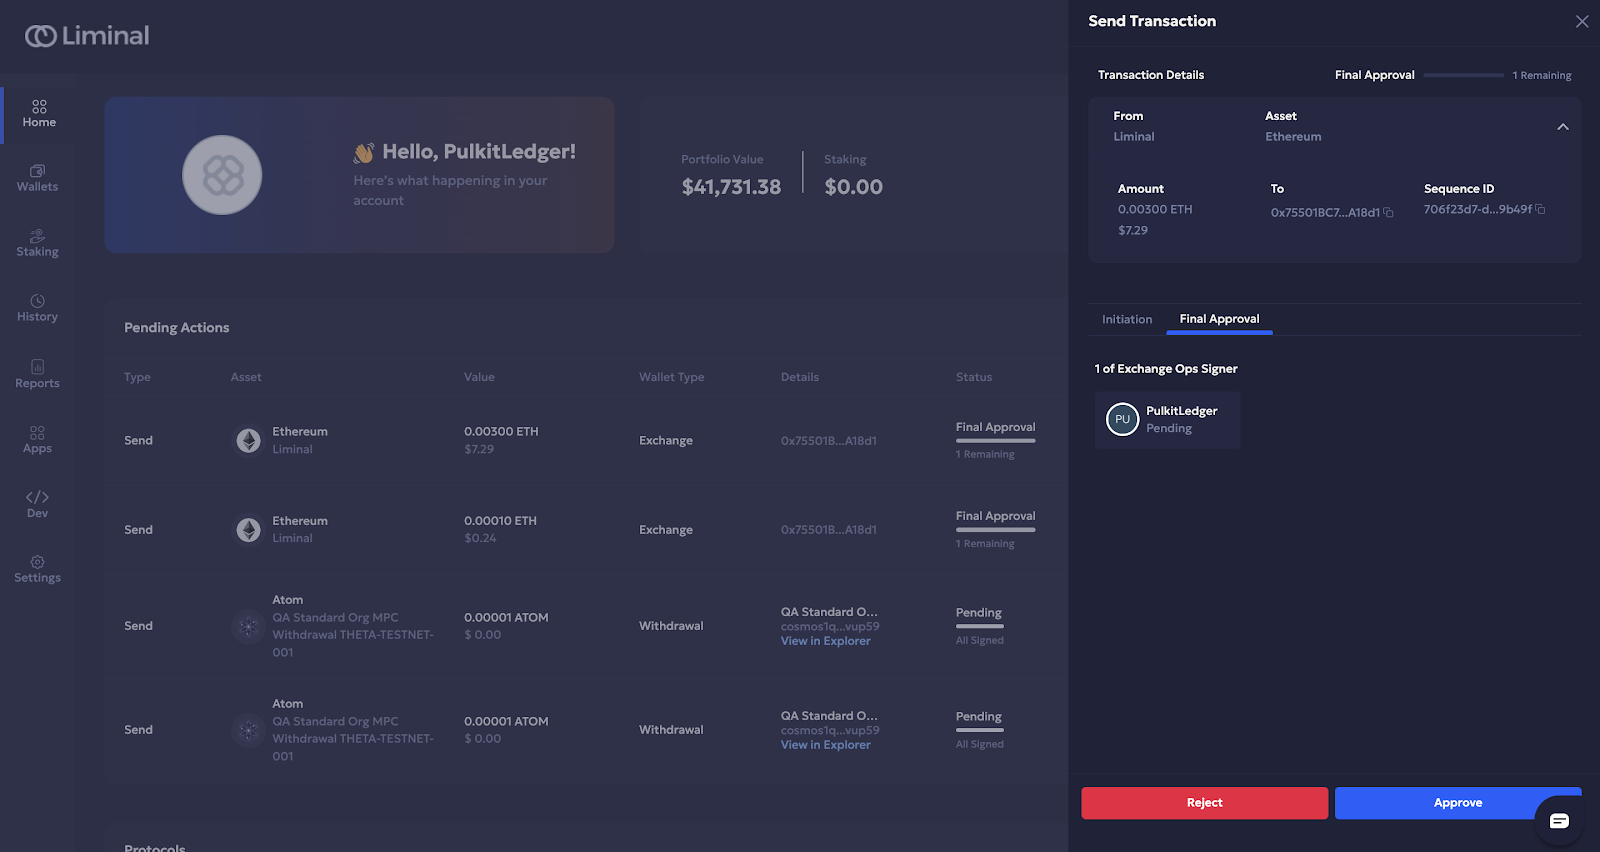
- Enter the code received in the Google Authenticator mobile app.
- Select Continue.
Once your transaction is approved by the minimum number of initiators and signed by the minimum signers, you can view your transaction in the History section of the Binance account. Go to Wallets > Exchanges, select your Binance account, and then select History to view your transactions.
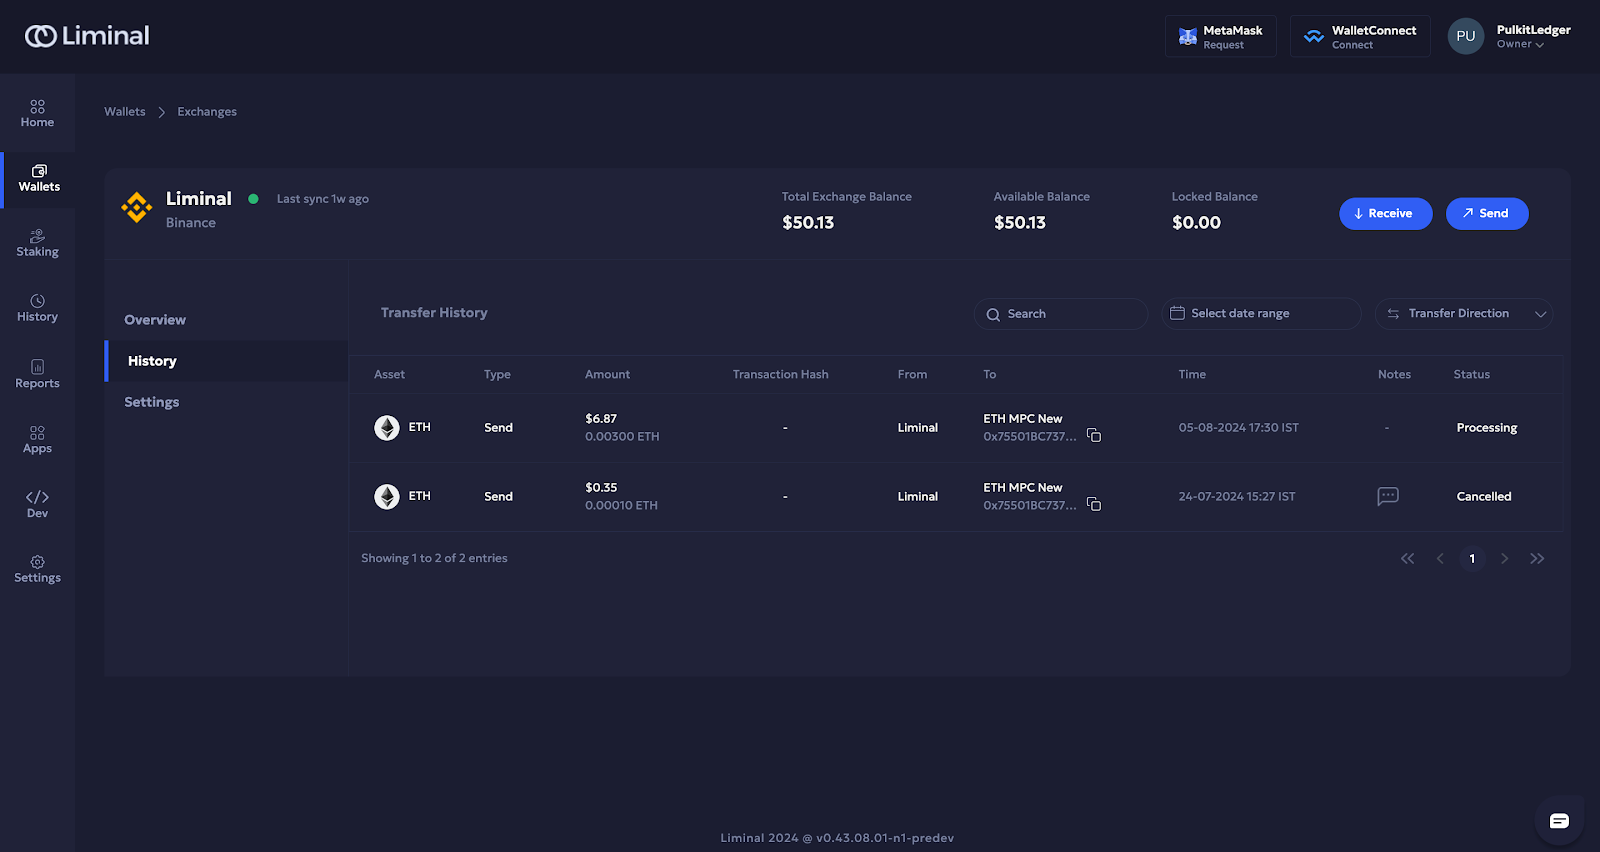
till here.
Updated 11 days ago