Transfer funds from a multisig wallet
A cold multisig wallet is a wallet that holds private keys offline and enhances security by requiring approval from multiple authorised signers before executing a transaction, thus minimising the risk of unauthorised access. In Liminal Vaults, you can send and receive funds from other wallets.
Note
- Tron transactions have an automatic 24-hour signing window. Ensure all signers have signed and approved the transaction within the window. Learn more about it here
- For Send transactions:
- For EVM chain transactions: Gas Station acts as the final signer after all policy checks are completed. Additionally, the gas fee is also deducted directly from the Gas Station. Refer to the Gas Station guide to learn more.
Receive funds into a multisig wallet
Wallet members can send funds from the multisig wallet after it is configured in their Vaults web app.
Follow the steps to receive funds into your cold multisig wallet:
- Log in to https://vaults.lmnl.app/ for the production environment, or https://dev.lmnl.app/ for the testing environment.
- Go to Wallets.
- Select your multisig wallet.
- Select the Receive button.
- Copy the wallet address and use this as the destination address to transfer funds to this wallet.
Send funds
Required parameters
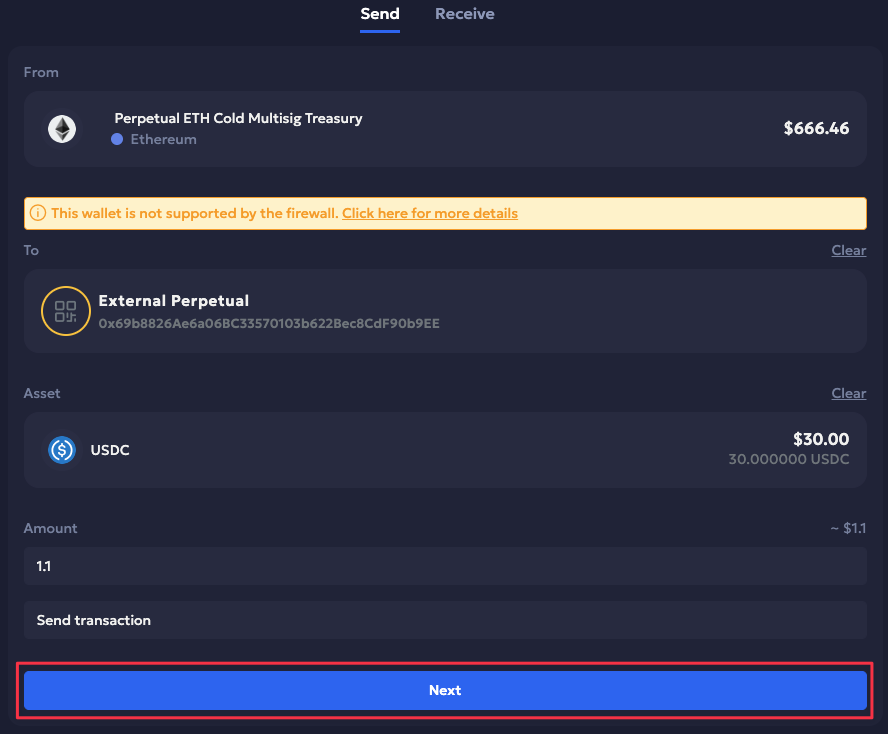
The following details are required to send a transaction with a multisig wallet:
| Field | Description | Required / Optional |
|---|---|---|
| From | The multisig wallet from which you will send funds. | Required |
| To | The destination wallet where you want to send the funds. | Required |
| Asset | The type of asset for the transaction. | Required |
| Amount | Enter the amount of the transaction. | Required |
| Note | Short transaction description. | Optional |
Prerequisites
- Ensure that you whitelist the destination address before initiating the transfer. Refer to the Whitelist an address guide.
- Ensure you are added as a member to the respective wallet team. Refer to the Set up a cold multisig walletguide to add wallet members.
- You have connected the ledger device to your Vaults account. Learn how to link your hardware device here.
Steps
Follow the steps below to send funds from a multisig wallet:
-
Log into https://vaults.lmnl.app/ for production environment, or https://dev.lmnl.app/ for testing environment.
-
You can initiate a Send transaction either from:
-
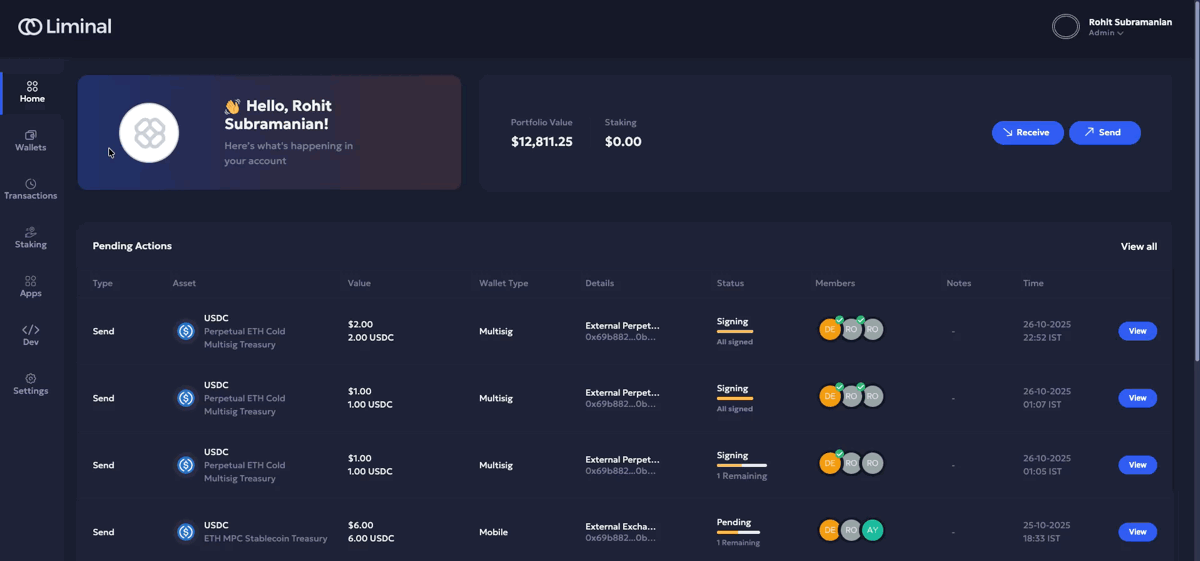
The Home page: Select Send to the right of the page header to bring up the Send transaction panel.

-
The Wallet Details page:
-
Navigate to Wallets.
-
Select the respective supported wallet to proceed to the Wallet Details page.
-
Click Send to the right of the wallet header.
-
-
-
Enter the required fields in the Send flow. Select Next to continue.
-
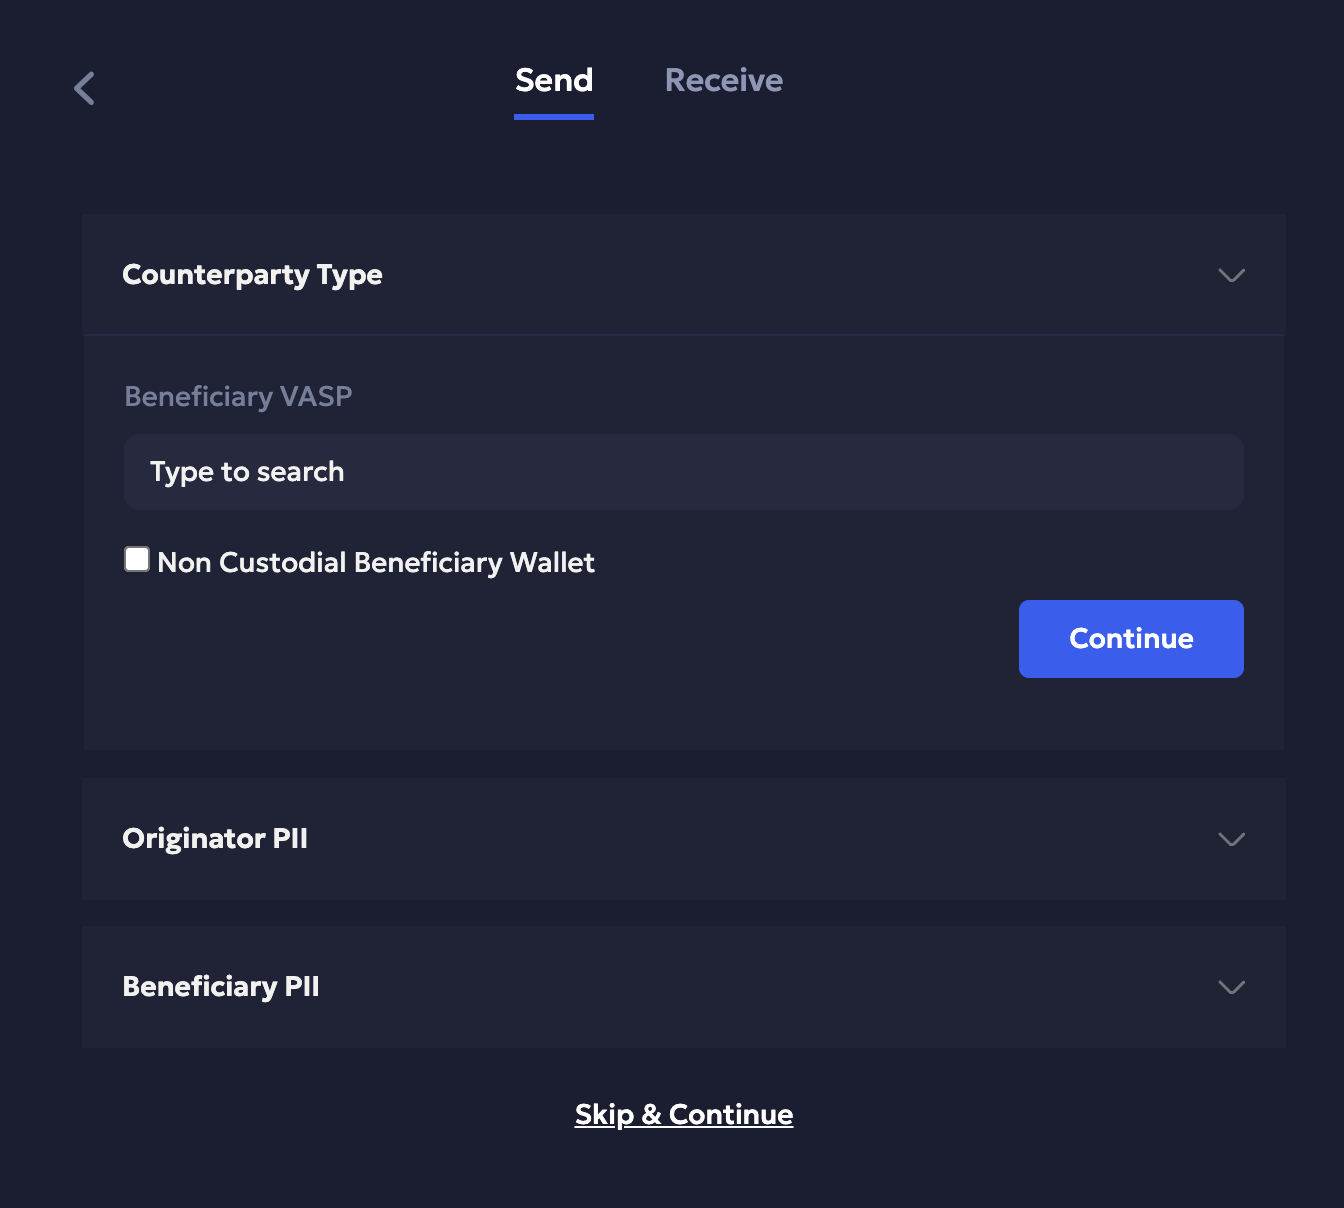
Enter the required Beneficiary and Originator details if Travel Rule (link) is enabled for the wallet, and click Continue. Else, click Skip and Continue.
-
Review the following transaction details before proceeding:
- Sender and receiver address, transaction amount, estimated transaction fee, and maximum transaction fee.
- Address screening security authentication.
- If your multisig wallet uses a supported EVM chain, the transaction details include the following information for verification:
- Input data decoding and verification via the External Decoder. See How to Verify Input Data on an External Decoder.
- Tenderly Simulation Report to help simulate the transaction execution process for threat and security verifications.
- Domain and message hash data to verify on the Signing Device.
- Safe transaction hash to verify manually via Safe Utils.
-
Click on Confirm and Initiate.
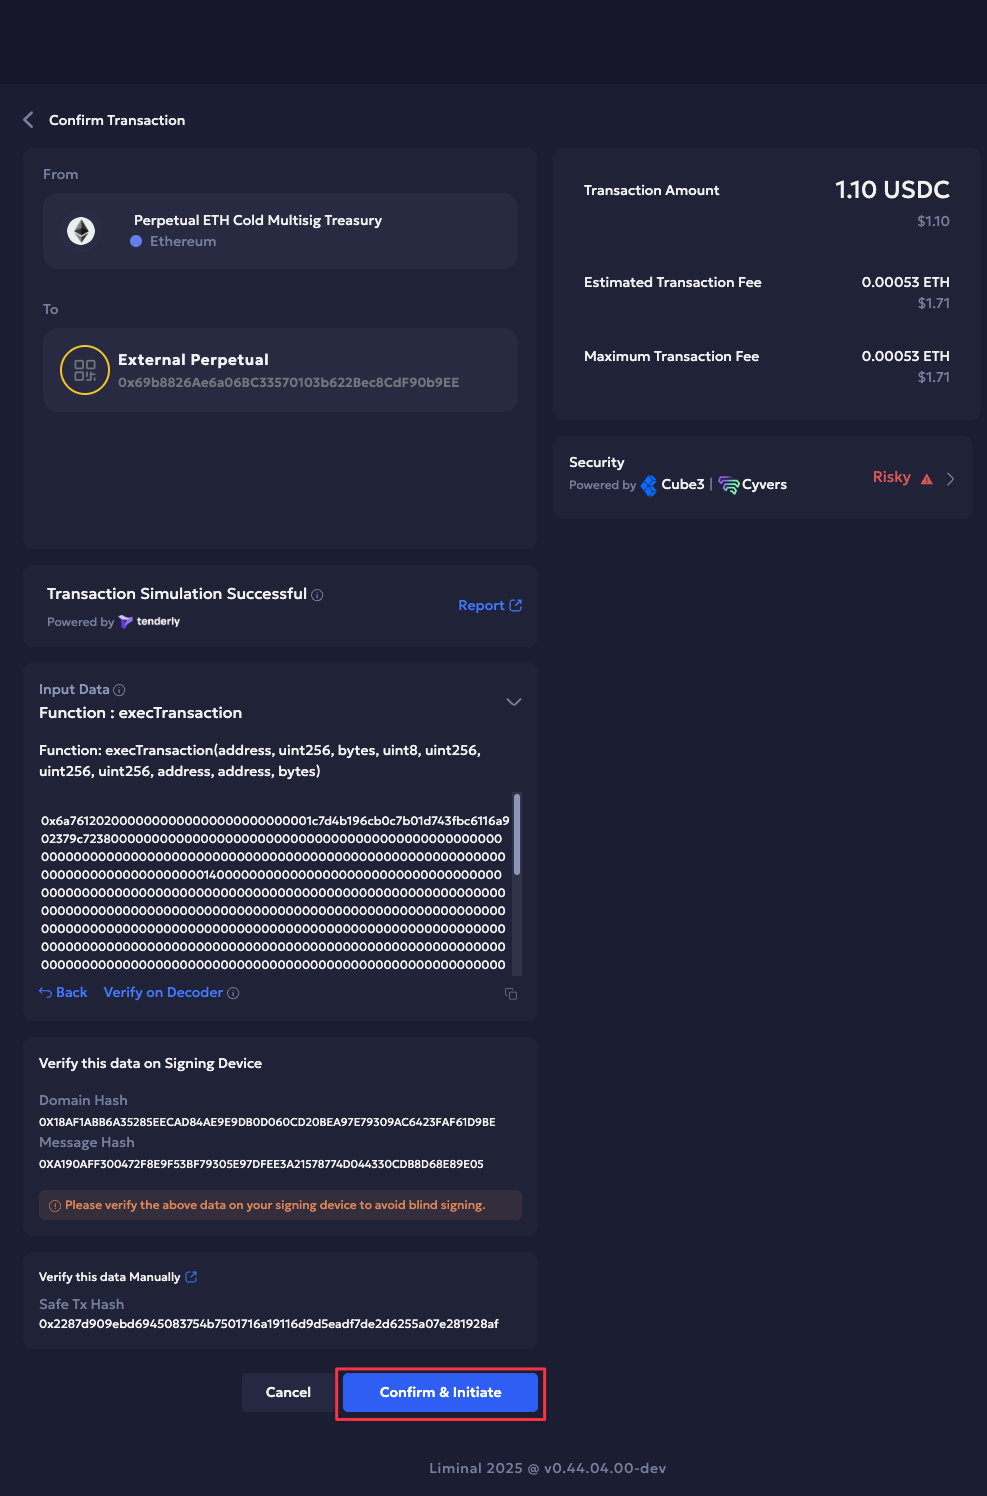
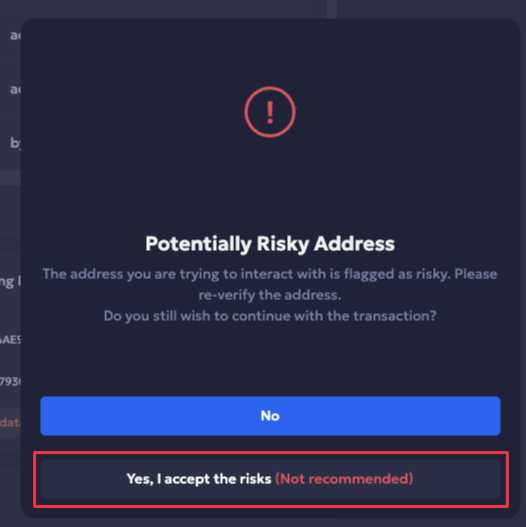
If the address is risky, depending on the Address Screening threshold settings, you may be prompted to re-verify before proceeding. Click Yes, I accept the risks (Not recommended).
-
Follow the approval instructions on your hardware device to sign the transaction. As the first signer, you are also initiating the transaction. For EVM chain transactions, on the hardware device, you will see the message hash and domain hash before signing the transaction. Ensure that you cross-verify it with what is shown on screen.
Note
- For EVM Chains, the other signers will be able to cross-verify the message hash and domain hash they see on the hardware device on the Gnosis Safe UI or third party tools. See How to Verify Message Hash and Domain Hash to avoid blindly signing messages on your hardware device.
As soon as the transaction is initiated, all the other signers will receive a notification about the transaction via email. To sign the transaction, they can log into their Liminal Vaults and view the pending transaction under Pending Actions. In case of EVM Chain transactions, signers can verify the message hash and domain hash using a Safe utils app by manually inputting the input details and additionally, cross verify it on the Gnosis Safe UI. Once verified, they can select the approve button in the dashboard, connect their hardware device, and follow the approval instructions on their hardware devices to sign the transaction.
Read the complete Co-Signer Guide on how to securely verify and sign multisig transaction requests.
Once the minimum number of signatures are collected, the transaction is broadcasted to the blockchain.
Updated about 2 months ago