Stake Tron Assets
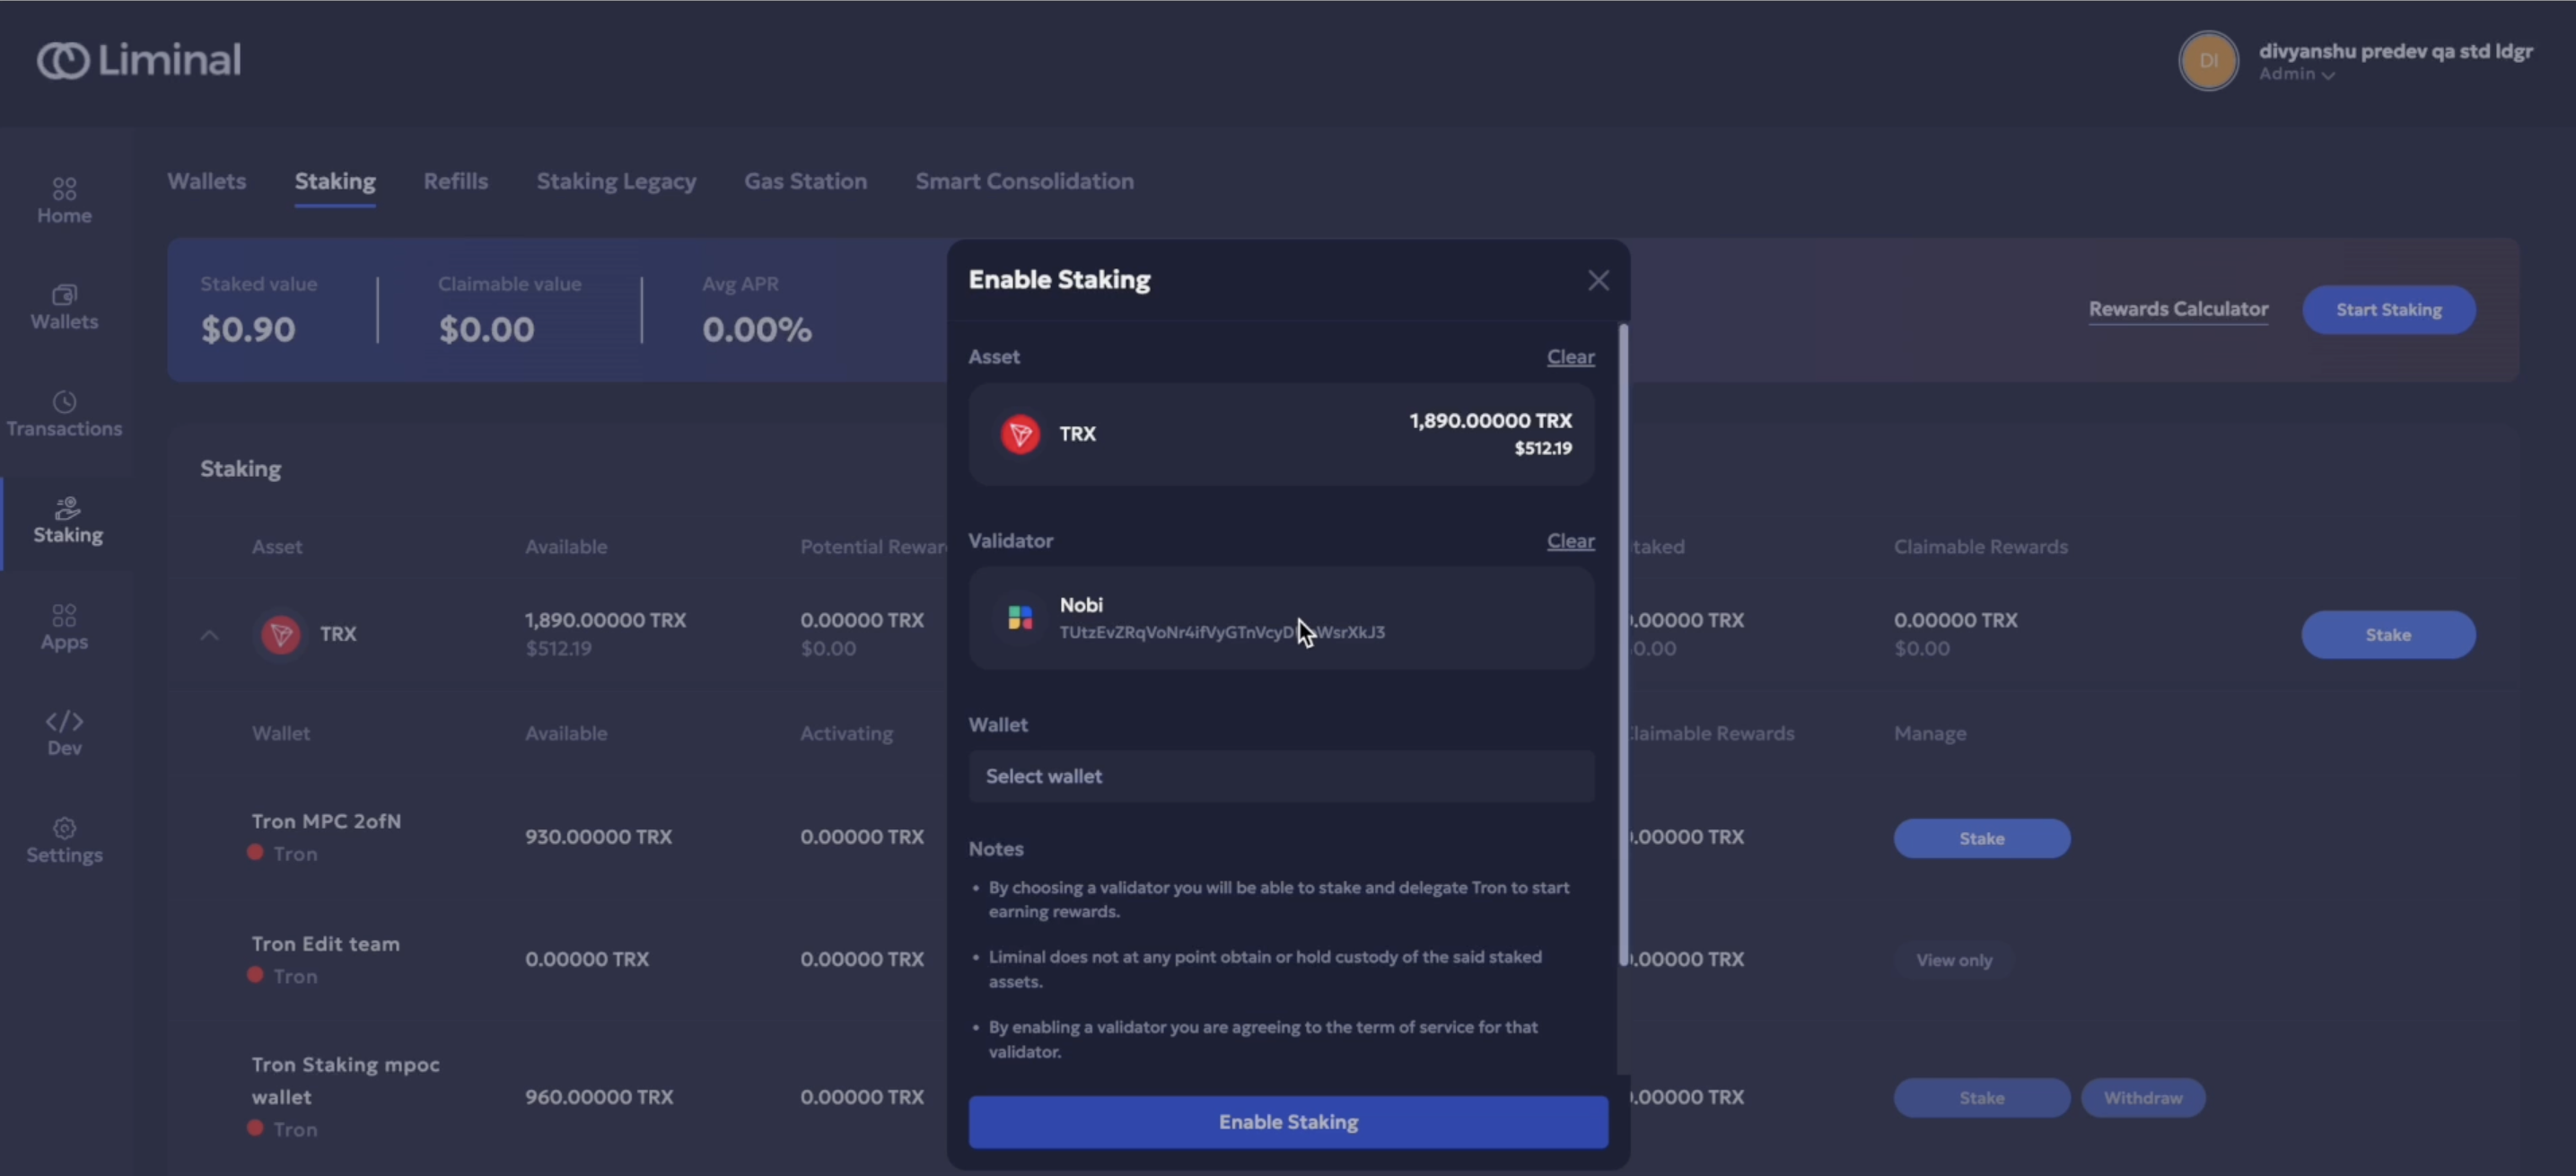
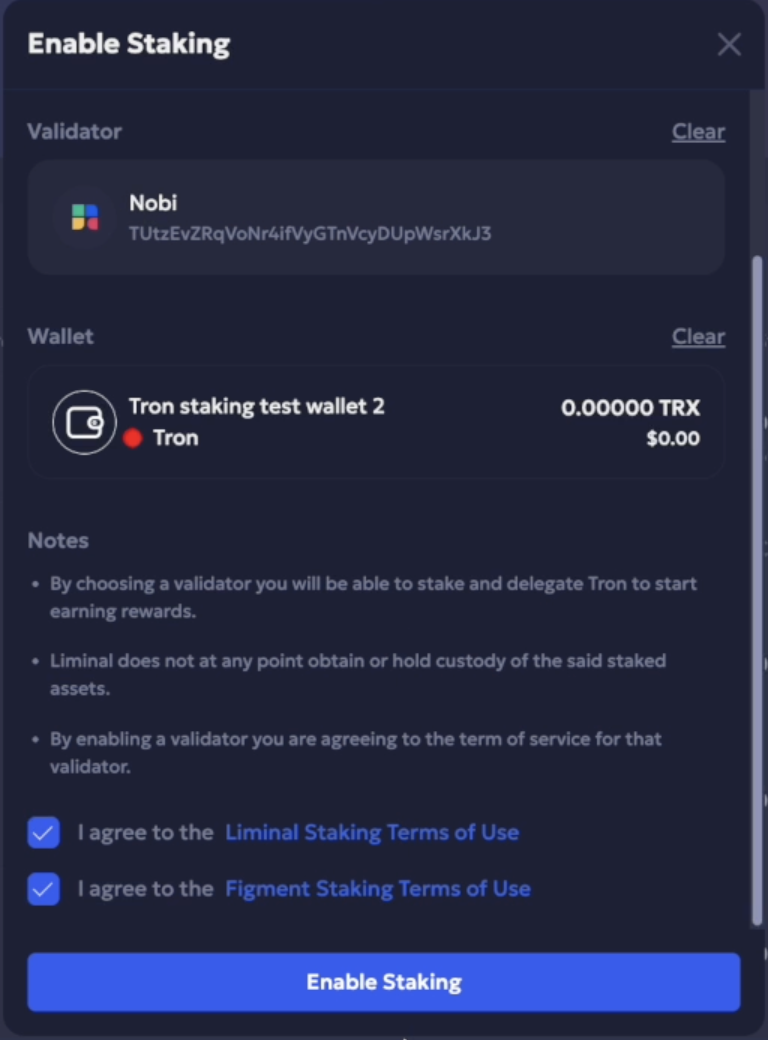
Enable Staking
To initiate staking, reach out to our sales team at [email protected] to enable the staking feature for your organization.
Once staking is enabled, you can either:
- Create a new TRON MPC warm wallet, or
- Enable wallet for staking on an existing one (wallet member can initiate the request)
Enabling staking whitelists the validator address on your wallet and ensures only authorized staking transactions can be made, helping avoid accidental delegation to incorrect addresses.
Need help setting up a warm wallet? Refer to our Warm Wallet Setup Guide.
Start Staking
- Navigate to the Staking menu and click Start Staking.
- Select your TRON MPC Warm Wallet.
- Review and accept the Terms and Conditions.
- Click Enable Staking, then complete 2FA approval.
- Once the wallet is staking-enabled, click Stake.
- Input the amount and optional note, then click Next.
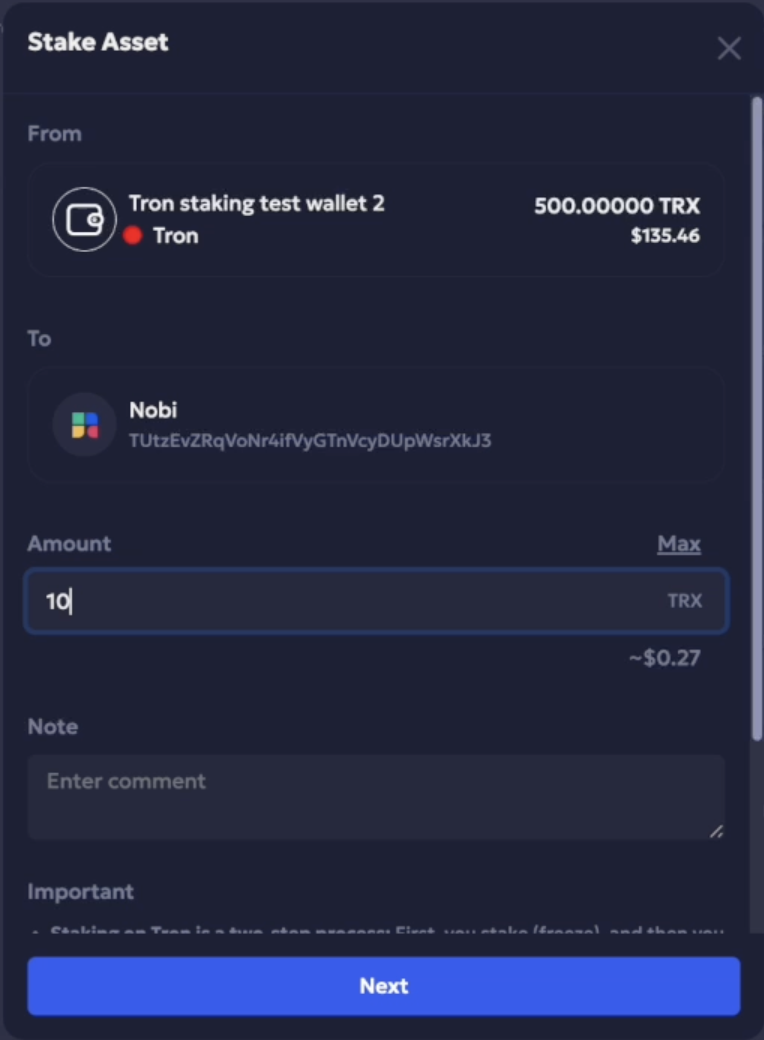
- Enter 2FA and initiate the stake request.
- Approve and sign via mobile (based on wallet quorum).
- Click Delegate, input 2FA, and sign again via mobile.
- Once delegated, staking enters a 1-day bonding period.
- After bonding, your wallet will begin to earn daily rewards.
Updated about 1 month ago