Wallet Details
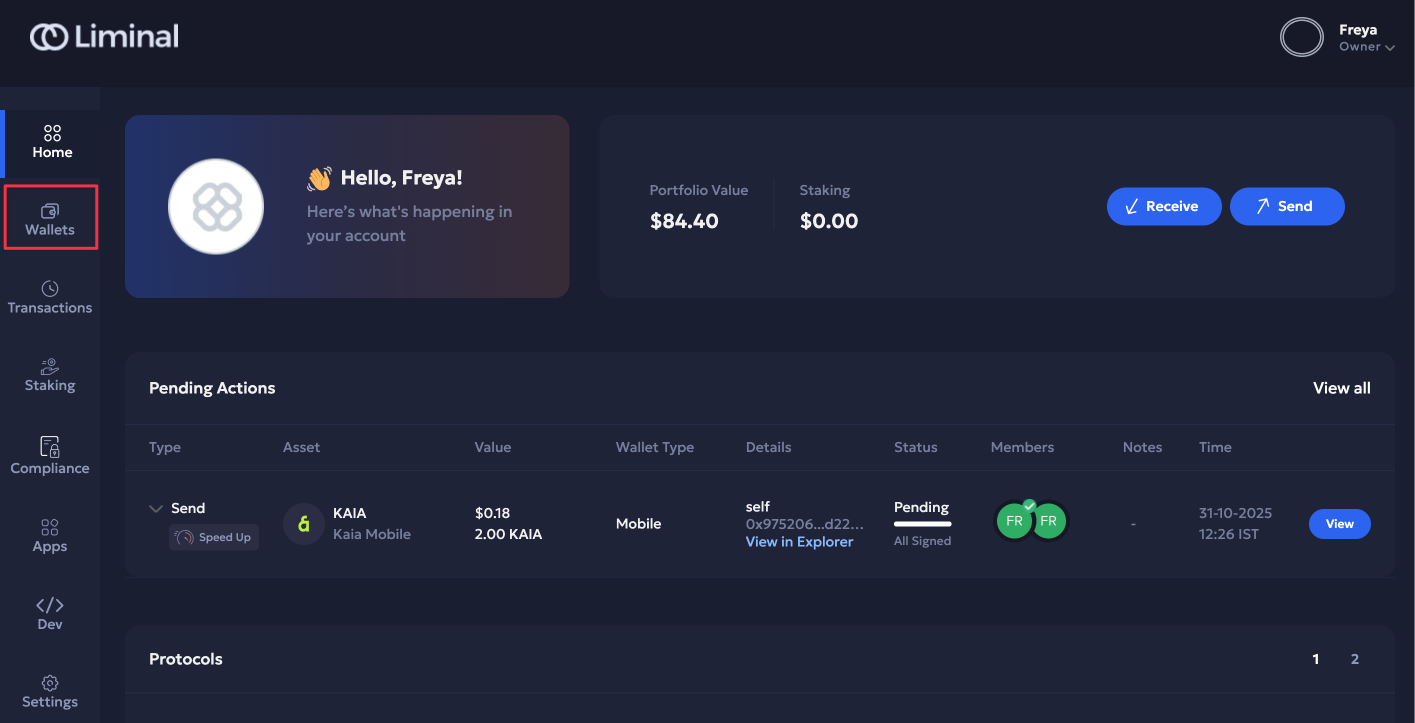
You can manage your asset wallet and perform wallet-specific operations from the Wallets page. Select a wallet on the Wallets page to navigate to its profile.
Every asset wallet page has:
- Header: A static header with the required wallet metadata.
- Tabs: Navigate across the Overview, History, Policy, and Settings tabs to perform required functions.
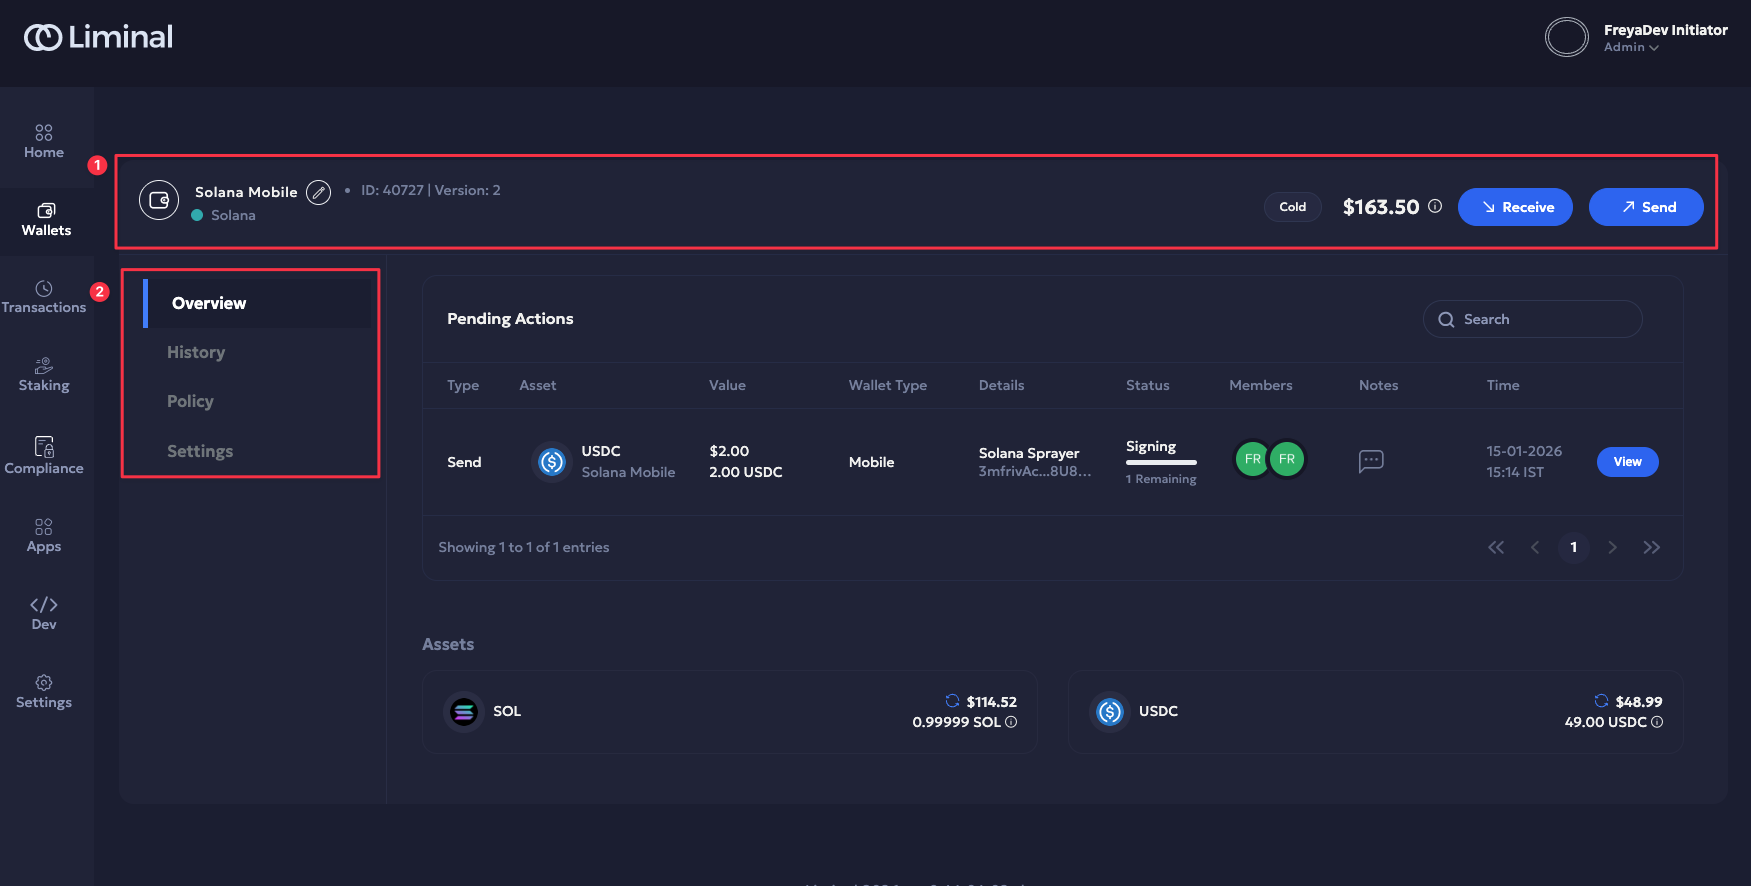
Header
The header includes the following:
- Wallet name and chain name.
- Edit button to update wallet name.
- Wallet ID and version (either 1 or 2) to the right of the wallet name.
- Wallet type, including Hot or Cold to the right.
- The total wallet balance for the given wallet is a summation of all on-chain asset amounts. Hover over the info icon to view the balance breakup.
- Send and Receive buttons for transferring funds.
Overview
The default Overview tab provides a current landscape of the wallet as follows:
- Pending Actions: Navigate across all pending actions related to your wallet. Click View to bring up the transaction side panel.
- Assets:
- Lists the assets on your wallet, including native and stable coins. Each asset amount is in USD and native.
- Balance breakup: Hover over the info icon next to each asset to view its balance breakup.
- You can manually sync balances of individual assets if required.
- Search: Use the search bar to look up wallet details in pending actions.
Manual Balance Sync
Users can update the latest on-chain wallet balance by manually syncing the asset balance. This helps ensure that the balance displayed in your wallet profile reflects the most recent blockchain state. Additionally, if you have received recent funds that Liminal Vaults has not yet synced, you can sync them manually using the balance sync feature.
Manual balance sync is particularly useful when a transaction is made. Still, it has not yet synced in your Liminal Vaults account, i.e., the transaction history is not yet updated, and the required webhooks have not been sent yet. This delay can occur due to blockchain network sync delays or a lag in the consumer and parser of the CRON job that updates the on-chain balance.
Manual balance sync is supported for Cold, Warm, Hot Deposit, and Withdrawal wallets. You can view the total wallet balance directly in the wallet profile. It is currently available for SOL, TRON, and EVM chains only.
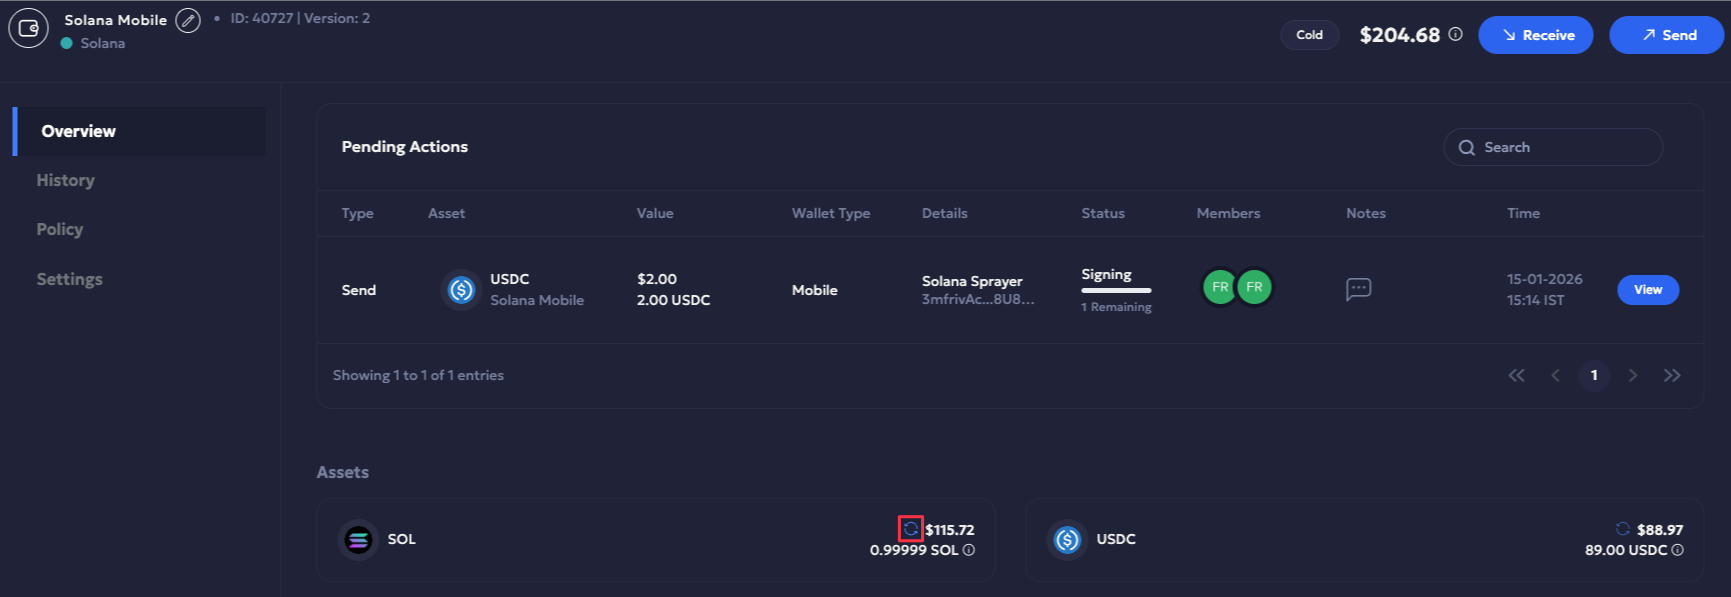
To manually sync the balance for both native and non-native assets in a wallet:
-
Log in to your Liminal Vaults account.
-
Navigate to Wallets and select the respective wallet from the dashboard.
-
In the Assets section, click the ↻ Resync icon next to the asset whose balance you want to update.
-
Hover over the ↻ Resync icon to check the last synced timestamp.
Note
- Checking balance for Deposit wallets with multiple addresses: The total balance amount for Deposit wallets is not updated during manual sync, as these wallets contain multiple deposit addresses. You have to manually verify individual deposit addresses, respectively.
Refer to the Addresses section for details.- Delay in a transaction sync and its respective webhook notification is a rare scenario. Use the manual balance sync feature sparingly.
- Manual sync can only be performed once every five minutes. You must wait for five minutes before initiating the next manual sync.
Demo
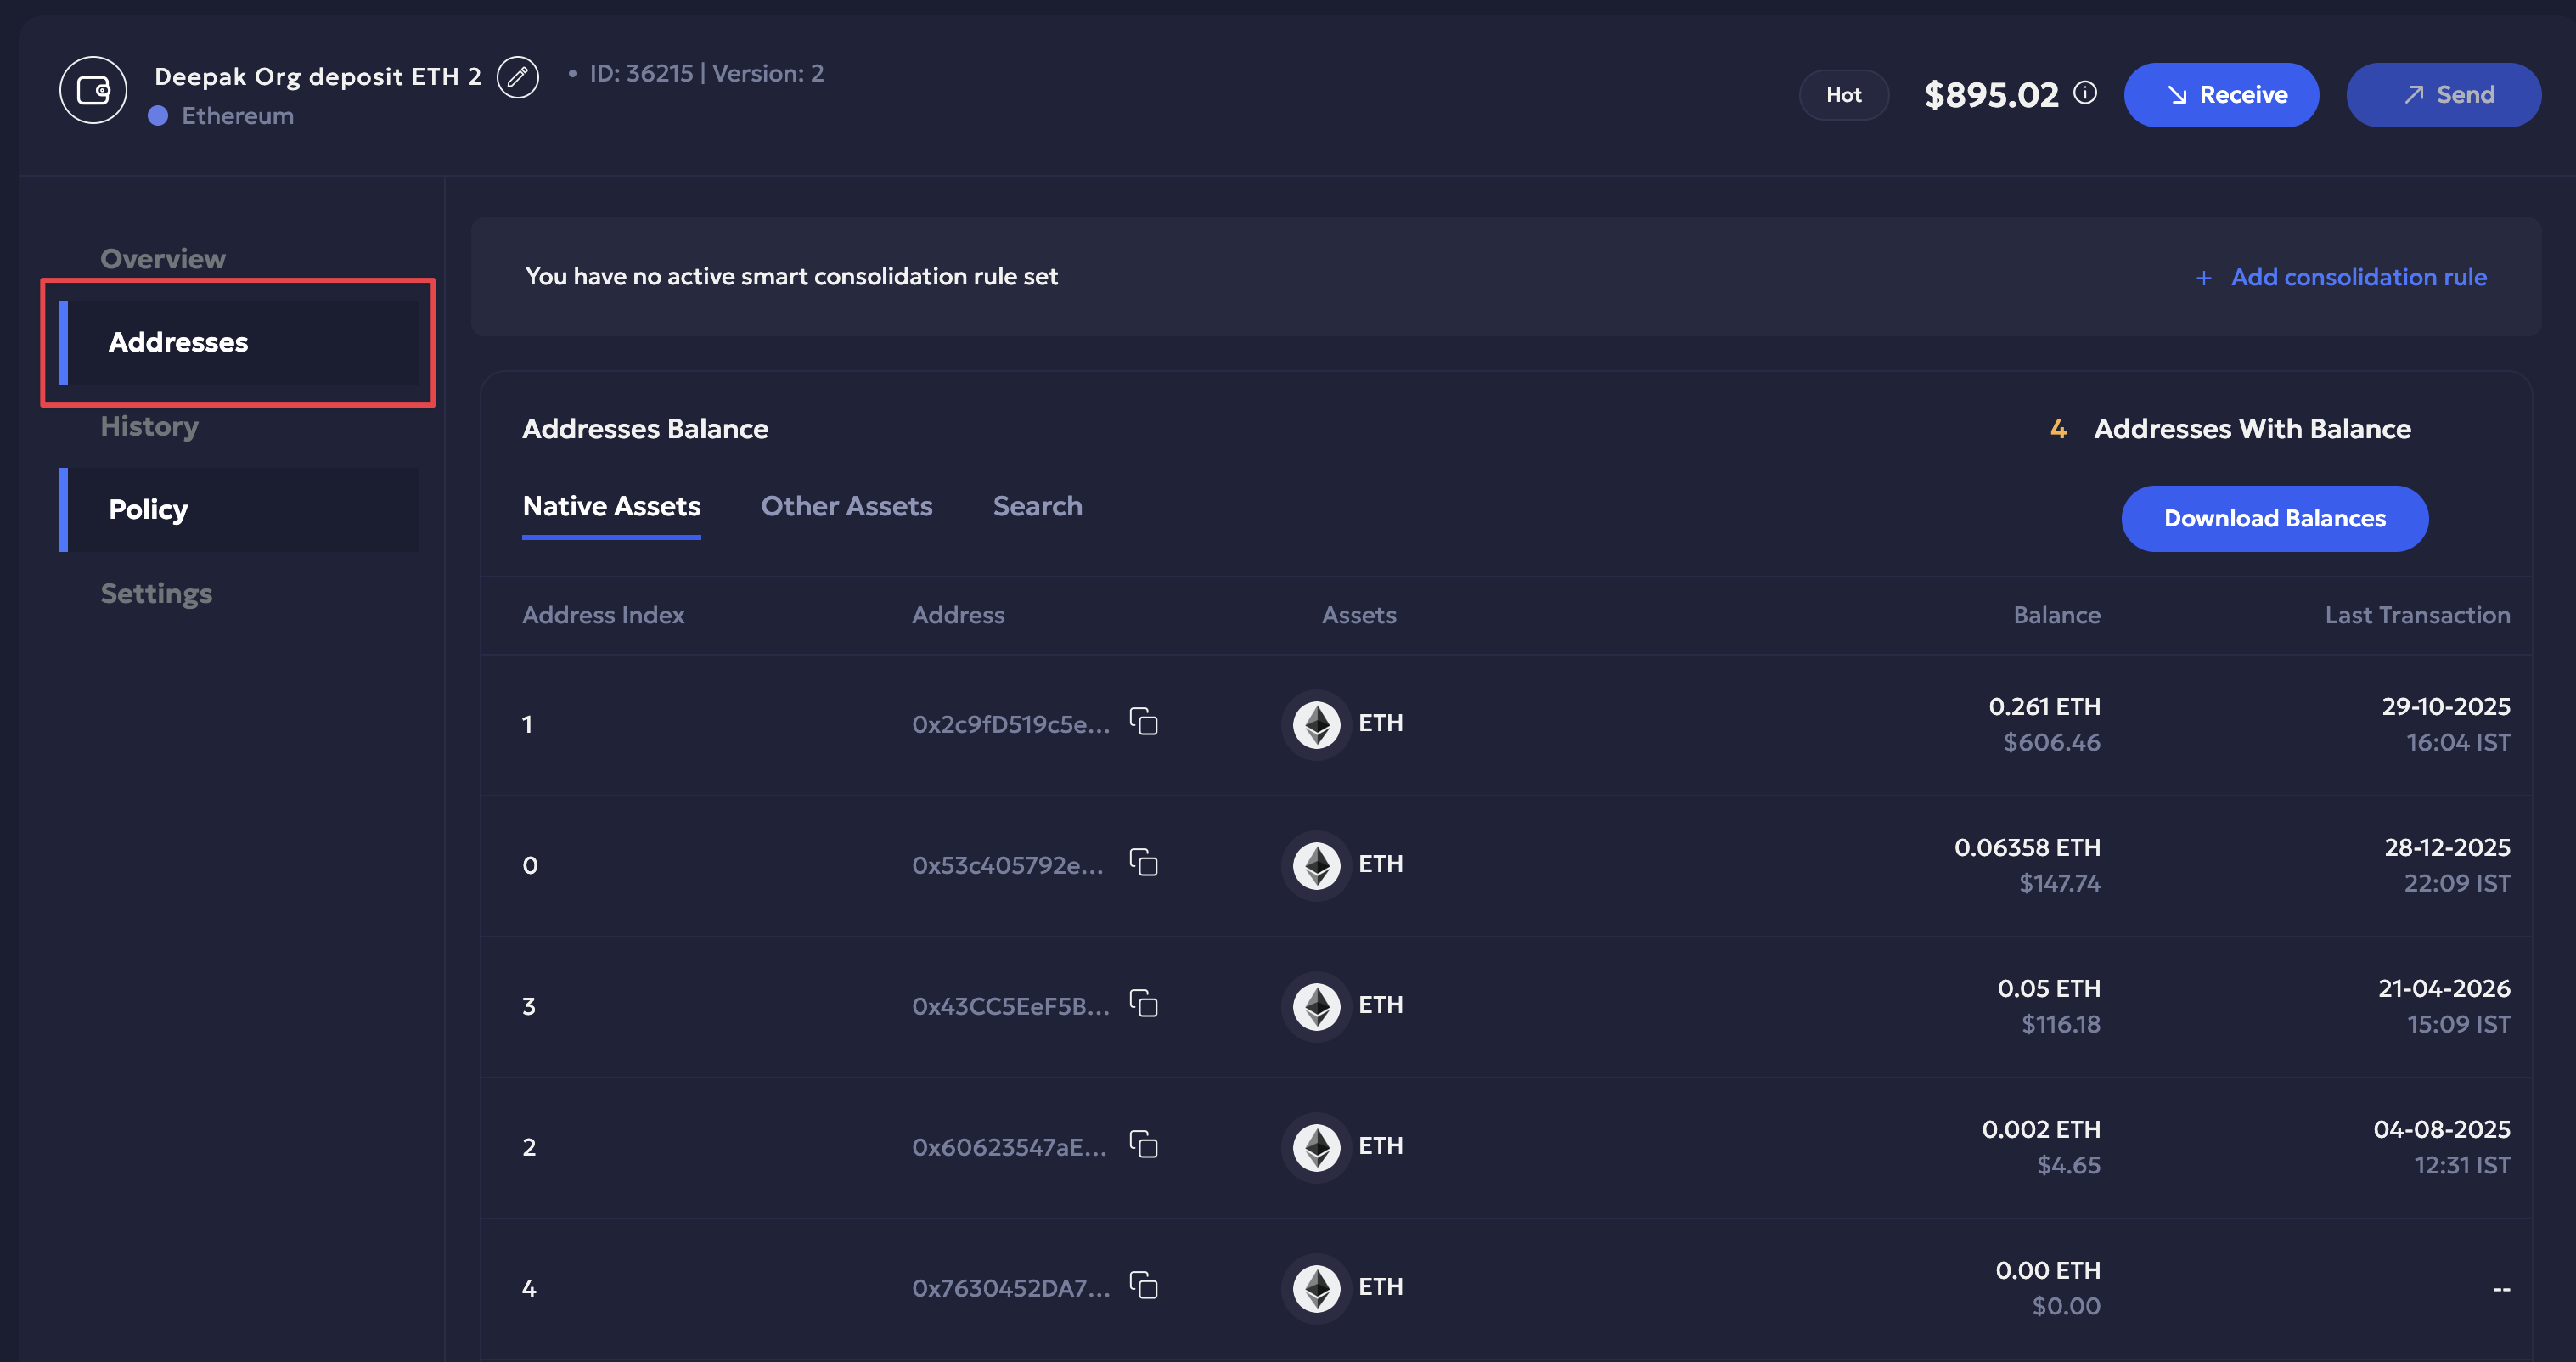
Addresses (for Deposit wallets only)
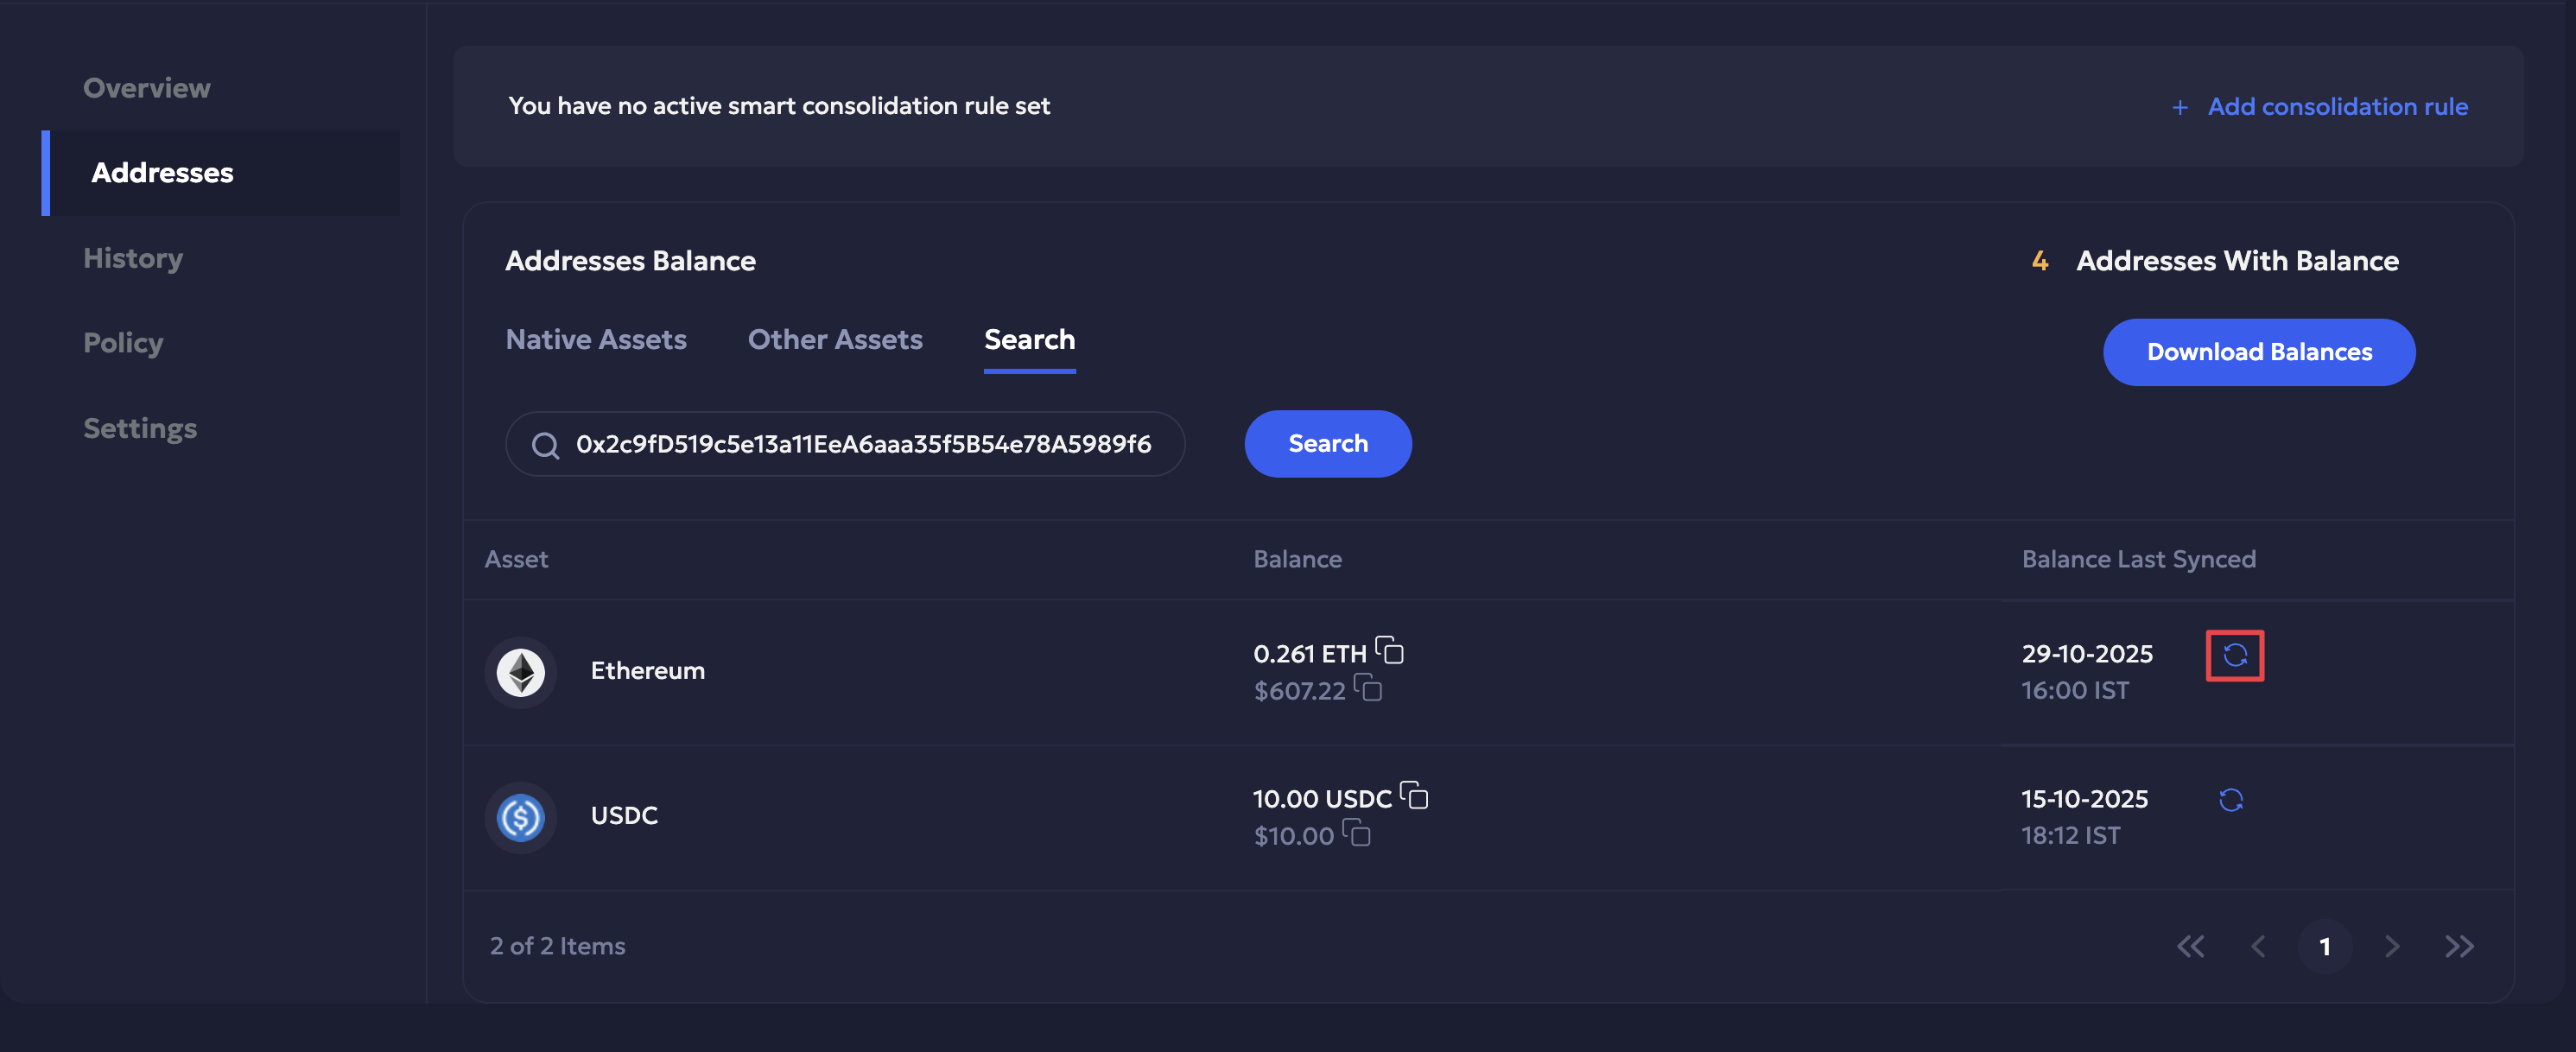
Deposit wallets have an additional Addresses tab consisting of the list of addresses stored in it. It includes the following tabs:
- Native assets: Lists the native assets available for every address in the deposit wallet. It includes the address index, address, assets, balance and last transaction in its address balance metadata.
- Other assets: Lists the other assets (tokens) available for every address in the deposit wallet.
- Search: You can search for a particular wallet asset using the search bar. It includes Asset, Balance and Balance Last Synced columns. The Balance Last Synced has the ↻ Resync icon for every wallet address for resync.
Download balance: Click the Download Balance button to the right for a list of all balances in the deposit wallet in CSV format.
When syncing individual addresses of a deposit wallet, you need to copy the address in the search bar. Click the ↻ Resyn icon to sync wallet balance as per the respective address.
History
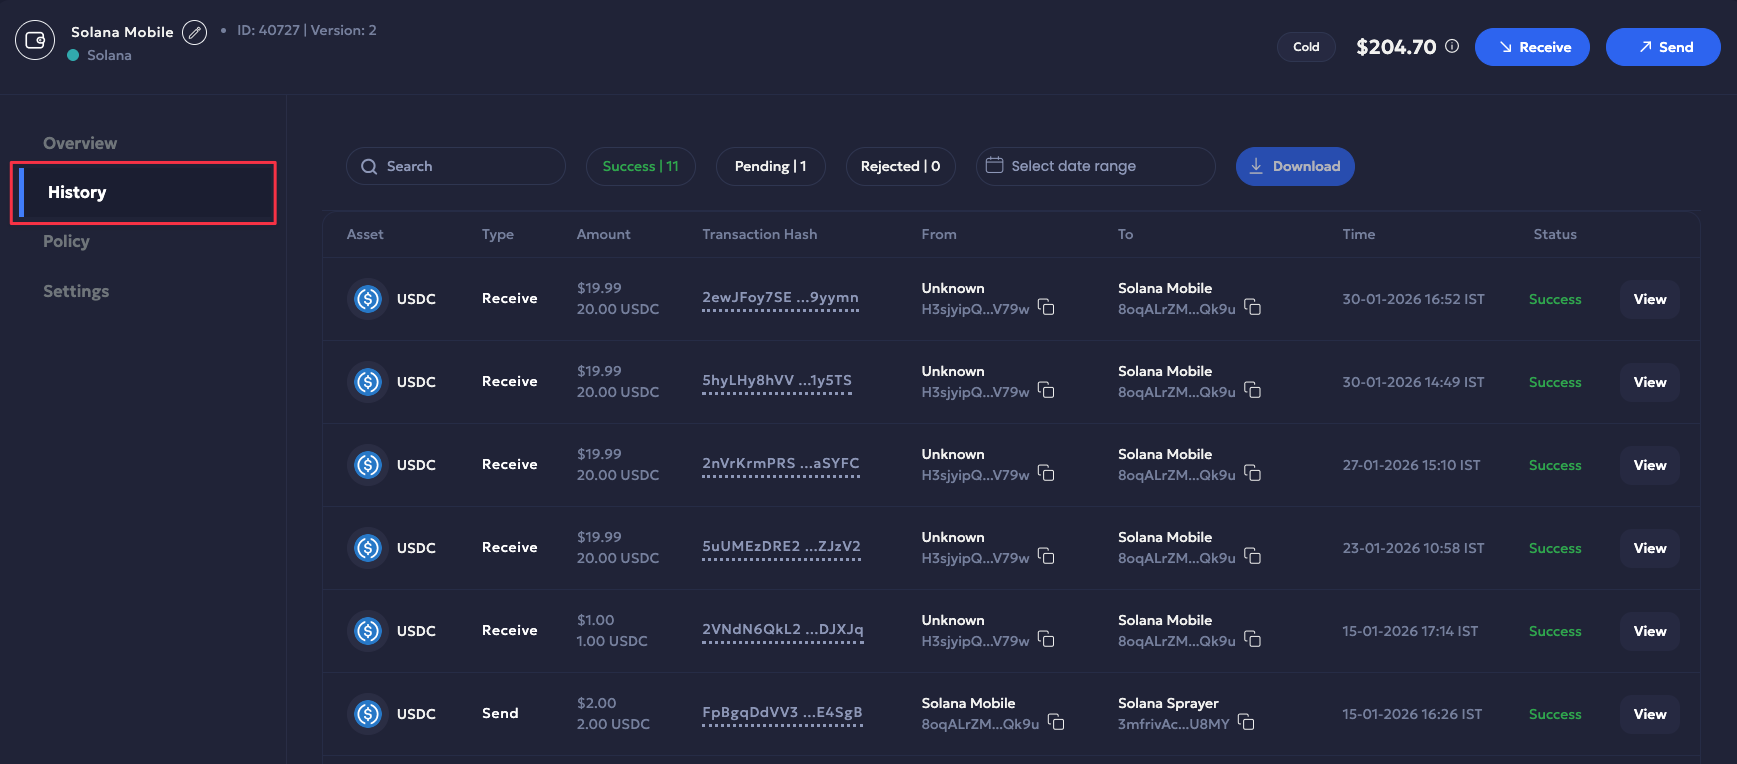
Navigate to History to explore the wallet’s end-to-end history.
- Search transactions using the search bar.
- Filter transactions using Success, Pending, and Rejected.
- Download the transaction history CSV using the date range filter.
- Explore transaction entries and timeline using the Transaction Side Panel.
Refer to the Transactions History page to learn more.
Policy
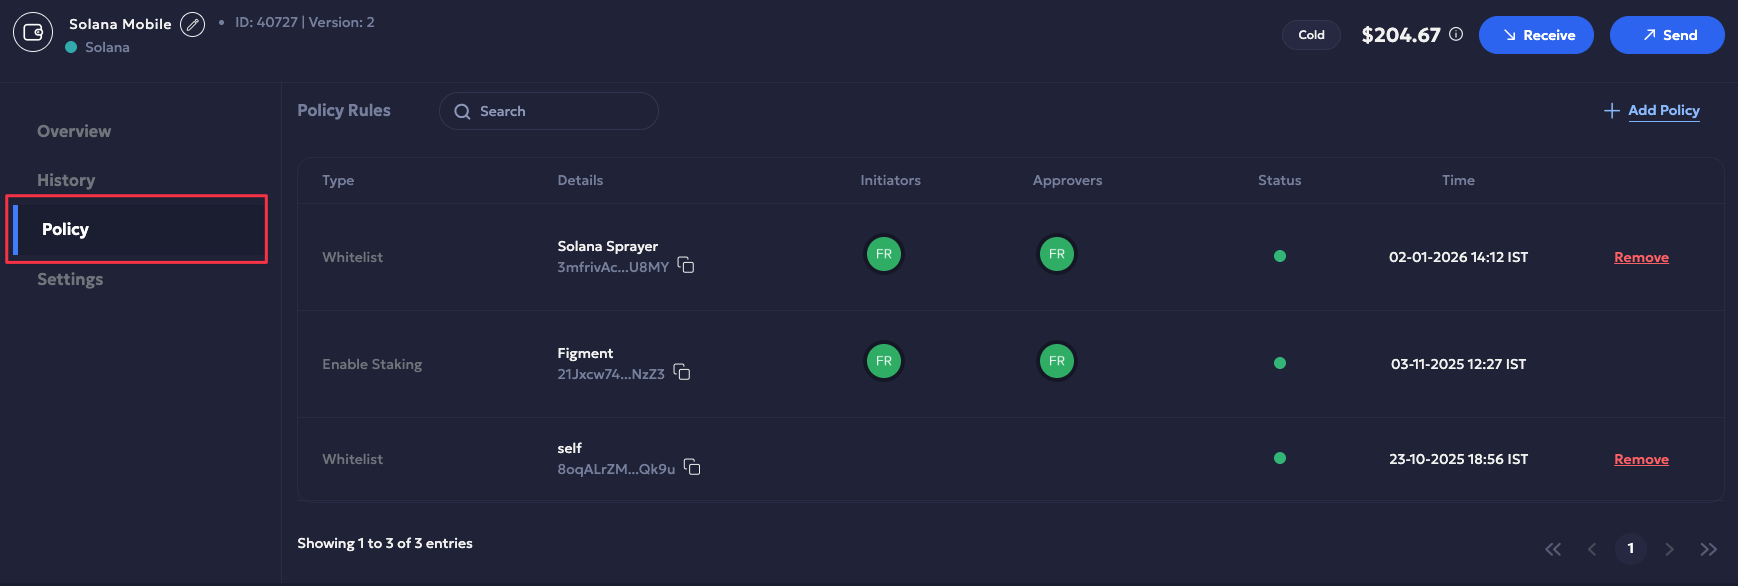
The Policy tab lists the transaction policy rules associated with the respective wallet, including:
- Whitelist Address,
- Spending Limit, and
- Transaction Limit.
Transaction policies are applied to the wallet when initiating a transaction. Refer to manage transaction policies to learn more.
The following metadata is listed:
| Label | Description |
|---|---|
| Type | Policy type. |
| Details | Wallet name and address. |
| Initiators | Initiators associated with the wallet. |
| Approvers | Approvers associated with the wallet. |
| Status | Policy status, including active and inactive. |
| Time | Date and time when the policy was added. |
You can perform the following actions:
- Add Policy: Click +Add Policy to add a policy for the wallet.
- Remove Policy: Click Remove to the right of the policy rule to remove it. Click Yes to confirm.
- Search Policy: Use the search bar to check for a policy.
Note
Policies added during Staking are also recorded for the wallet under Policy Rules.
Example: The Enable Staking policy is added to the wallet when the staking validator whitelists its address.
Settings
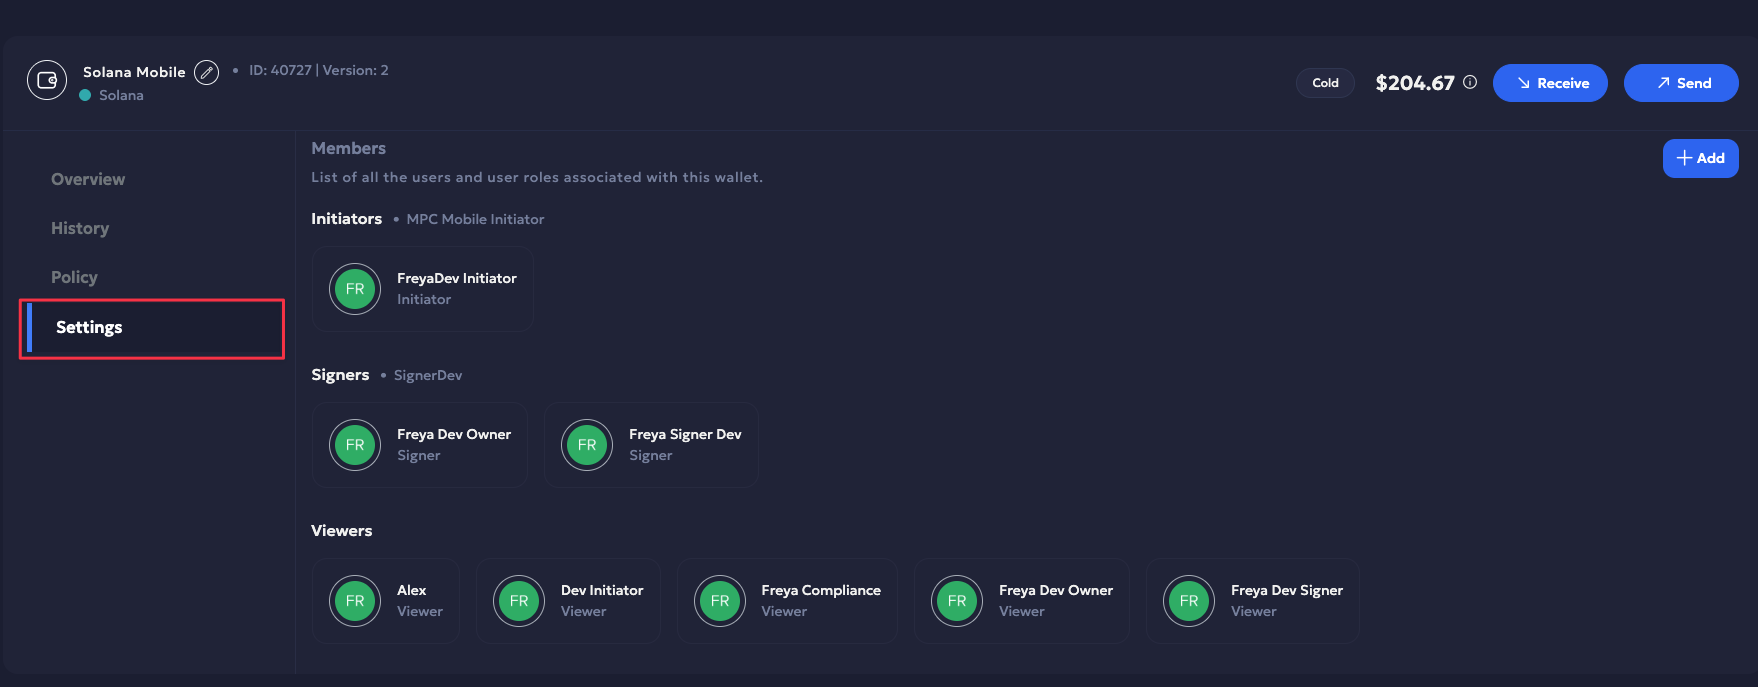
Manage wallet team role and access from the Settings page. Here you can:
- Add Team Member: Click +Add to add a team member as either Intiator, Signer, or Viewer.
- View Wallet Team Details: Every wallet will list the team name and its members.
Refer to this guide to learn more about wallet member roles and access.
Updated 3 months ago