Watch-Only Wallet
This guide provides an overview of the Watch-only wallet and how to use and manage it effectively.
A watch-only wallet (also known as a view-only) is a read-only wallet that only allows you to watch and monitor asset transactions of a wallet’s single address or a list of Externally Owned Addresses (EOA). Unlike deposit and withdrawal wallets, it does not store private keys and therefore cannot initiate or sign transactions.
Exchanges, asset managers, and institutions can import existing external deposit addresses into the Liminal Vaults Watch-Only wallet to safely track asset movements without risking unauthorised access to wallet balances.

What you can do with Watch-Only wallets:
- Create watch-only wallets using the Watch-Only Wallet API.
- Import addresses from existing wallets using the Import Address API.
- Receive webhook notifications for any transactions involving the addresses in your watch-only wallet. Additionally, periodic webhooks are supported for watch-only wallets.
- Archive/ unarchive your watch-only wallets.
- Use data APIs to fetch wallet balances, wallet lists, and addresses.
- Generate Reports, including Holding statements and Account statements for your watch-only wallets.
What you cannot do with watch-only wallets:
- Cannot consolidate funds: watch-only wallets do not have private keys to move assets.
- Cannot initiate fund transfers: you can only monitor and not send transactions.
Create, Import, and Manage Watch-Only Wallets
The watch-only wallet only “watches” blockchain activity, i.e., wallet balances, deposits, and withdrawals, and relays the transaction information on Liminal Vaults' web.
It enables exchanges to bring their existing deposit wallets into Liminal without giving up private keys. It operates using the Liminal Express SDK and APIs, allowing users to add their existing deposit wallets to Liminal Vaults wallets. The imported addresses are updated in Liminal Vaults as watch-only.
You can monitor transactions using webhooks and support data APIs for balances and history. This provides full visibility and seamless migration while maintaining custody and secure authorisation to monitor deposit wallets.
Supported data APIs
Use the following APIs to perform watch-only wallet actions:
- Create Watch-Only Wallet API: to create a new Watch-Only wallet.
- Import Address API: Import public addresses of existing deposit wallets.
- Data APIs (wallet balance and history):
- Get wallet balance: check wallet balance.
- Wallet list: retrieve a list of wallets.
- Wallet data: access wallet-specific information.
- Get address balance: check the individual address balance.
- Get transfer list: retrieve transaction history by status.
- Get transfer details: view transaction specifics.
Steps to create a Watch-Only Wallet
You can use the /create-watch-only-wallet endpoint to create one wallet per API call. You can import addresses into your wallet and manage them on your Liminal Vaults web account.
Prerequisites
- You have an account within your organisation in Liminal Vaults. Check out the Onboarding guide to onboard your organisation.
- You are an Owner or Admin user. Check User Roles to learn about Liminal Vaults user roles.
- Ensure you have the latest Liminal Express version with the latest Liminal SDK Docker image updated.
- You have a Liminal Vaults wallet. Connect with the Liminal Support for assistance.
Step 1: Create a Watch-Only Wallet
Refer to the Create Watch-Only Wallet API reference guide to create a Watch-Only wallet.
The required parameter is mainWalletAddress.
Step 2: Import Wallet Address
Refer to the Import Addresses API reference guide to import addresses into your Liminal Vaults account.
Step 3: Receive webhook notifications
You will be notified whenever transactions are received into (incoming) or moved out (outgoing) of the address in your Watch-Only wallet.
Use the following webhook endpoints:
- Receive Transactions: Set up Successful and Periodic webhooks (for ETH and BTC).
- Send Transactions: Set up Successful webhooks to stay updated on outgoing transaction movements.
Step 4: Wallet Profile
Once you have created your Watch-Only wallet and imported deposit addresses successfully, you can check its profile on your Liminal Vaults account.
Follow the steps below:
- Log in to your Liminal Vaults account.
- Navigate to Wallets to visit the wallet dashboard.
- Select the Static filter or enter “watch-only” in the search bar to filter all Watch-Only wallets on your dashboard.
- Select the required Watch-Only wallet to check its details.
Wallet Details dashboard
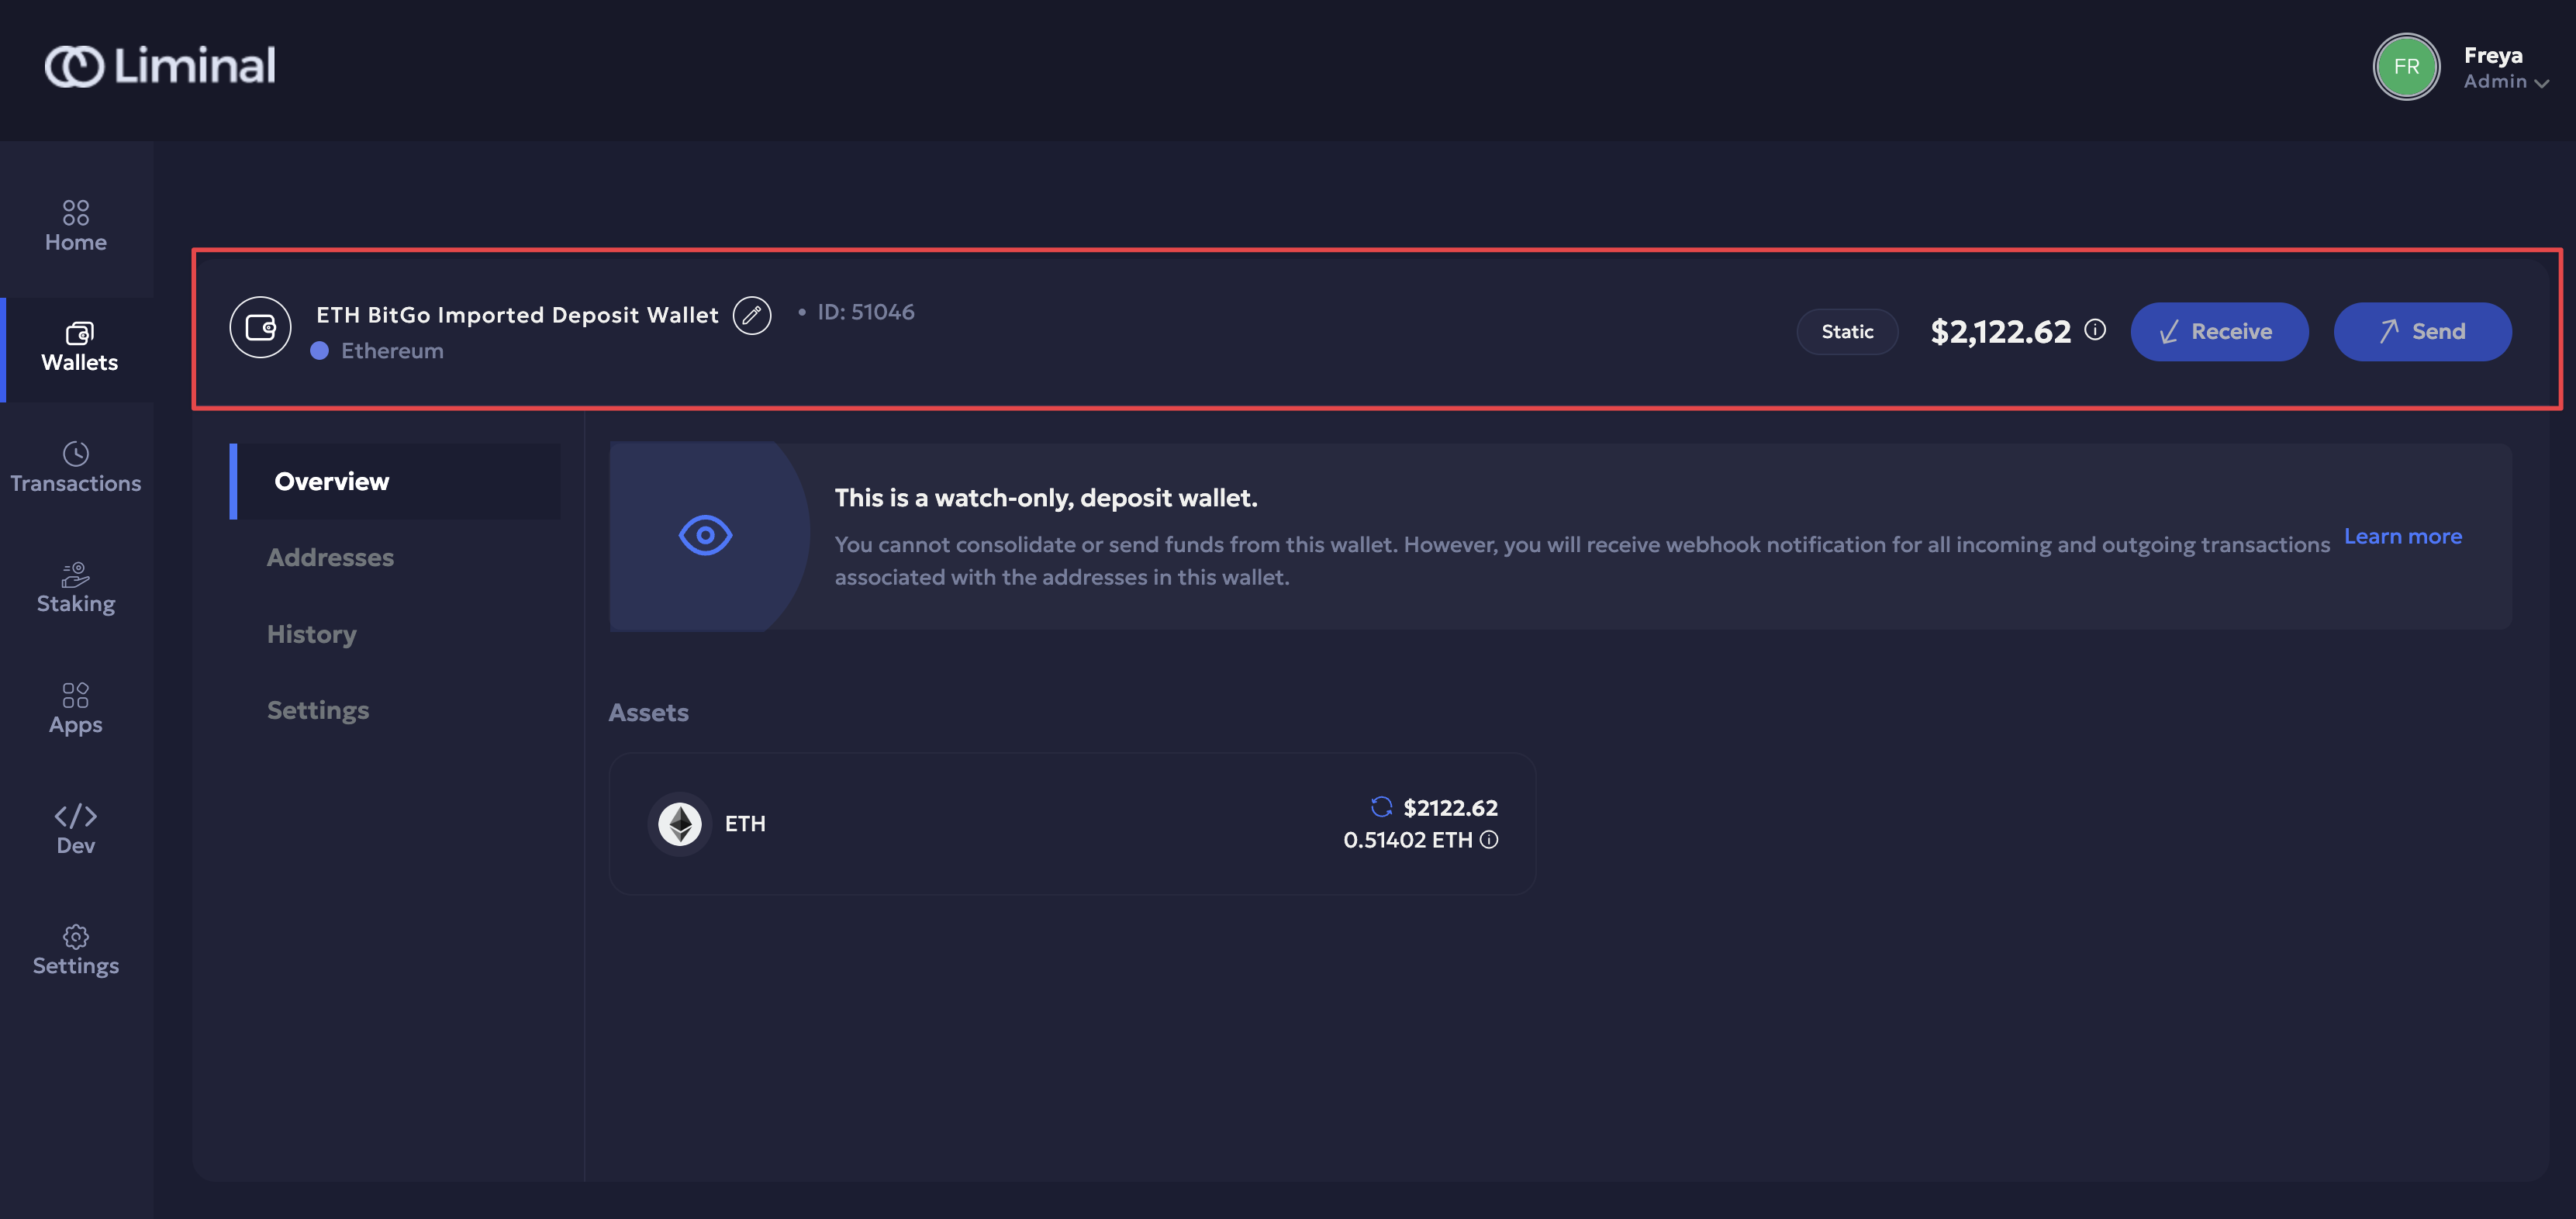
The Watch-Only wallet is displayed on the default Overview page. You can find the following details in its header:
- The deposit wallet name, token type, and token ID.
- The Static wallet filter is to the right.
- Total wallet balance in USD. Hover the Info icon to view the balance details.
- Disabled Receive and Send buttons since watch-only wallets only allow you to monitor deposit wallet addresses.
Overview
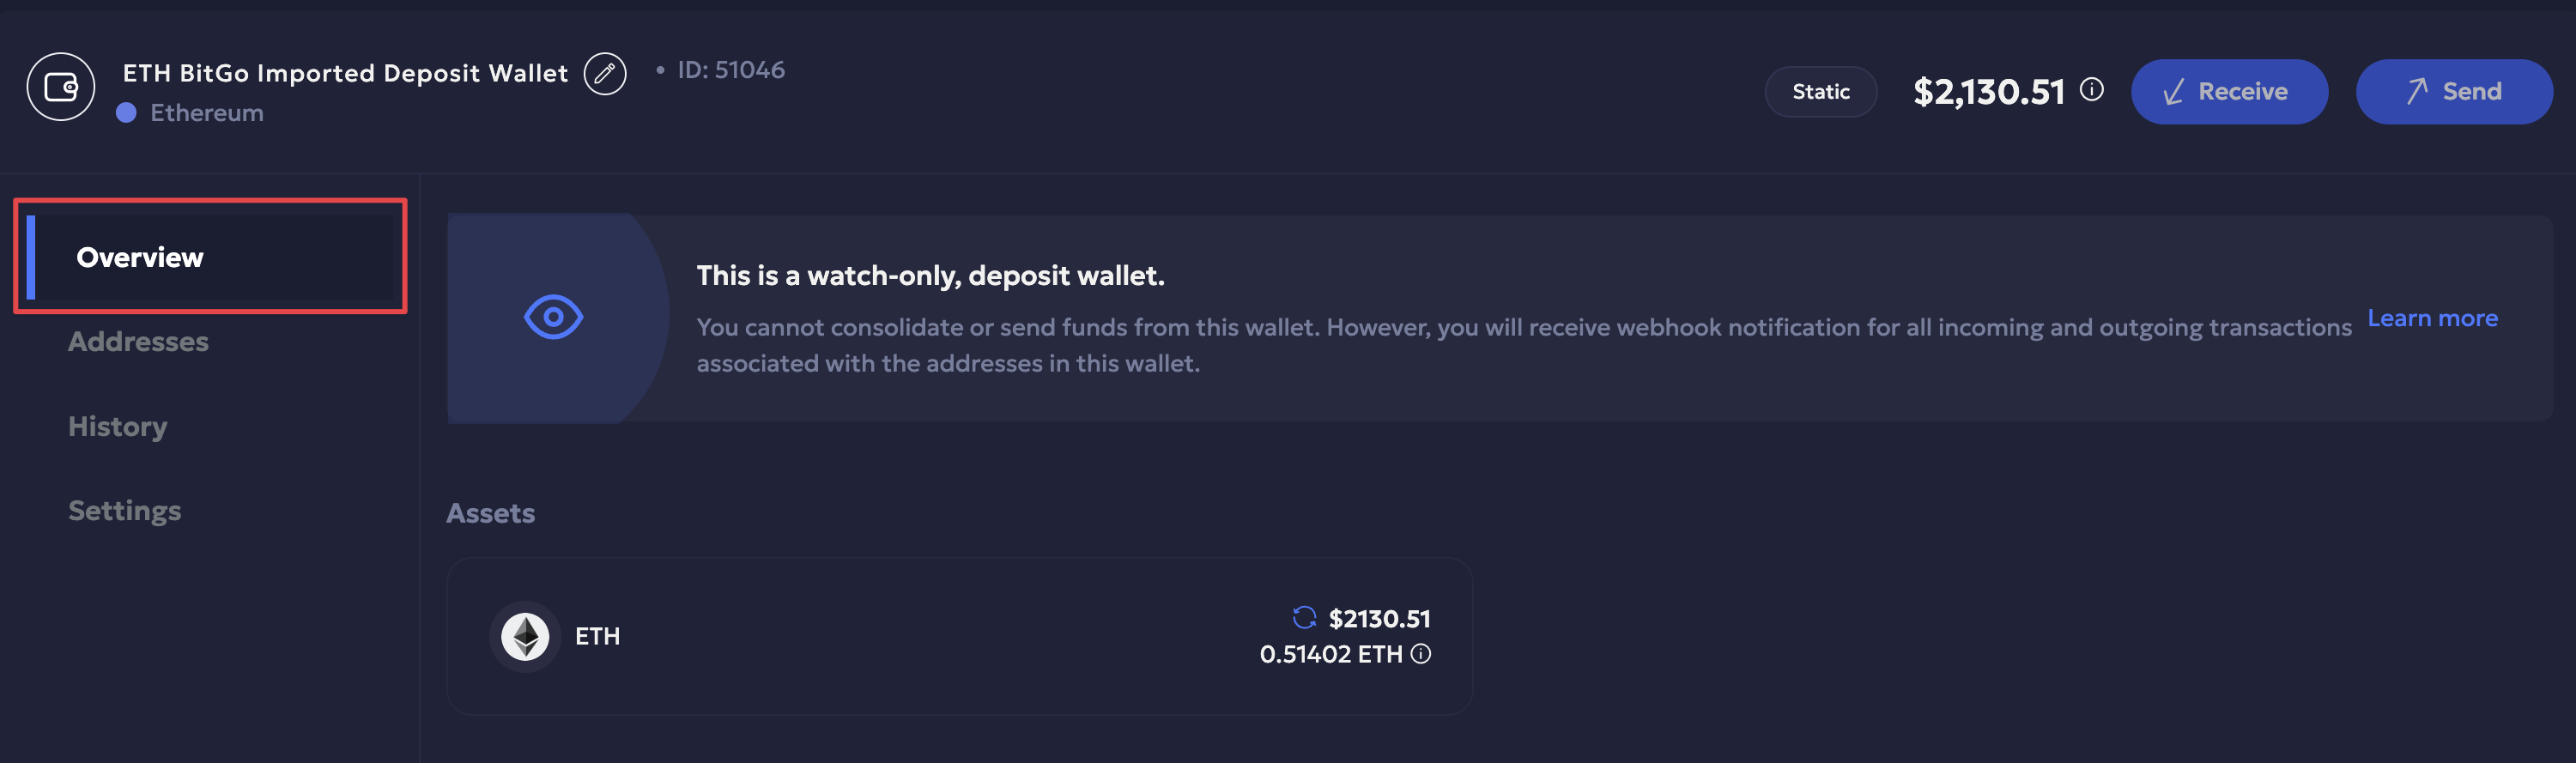
You can check all the assets in your Watch-Only wallet:
- Total asset value in (USD) and transaction amount (token amount + symbol)
- Last synced timestamp.
- Perform manual sync to update the asset balance if required. Check out the guide [link] to learn how manual sync works.
Addresses
You can monitor deposit addresses and their balances without private key access via the Addresses page. You can view them in two main data tabs, along with a search tab, once deposit addresses are imported.
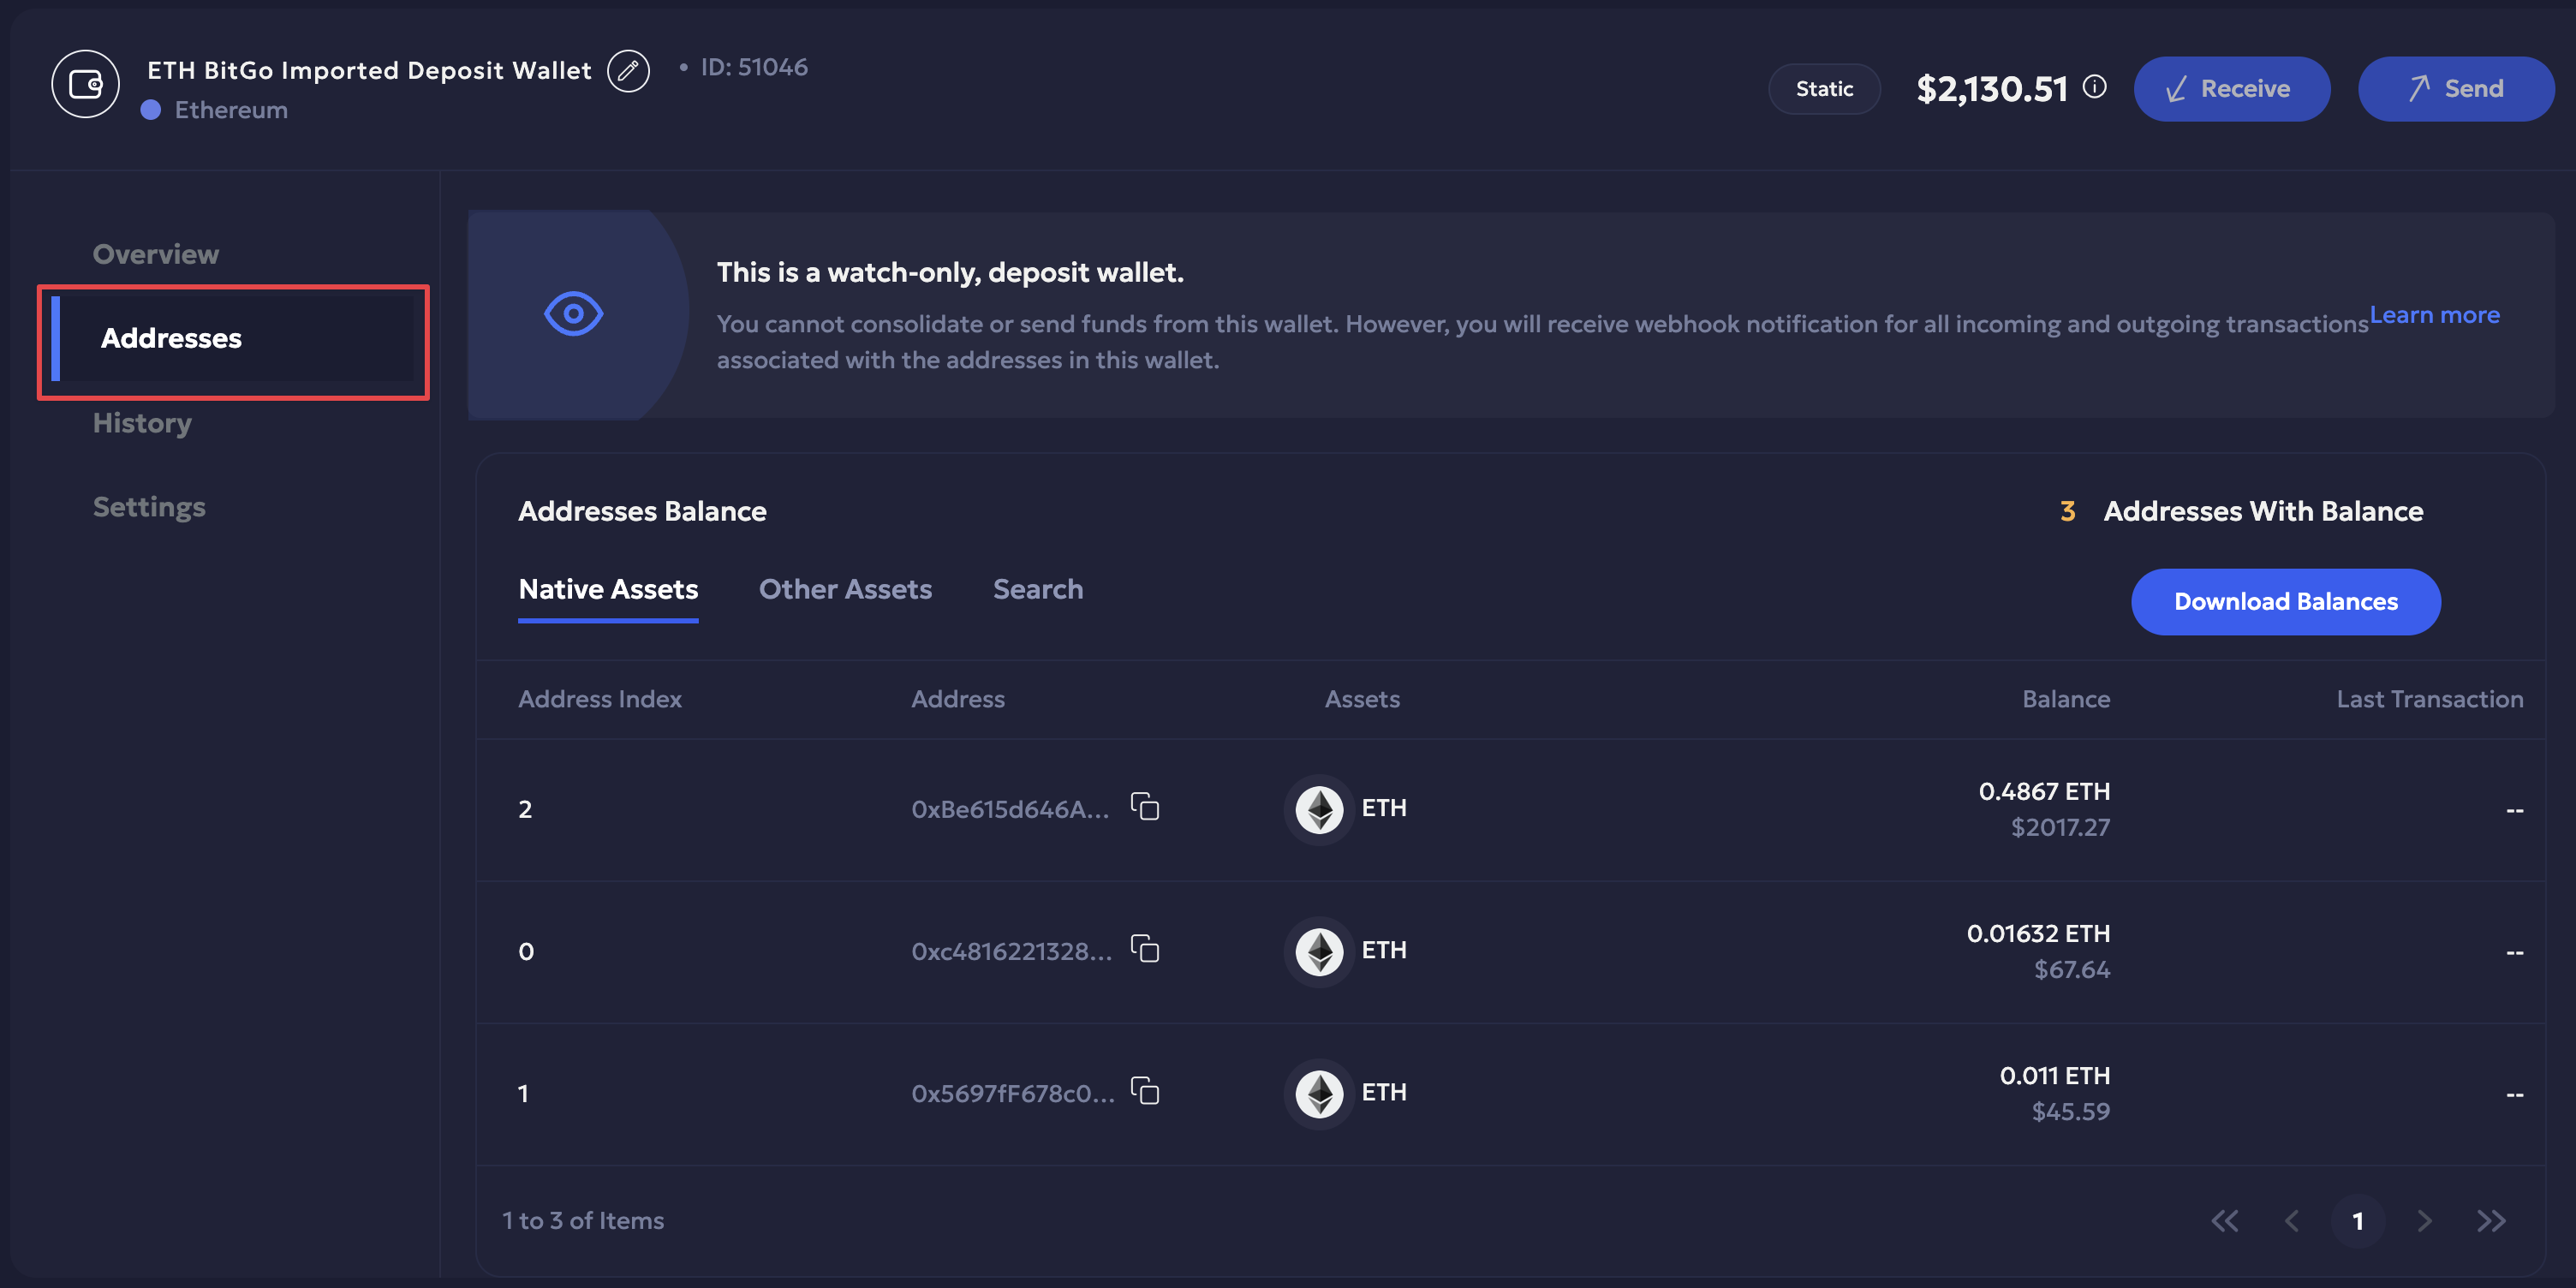
Address Fields Table
| Field | Type | Description |
|---|---|---|
| Address Index | Integer | A sequential index assigned to the imported address. |
| Address | String | Blockchain address of the wallet. |
| Asset | String | Name or symbol of the asset held at the address (e.g., ETH, USDC). |
| Balance | String | Current balance of the asset at this address. |
| Last Transactions | String / Link | Summary or link to recent transactions for this address. |
The following tabs help you monitor address balances:
- Native Assets
- Shows native blockchain assets (e.g., ETH, BTC) for your imported addresses.
- Each row displays the fields listed above.
- You can download balances as a CSV to export metadata for offline analysis.
- Other Assets
- Shows non-native or token assets (e.g., ERC-20 tokens like USDC)
- The table fields are the same as Native Assets, but the data reflects token holdings instead
- CSV export is also available for this tab.
- Search
- Allows you to search across all imported addresses.
- You can search by Address, Asset, or Balance to quickly locate specific entries.
Note
- There is a maximum import limit of 10,000 addresses per Watch-Only wallet.
- Each imported address is validated via the Address Verification API.
History
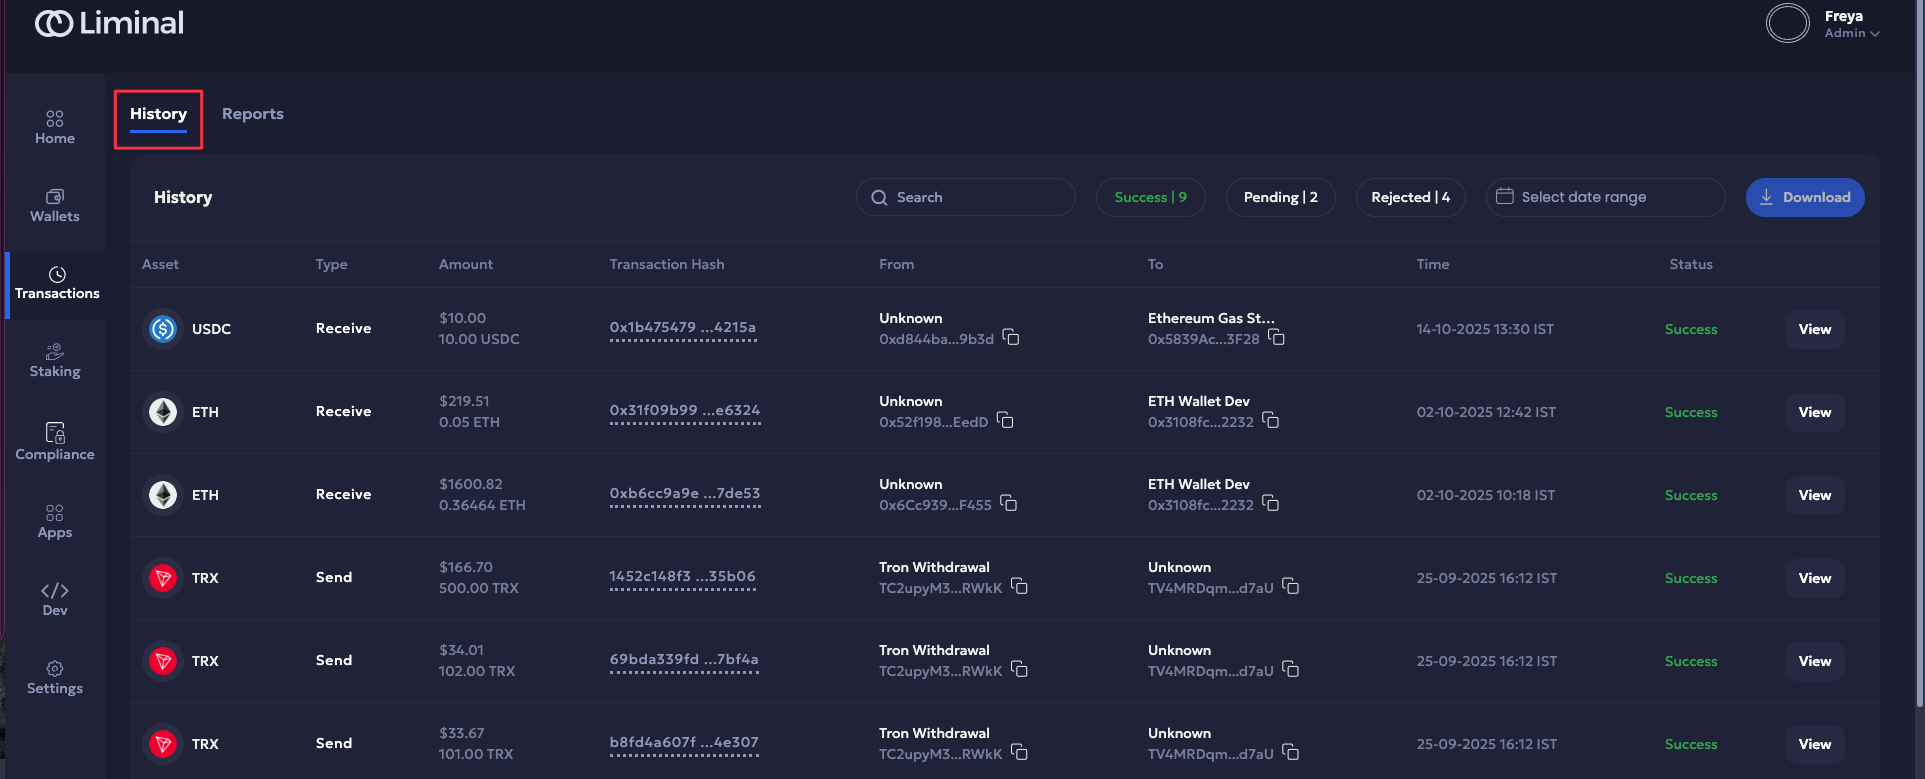
You can view the transaction history record of the Watch-Only wallet. You can also:
- Filter transaction history by its status.
- Search transaction.
- Download the transaction history report for a selected range in CSV format.
Check out Transactions to view and manage the transaction history of your entire wallet infrastructure.
The following metadata are provided:
| Field | Type | Description |
|---|---|---|
| Asset | String | Name or symbol of the asset (e.g., ETH, USDC). |
| Type | String | Transaction type (e.g., Deposit, Withdrawal). |
| Amount | String | Amount of the asset transferred in the transaction. |
| Transaction Hash | String | Unique blockchain transaction hash for reference. |
| From | String | Sender address of the transaction. |
| To | String | Recipient address of the transaction. |
| Time | String / DateTime | Timestamp of the transaction. |
| Status | String | Current status of the transaction (e.g., Confirmed, Pending). |
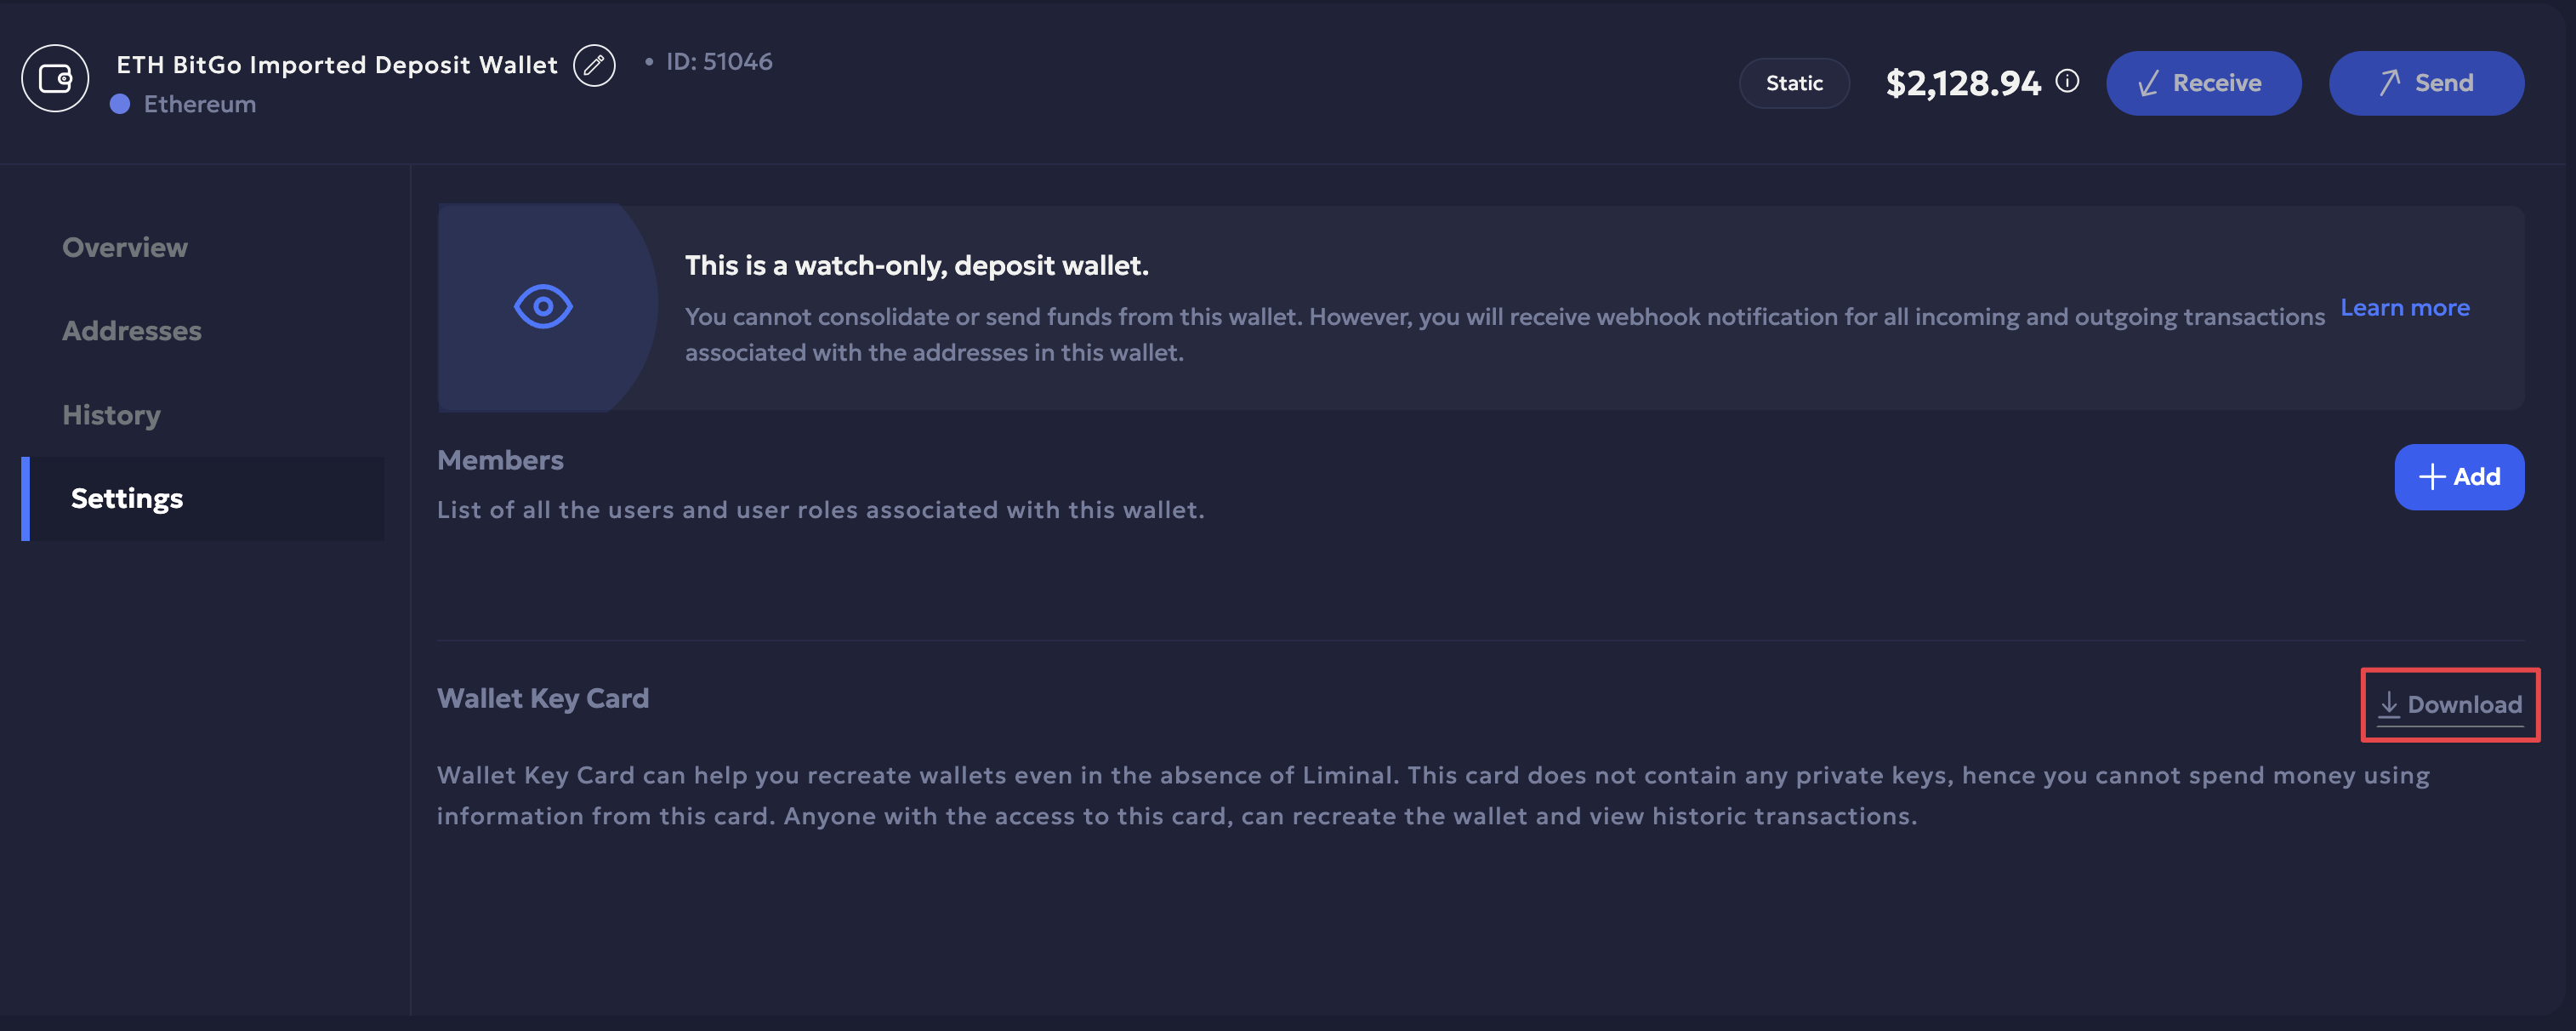
Settings
You can manage viewers and wallet recovery from the Settings page.
-
Members: All selected users are added as Viewers here.
-
Click Add to add a user to your Watch-Only deposit wallet as a viewer.
-
Select the required member(s) from the dropdown. Click Add Member.
-
Click Done once the member is successfully added as a viewer. The user list is updated accordingly.
-
-
Wallet Key Card: The wallet key card acts as a recovery method for Watch-Only wallets. It helps you recreate the wallet anywhere and does not contain any private keys.
Click Download to download the wallet key card in PDF format and view its details.
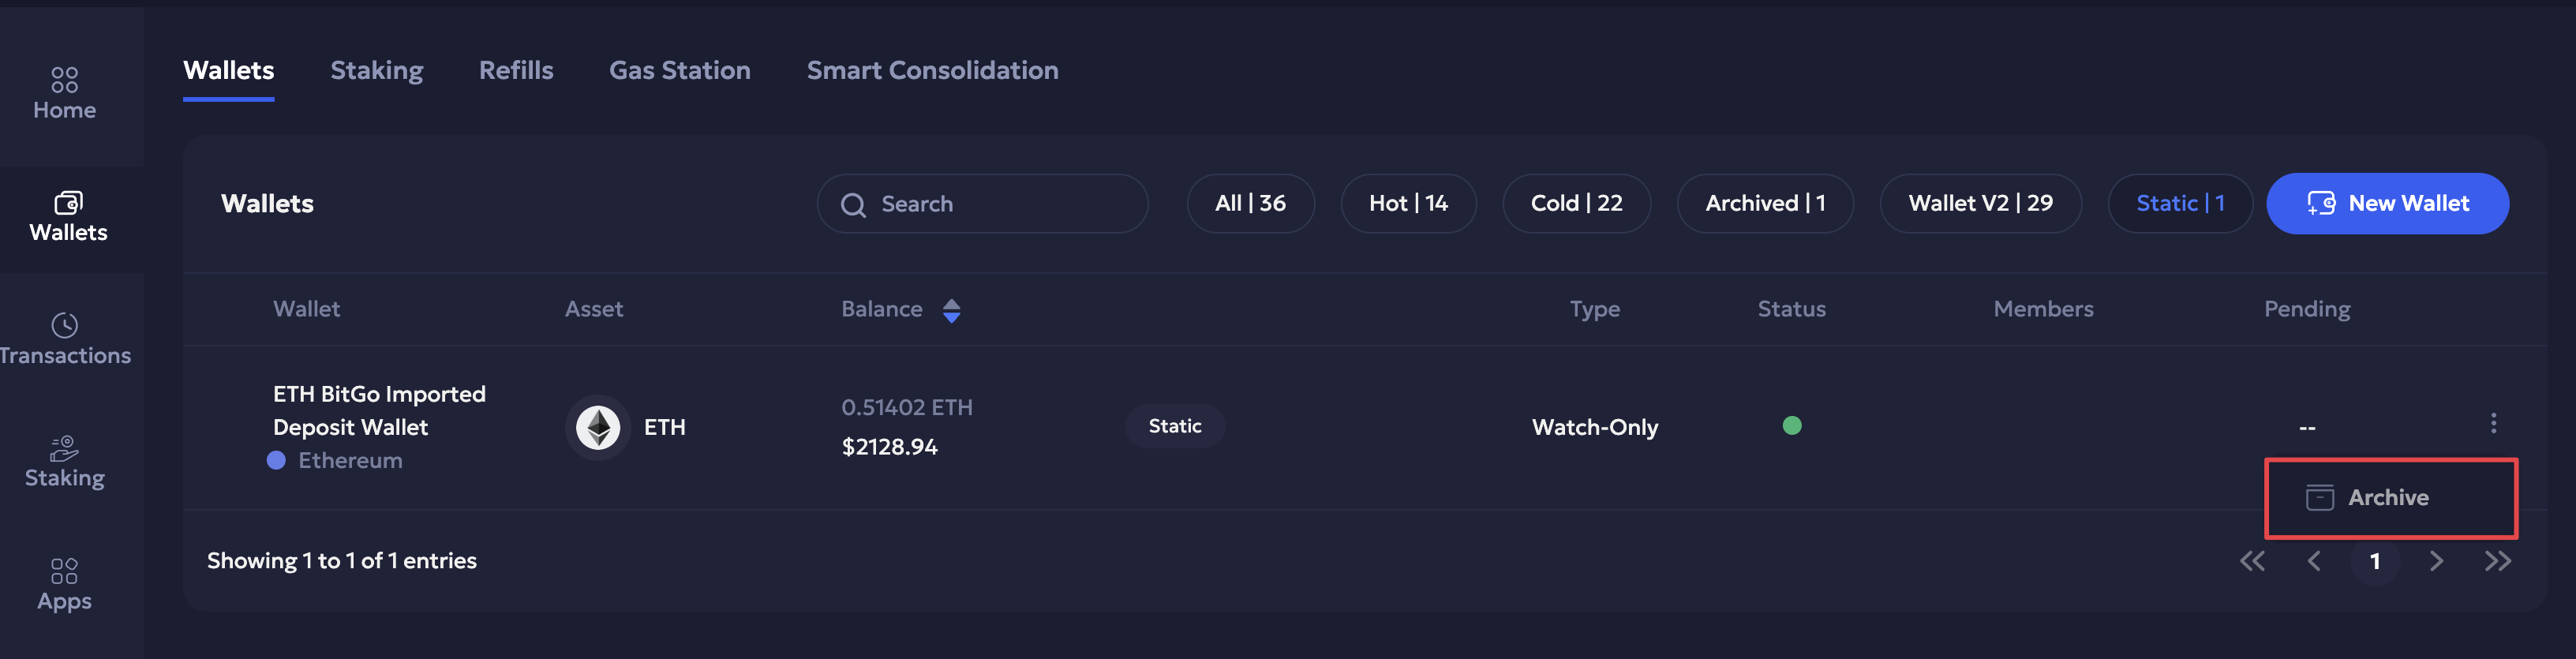
Archive/ Unarchive a Watch-Only wallet
Only Owners can archive and unarchive a wallet. Archiving a wallet hides it from the dashboard.
Follow the steps to archive a wallet on your dashboard:
- Navigate to the Wallets dashboard.
- Filter Watch-Only wallet by selecting the Static filter.
- Click the three-dot Actions icon to the right of the required Watch-Only wallet.
- Click Archive to archive the wallet. Click Archive again to confirm the action.
You will receive a confirmation message once the wallet is archived.
The archived wallet is filtered and moved to the Archived section. Click the Archived filter button on the Wallets dashboard to navigate to the list of archived wallets.
Follow the steps below to unarchive a wallet:
- Navigate to the Wallets dashboard to check the list of archived wallets.
- Select the Archived filter to navigate to the archived wallets.
- Click the three-dot Actions icon to the right of the required wallet and click Unarchive.
- Confirm the action and continue.