
Whitelist a wallet address
For enhanced security, destination addresses must be whitelisted before initiating a transaction. Only a list of whitelisted addresses will be available in the destination address dropdown while creating transaction requests. As an owner or admin of your organisation, take the following steps to whitelist an address.
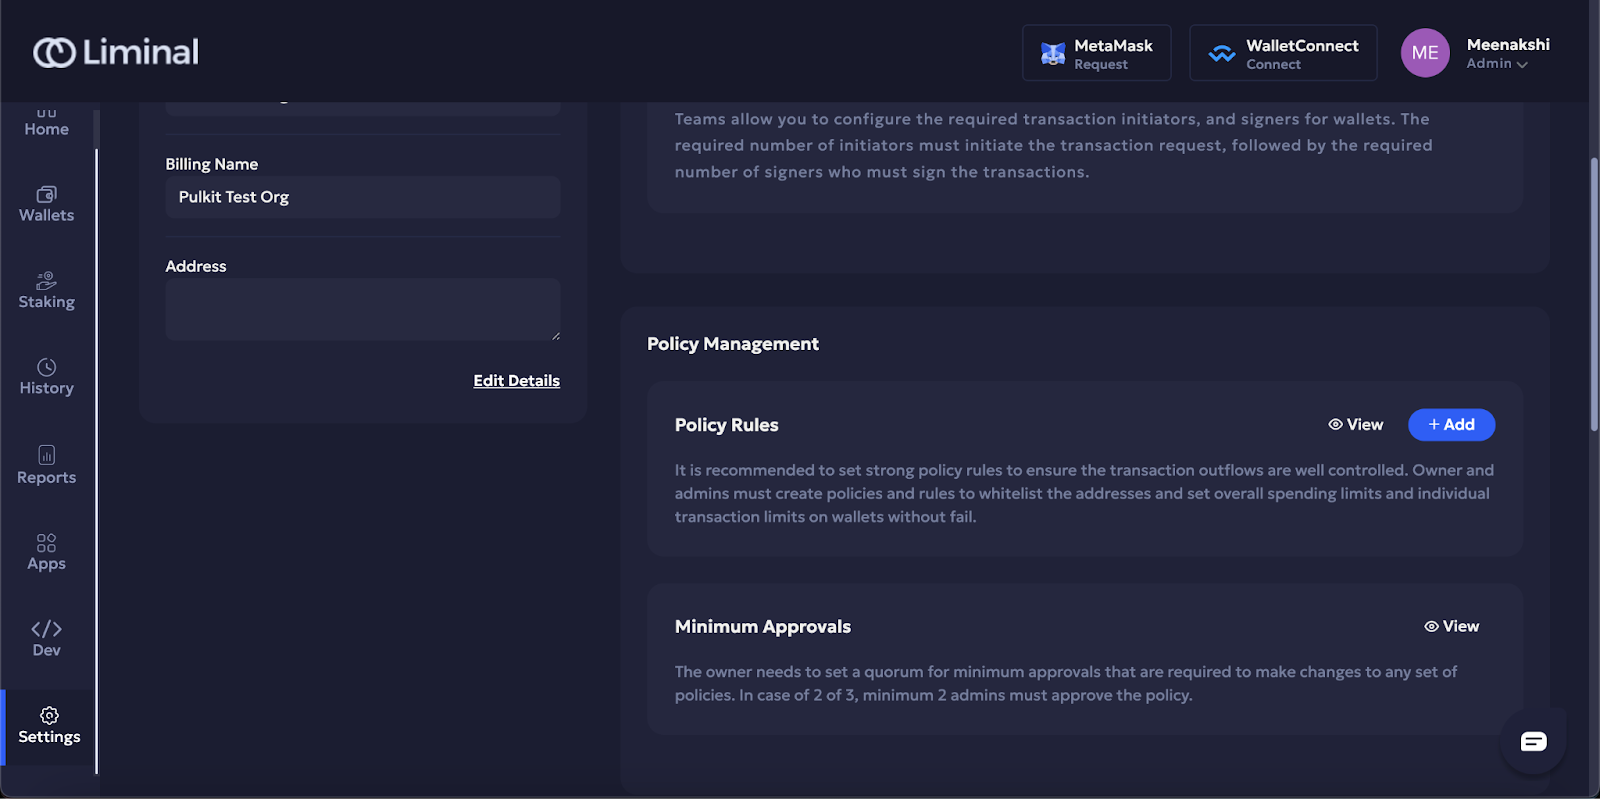
- Log into Vaults.
- Go to Settings > Policy Management > Policy Rules.
- Select +Add next to View, as shown in the following screenshot.
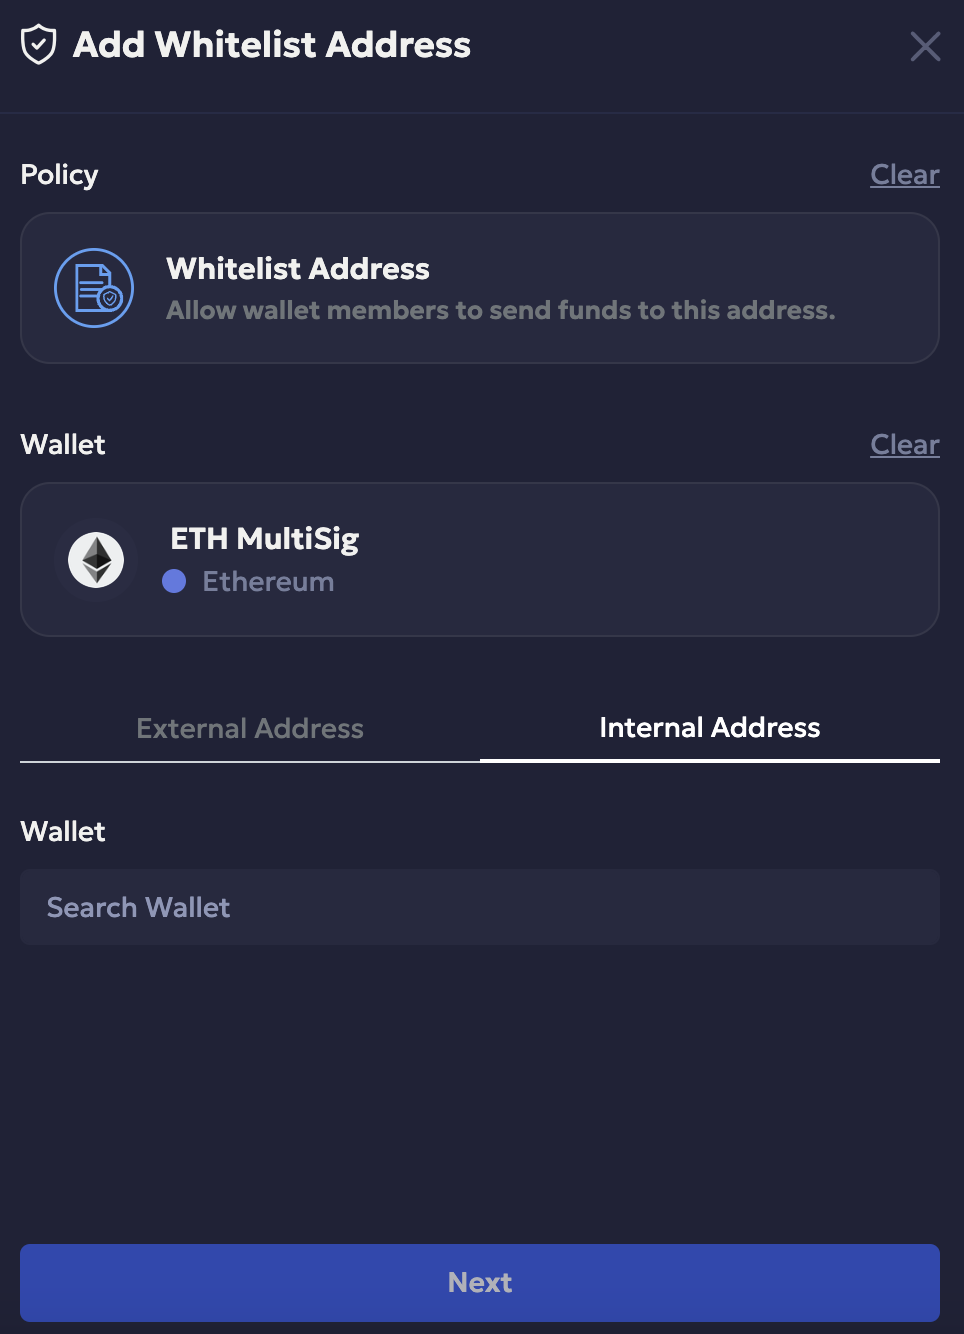
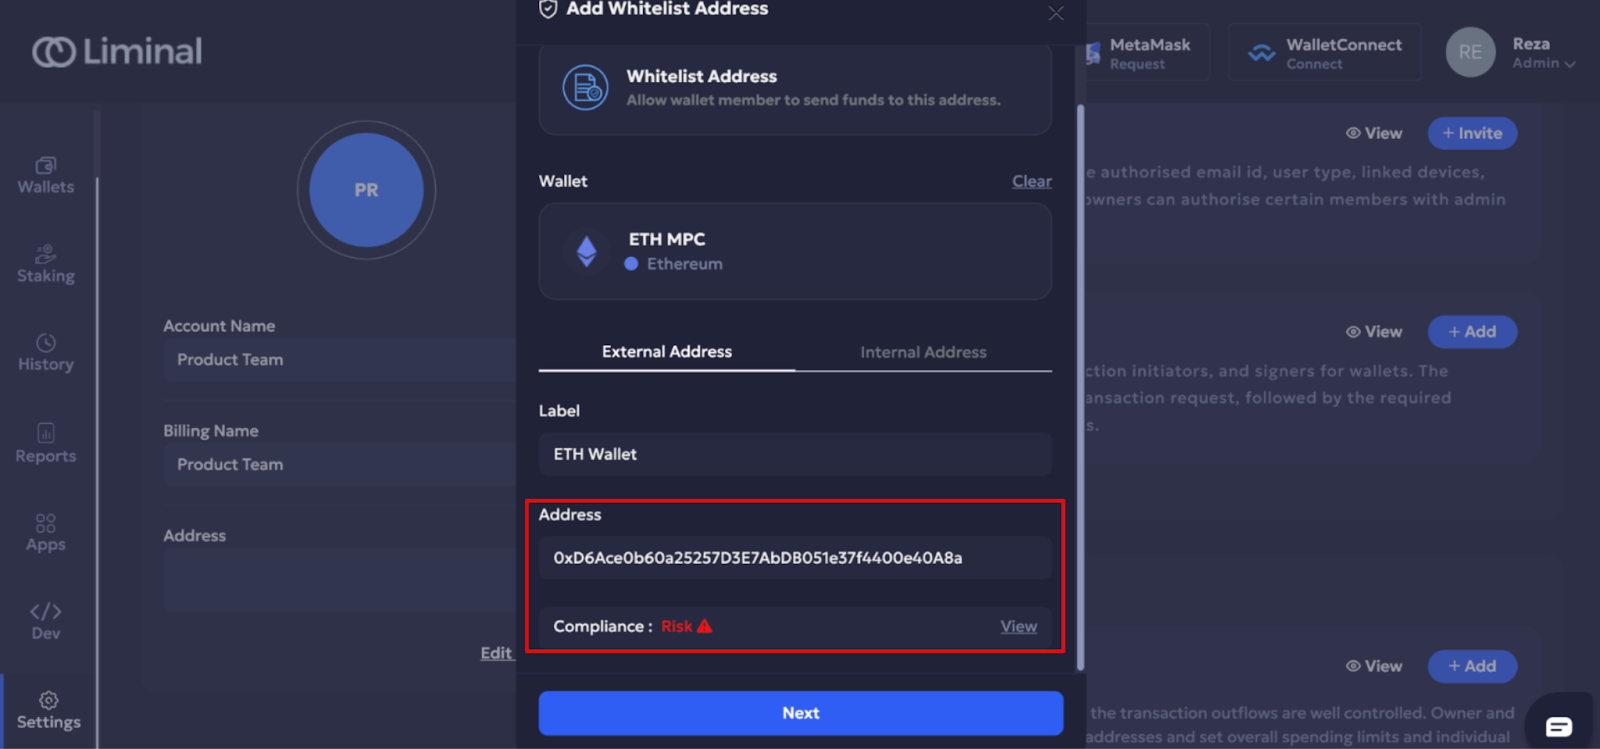
- In the Policy field, select Whitelist Address from the dropdown.
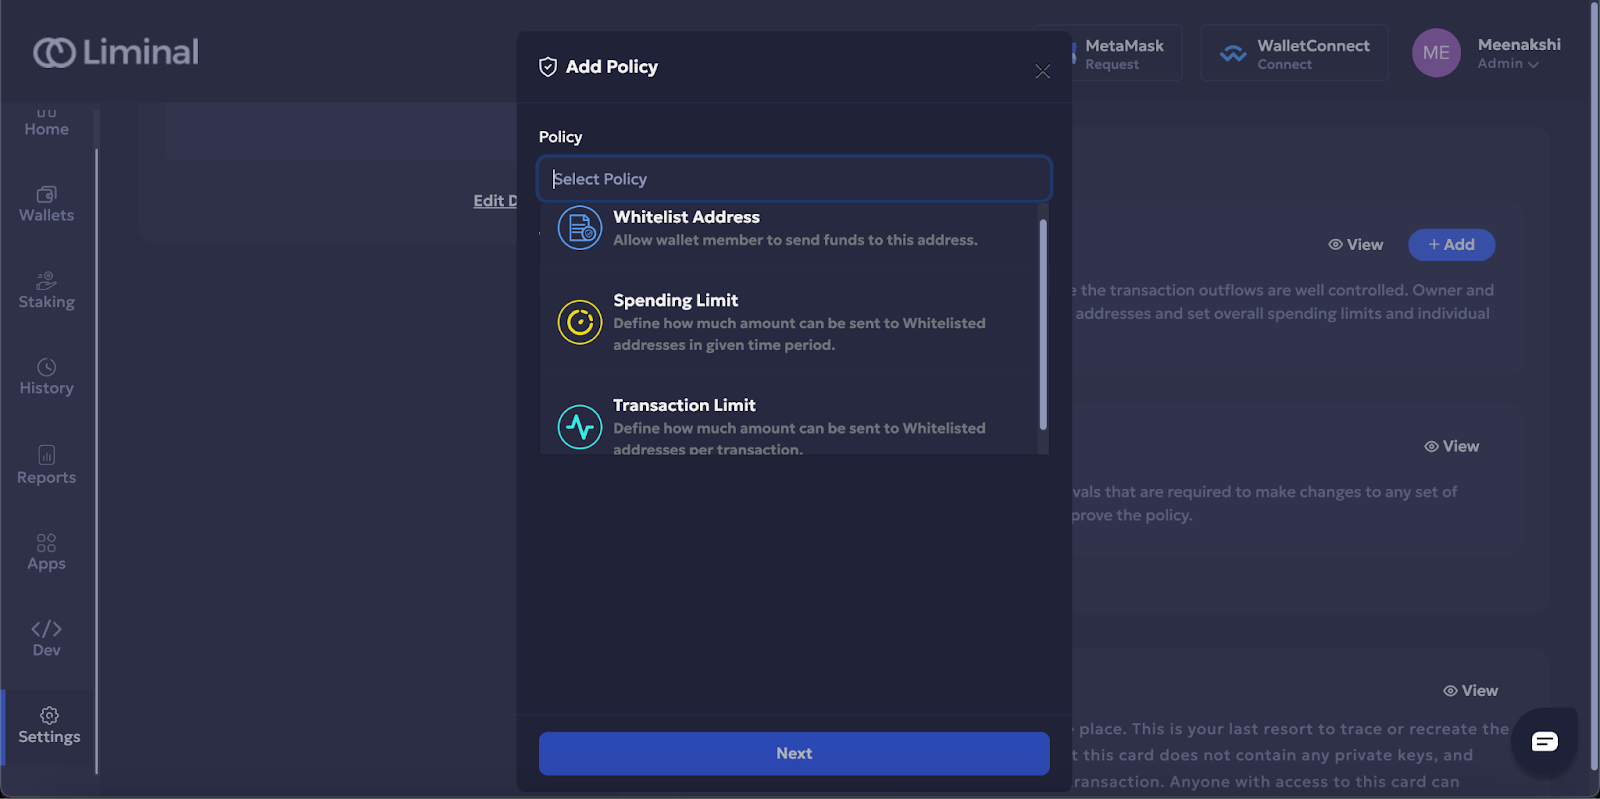
- In the Wallet field, select a wallet from the dropdown.
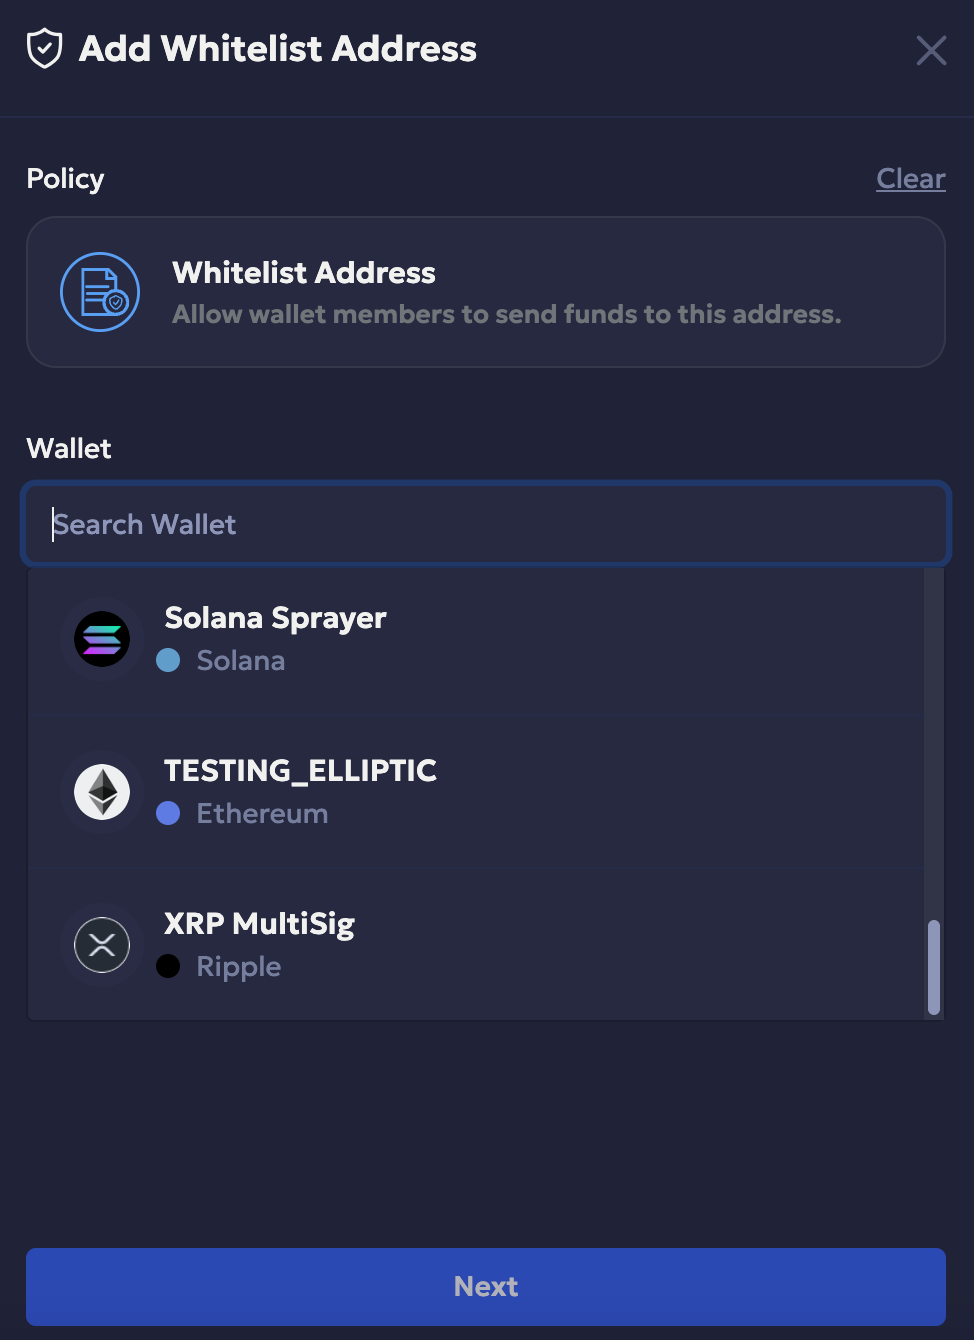
- Select whether the wallet is an External Address or Internal Address.
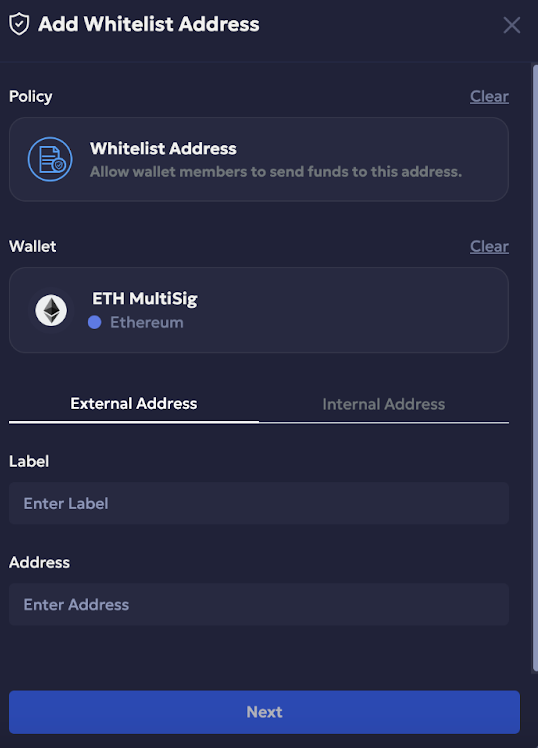
- If you selected External Address, provide a name in the Label field for the wallet's unique identification. Enter the wallet address in the Address field, as shown in the following screenshot.
- If you selected Internal Address, select a wallet from the available wallets in your organisation.
- Select Next to save the changes.
- Select Approve to approve your changes.
- Enter the code in the field you received in the Google Authenticator mobile app against the credentials with which you have signed into Vaults.
- Select Continue to authenticate yourself.
After whitelisting your wallet address, you can view the compliance risk of the address.
- Select View to view the risk score, as shown in the following screenshot.
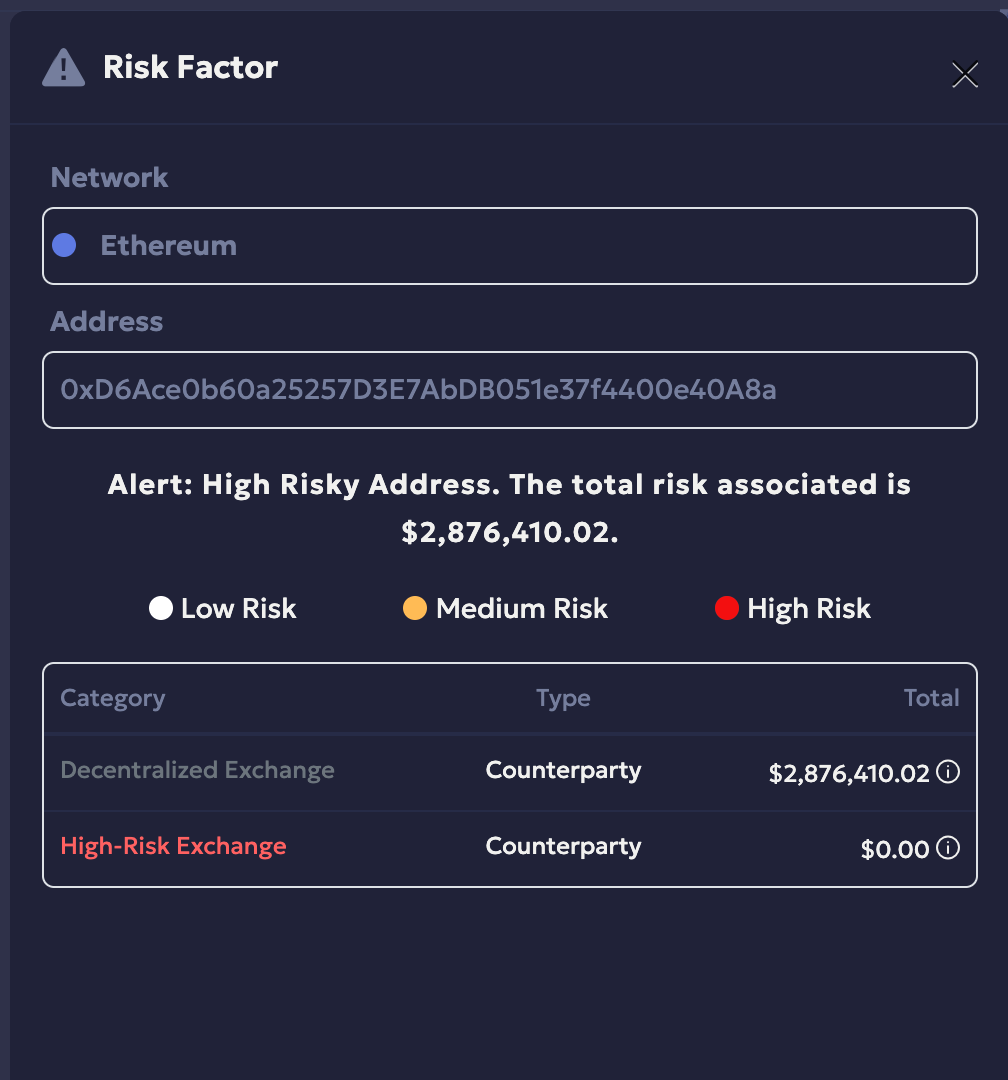
This risk factor only informs you about the associated risk with the address and does not prevent you from adding it. However, in Liminal Firewall, the outcome of the transaction—whether it is rejected, allowed, or requires approval—is determined by rules configured within the Transaction Risk policy. For more information, see Liminal Firewall.
Updated about 1 month ago