
Add Whitelist Address
For enhanced security, destination addresses must be whitelisted before initiating a transaction. In order to do so, you can set the whitelist address policy prior to initiating a transaction. The whitelisted address will appear as a part of the drop-down menu at the transaction request window. The following steps outline the key components of this process
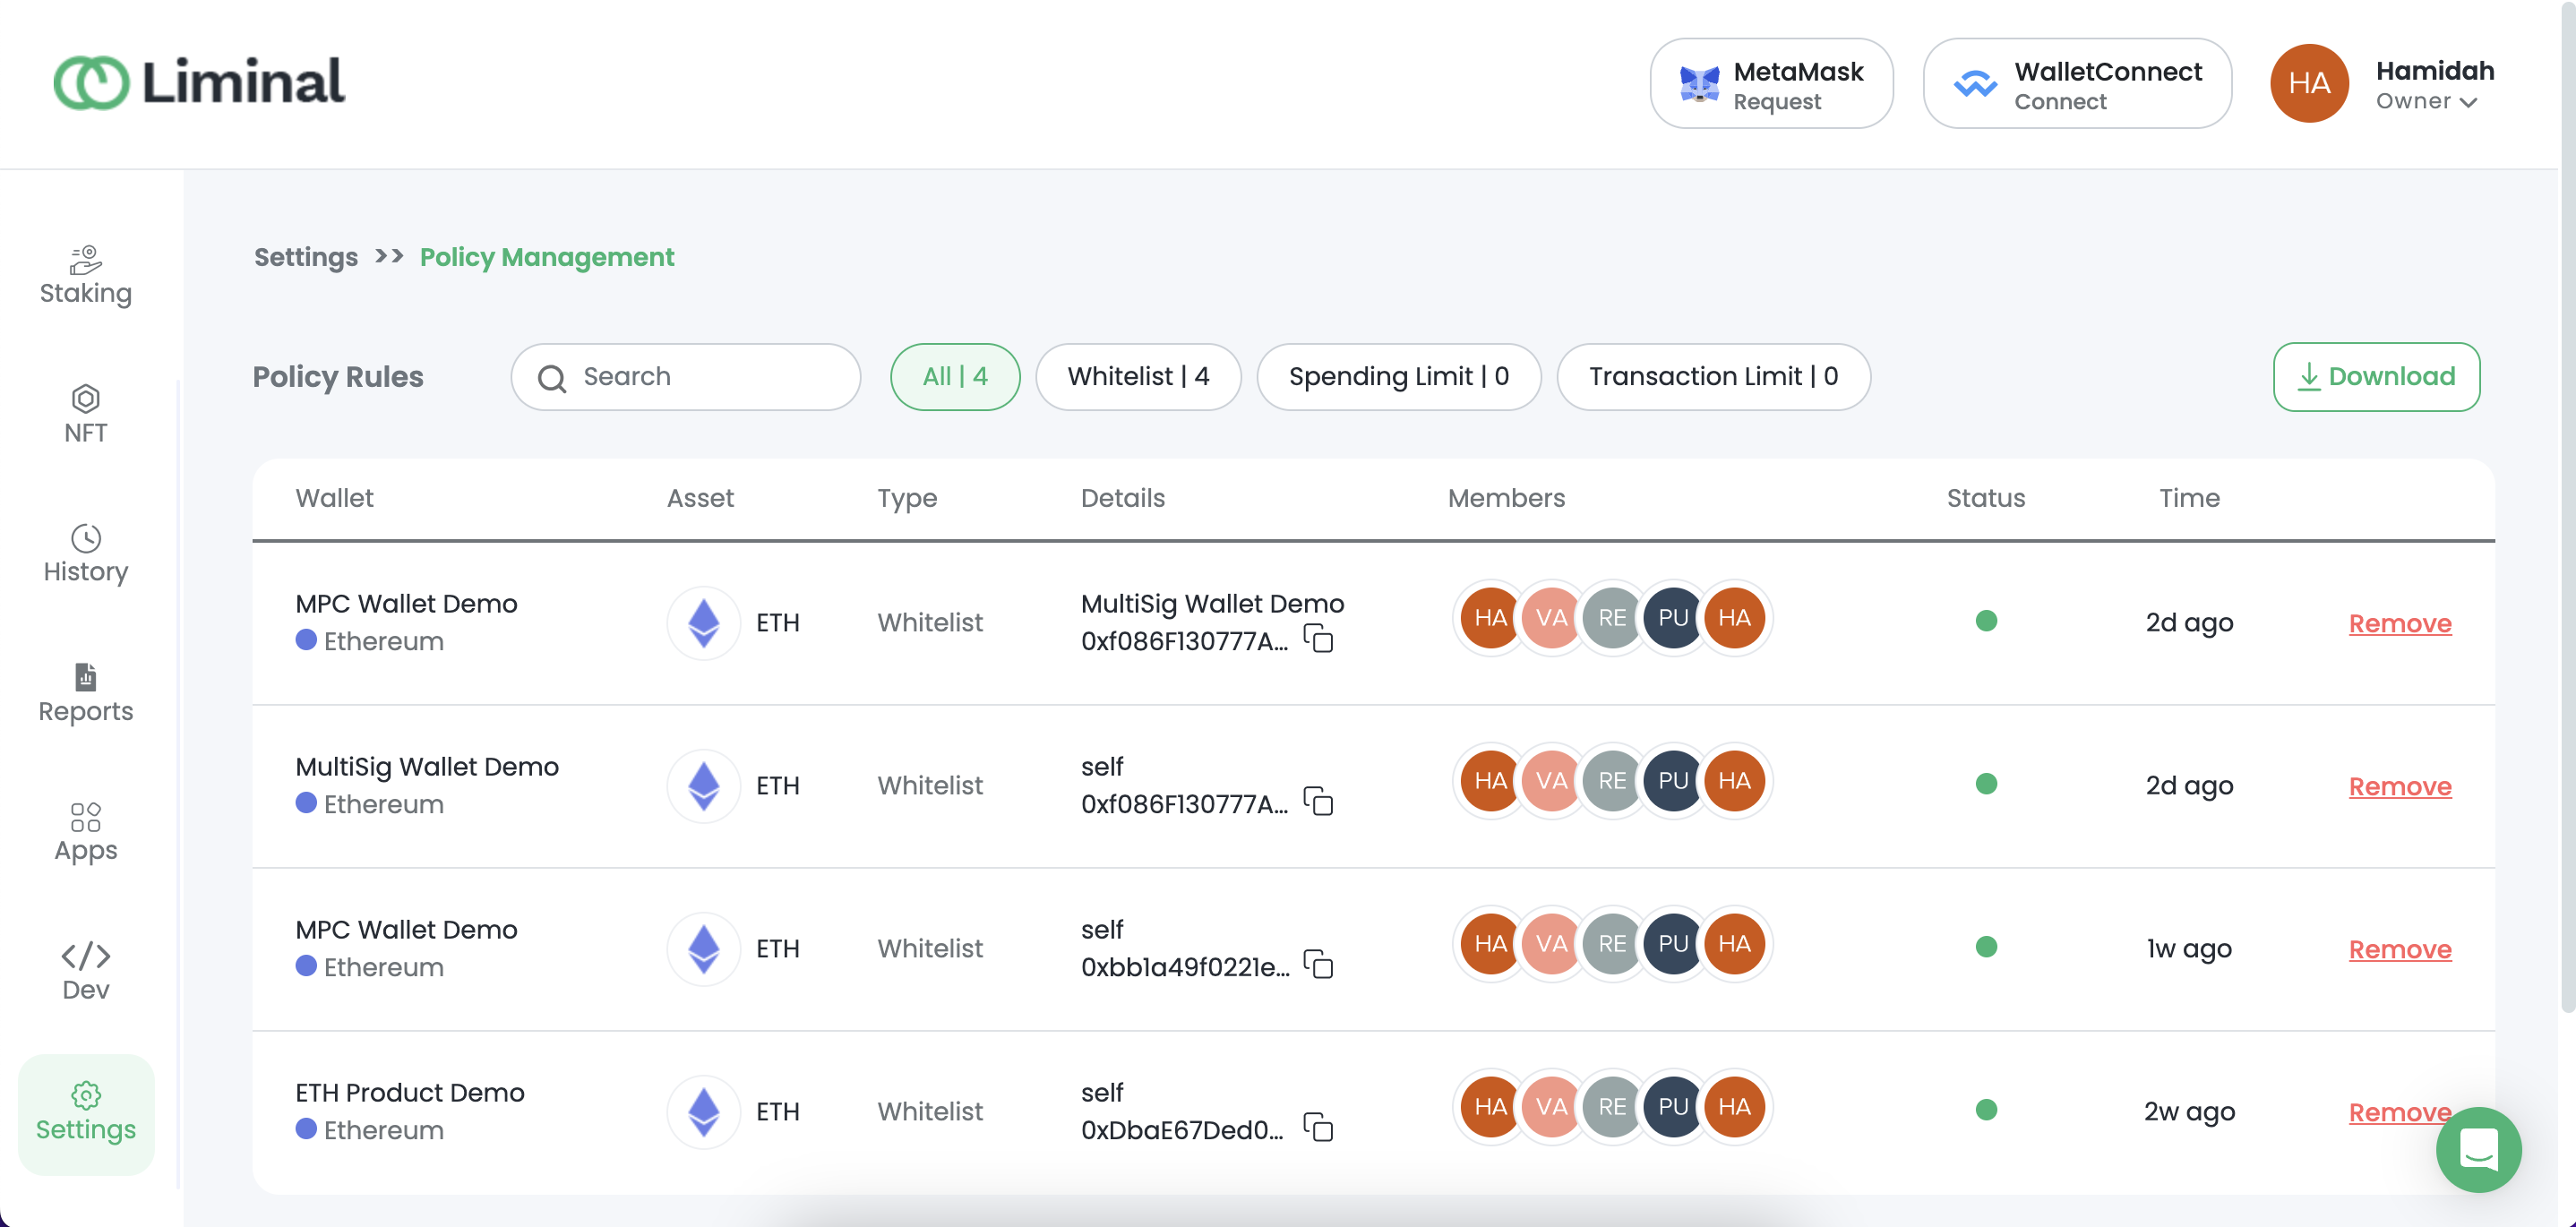
- Owner/Admin login to Liminal Vaults, then access the "Settings" menu on the sidebar and click on "Add" under Policy Management.
- Select "Whitelist Address" as the policy type and choose the desired "Wallet" of the transaction you wish to perform
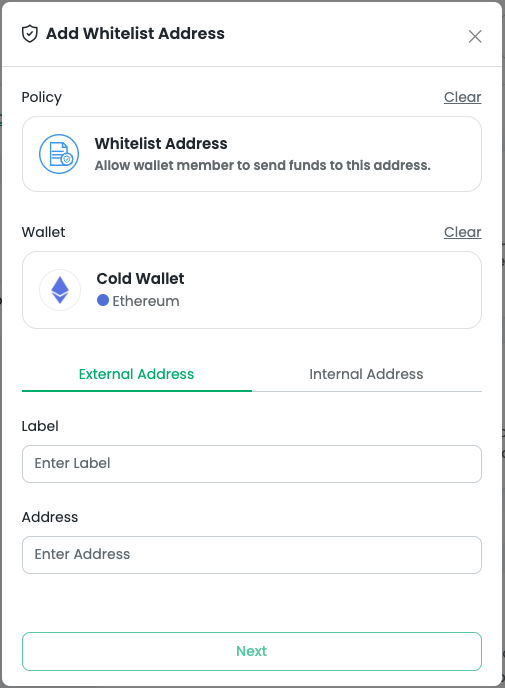
- Select whether the transaction involves an "External" or "Internal" address.
For an "External" address, provide a Label name and enter the specific address.
For an "Internal" address, choose from the available wallets within the selected organization. - You can view all whitelisted addresses by clicking on "View" under the Policy Rules section
Implementing a whitelist address policy ensures an extra layer of security to your account. Upon successfully configuring as outlined in the steps above, you are now well-prepared and ready to initiate your first transaction.
Updated 2 months ago
What’s Next