Set up Liminal Firewall
You can set up Liminal Firewall for your wallet transactions by configuring policies for your organisation. The Firewall Approval team helps approve or reject transactions. Vaults supports the Firewall Manager, where users can directly configure and manage firewall policies to add, edit, update and delete.
Vaults currently supports firewall policies via the following third-party service providers. You need to sign up in the following apps before configuring the respective firewall policy.
- Notabene for Travel Rule policy.
- TRM Labs for Transaction Risk policy.
- Transfers policy: You can configure the transfer policy directly from Vaults.
Supported Capabilities
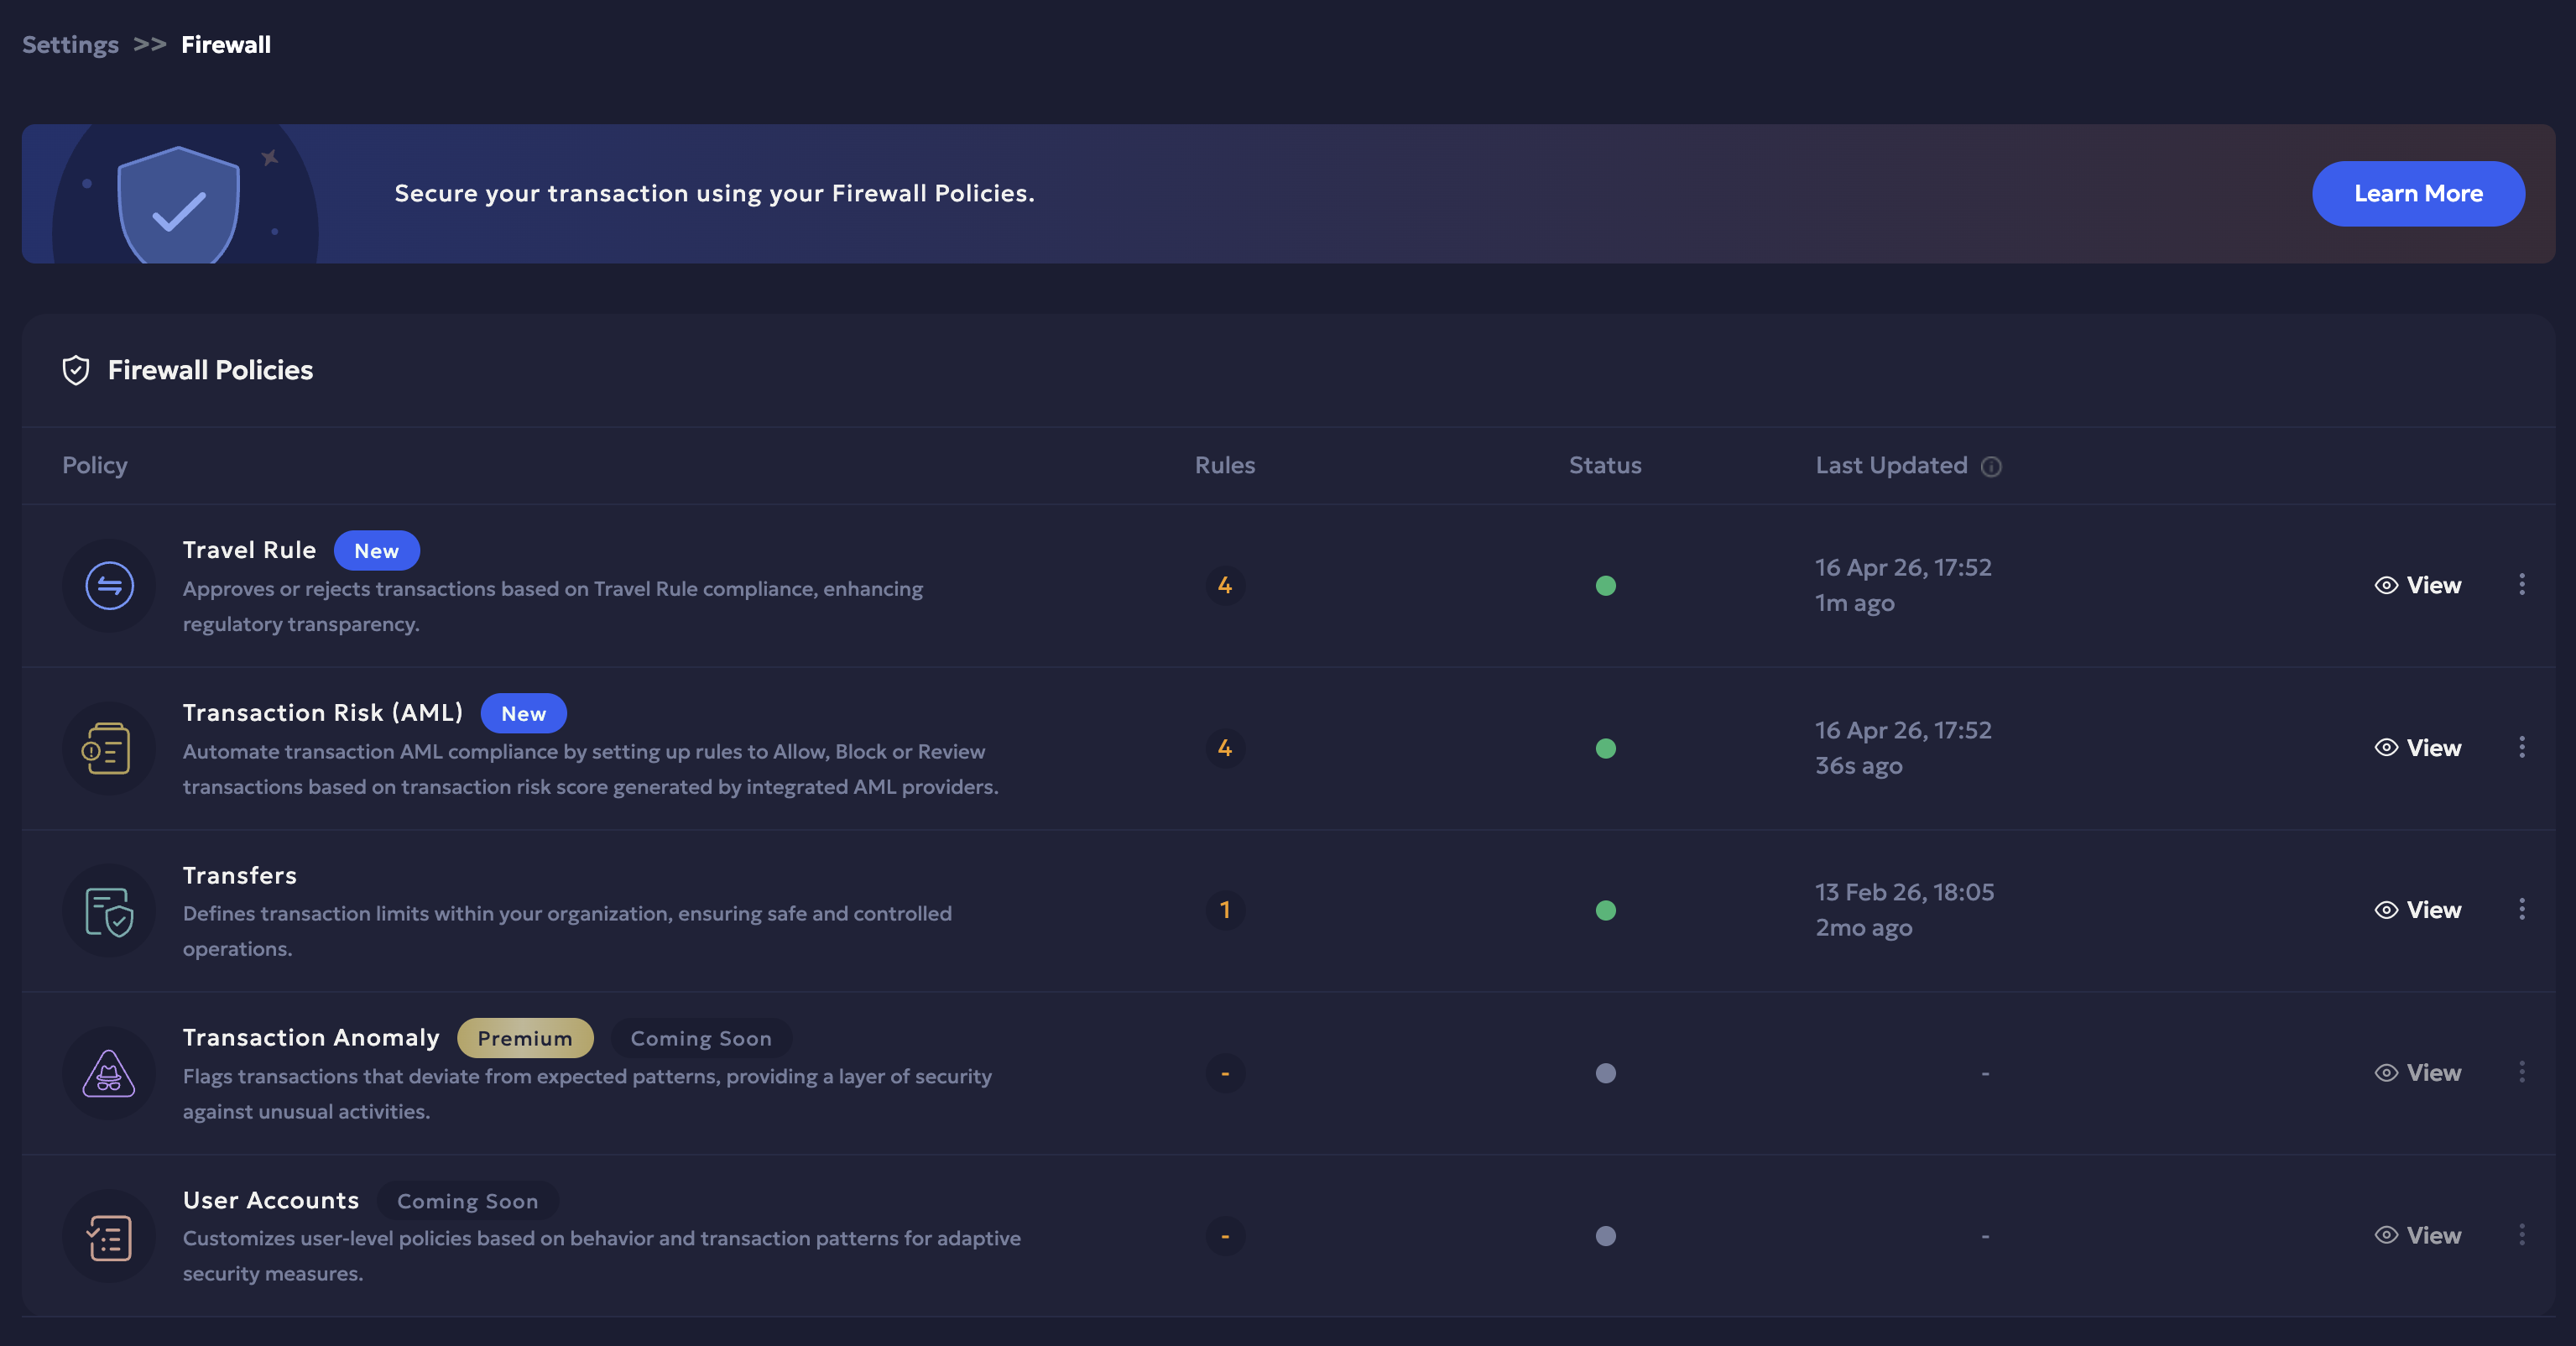
The Firewall Policies page displays the list of policies currently available on your Vaults organisation including, the total number of rules configured for each policy, the status (active/ inactive) and when the policy was last updated. Navigate to the Firewall Policies page on Vaults from Settings > Firewall.
By default, each policy has the following rule configured:
- Travel Rule for Send and Receive: Priority:1, Protocol: any, Asset: any, Status: any, Outcome: any
- Transaction Risk (AML) for Send and Receive: Priority:1, Protocol: any, Asset: any, Status: any, Outcome: any
- Transfers for Send: Priority:1, Protocol: any, Source: any, Destination: any, Protocol: any, Minimum Amount: $0 per transaction and Outcome: Accept.
The Firewall Manager supports the following capabilities:
- You can enable/disable a firewall policy.
- Add a new rule and delete an existing rule.
- You can edit the required Send and Receive rules for a policy in draft mode and save it once confirmed successfully.
- Sort and rearrange the priority of the rules for a policy.
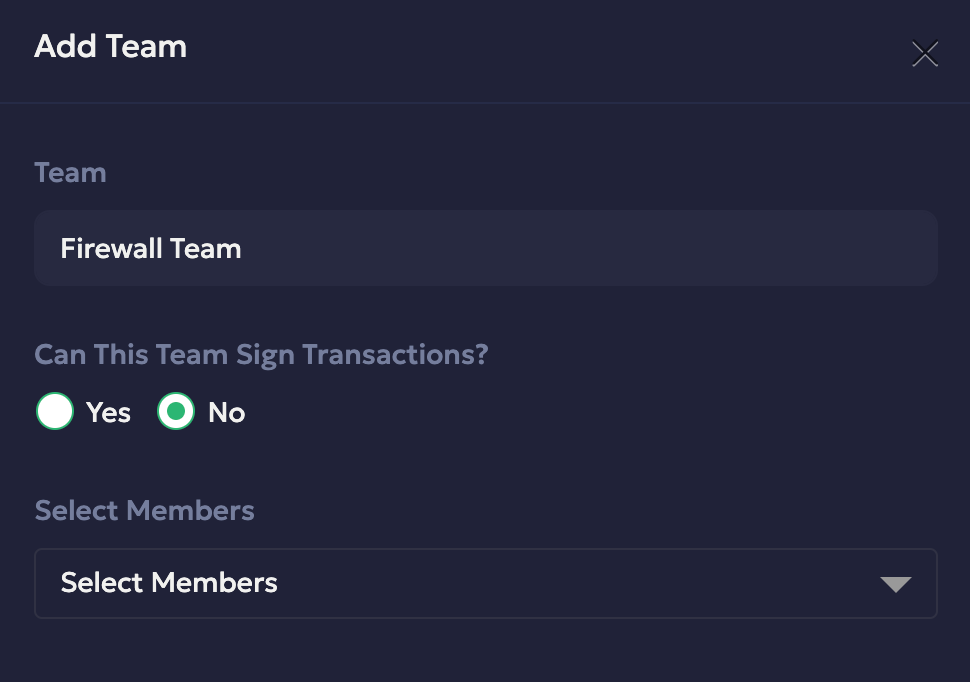
Firewall Team
Owners and Admins can create a non-signing team to initiate the Firewall transaction. The Firewall team helps to approve the transaction initiation request.
- Log into Vaults.
- Navigate to Settings > User Management > Teams.
- Select + Invite next to View.
- In the Team field, enter the name of your initiator team, as shown in the following screenshot.
- Select the No option in the Can This Team Sign Transactions field.
- Select the users from the Select Members dropdown who can initiate transactions.
- Select Add Team to save the changes.
Prerequisites
- Ensure you have signed up for Travel Rule and Transaction Risk policies.
- Ensure you have created a required Firewall team for transaction approval.
- You have Firewall enabled on Vaults v2 for your organisation. Contact Support to enable it for your organisation.
Set up Firewall Policies Request
Admins and Owners can configure the firewall policies for v2 directly from Vaults.
-
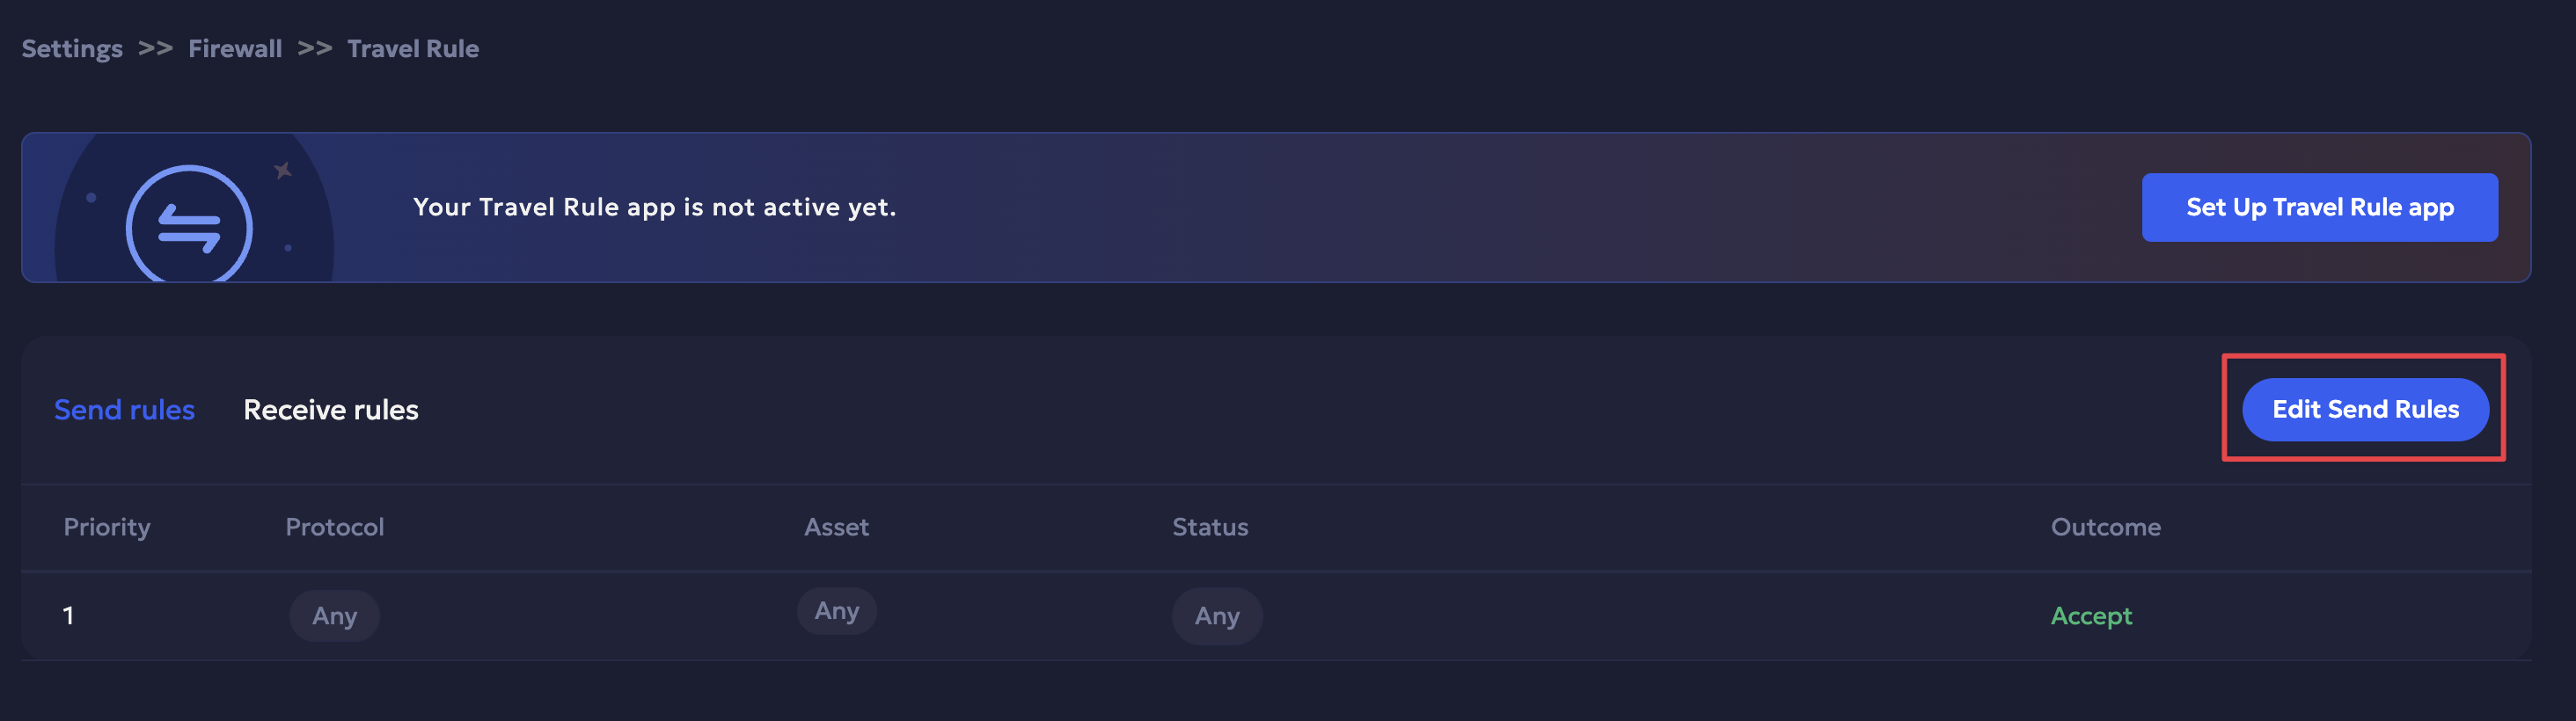
Navigate to the Firewall Policies page and click View next to the firewall policy you want to configure.
-
Click the Edit Send/ Receive Rules to the top-right in the Send/ Receive tab to go to Edit mode. You can perform the following actions in the Edit mode:
Add a new rule
-
Click + Add new rule to add a rule.
-
Enter the required details in the side panel, including the protocol from the dropdown, the asset, status and outcome.
-
Click Save to confirm.
-
The added rule is saved in draft mode. Add the required list of rules to the policy in draft mode. Once all rules are added and saved, click Submit to confirm.
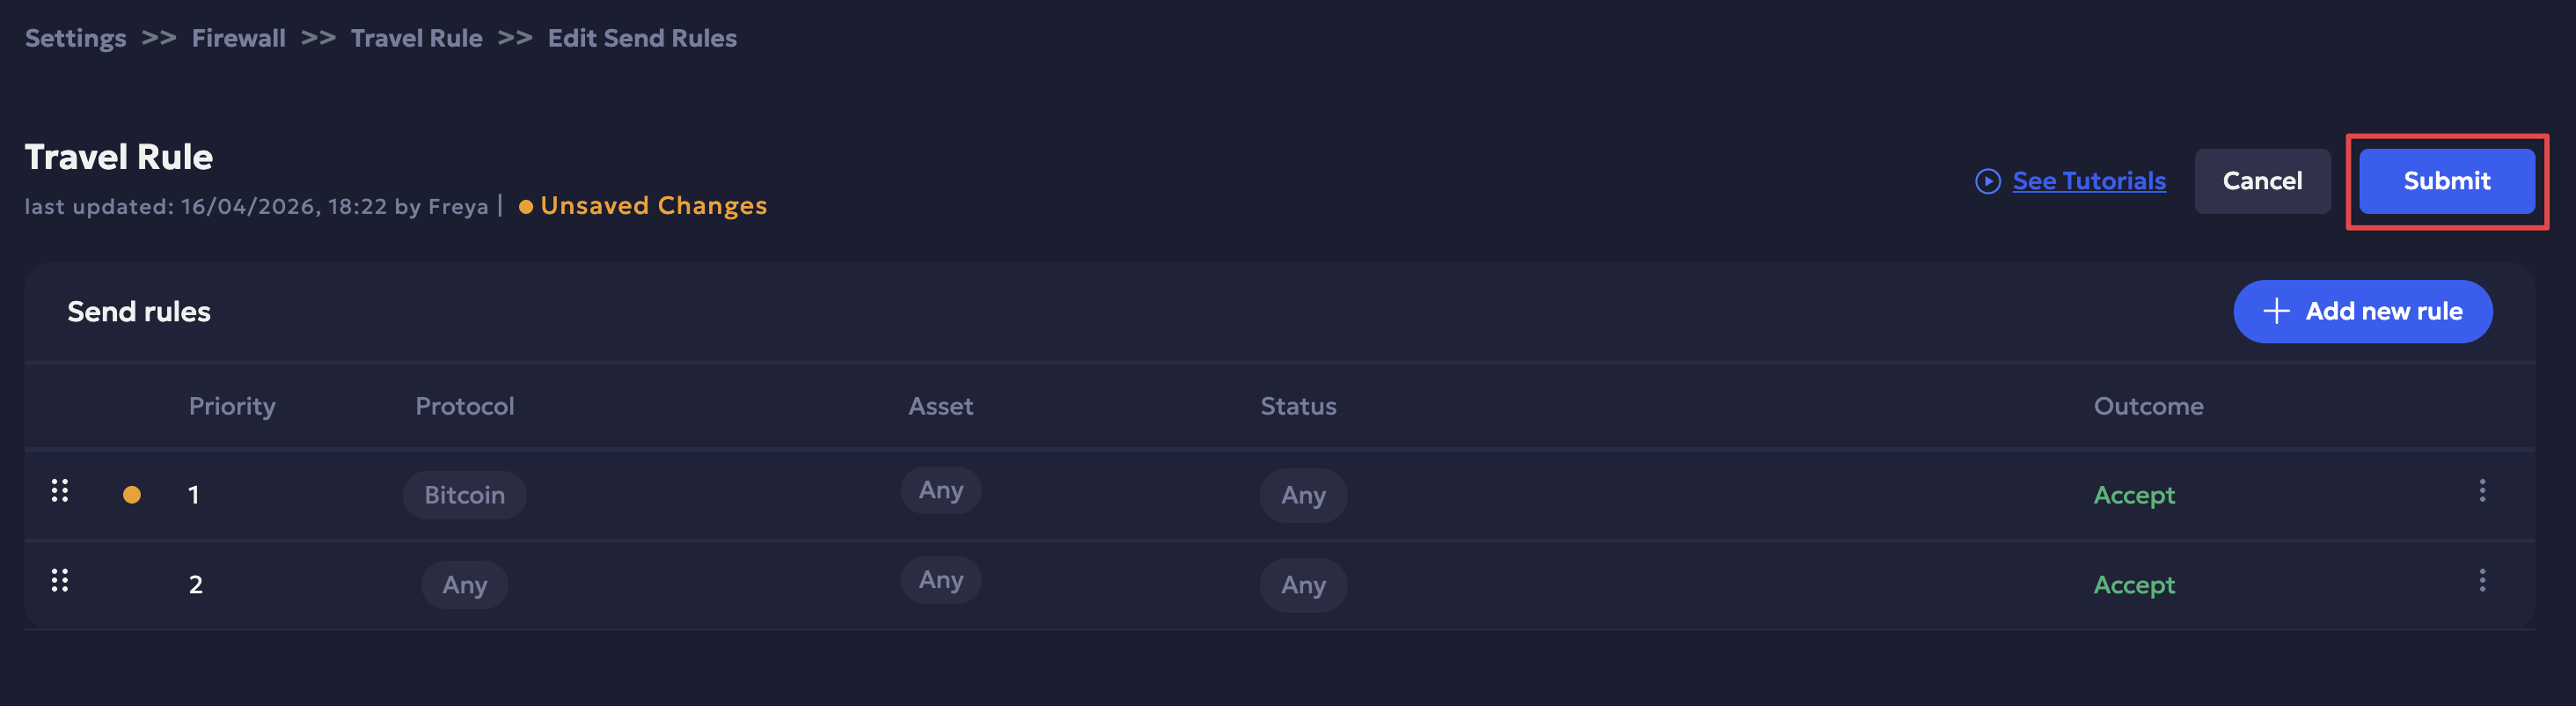
Alternatively, click Cancel to cancel the rule.
-
Enter the required 2FA code to confirm.
Update priority of rules
- Hold the sort icon to the left of a rule to sort the rules and update the priority accordingly.
Edit and Delete a rule
- Edit a rule:
- Click the three-dot icon next to the rule you want to edit and click Edit Rule.
- Once you have updated the changes, click Save and Submit the updated rule.
- Delete a rule: Click the three-dot icon next to the rule you want to edit and click Delete.
Enable/ Disable a firewall policy
- You can disable an active policy or enable a disabled policy from the Firewall Policies page.
- Click the three-dot icon next to the policy to disable/ enable it.
Updated 3 months ago